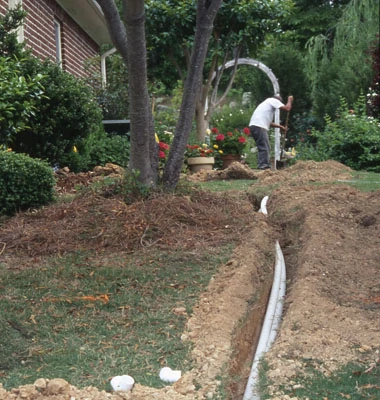
A smartly designed sprinkler system can keep your lush summer lawn strong, green and healthy.
The first and one of the most important steps in designing a sprinkler system is to gather information. A mistake at this point in the process will affect everything else, so accuracy and care are important.
Many irrigation system problems are traced back to inaccurate measurement of the area to be irrigated, so use a measuring tape or other reliable measuring device to get started. Go ahead and round off numbers to the nearest foot, but keep in mind that a minor deviation of a couple of feet can result in dry spots. Draw the area to be irrigated to scale on a piece of graph paper as you measure it. Use a scale of 1 square = 1 foot, or 1 square = 5 feet, if needed. Drawing as you go allows you to quickly catch errors.
If there is a building adjoining the irrigated area, start by measuring the building’s perimeter. Most buildings are built with square corners and straight sides, which gives you a good, accurate base for the rest of your measurements.
Measure the distance in a straight line from each corner of the building to the edge of the area to be irrigated. Draw in property lines and double-check everything by measuring the length of each actual property line.
Next, draw in the other items that are present in the area. For example, you would need to show the edges of lawns, tree locations, the location of your pool house, etc. With these items on the graph, you have a map of where you can and cannot plan the irrigation lines.
Measure the Water Supply
The next step is to measure the water supply. In the United States, water pressure is measured in pounds per square inch (PSI), and water flow is measured in gallons per minute (GPM).
Water pressure is the energy that powers your sprinkler system, so it is very important. If you work with it, it will make your sprinklers do the “rain dance.” If you ignore it, it can bite you hard in the wallet.
Water flow is the traveling companion of water pressure. Pressure is the “energy” that moves water through the pipes. Flow is the measurement of how much water is moved in a given amount of time.
You want to start by figuring out what the maximum water supply would be if you had perfect conditions, such as a very short pipe from the water meter to your house, lots of water pressure, a small yard, etc. Then you’re going to modify that number to reflect your actual conditions (long pipe, lousy water pressure, etc… More on this later …). The end result will determine what the exact, optimum water supply is for designing your sprinkler system. This means the sprinkler system will use less water, last longer, and there won’t be dry spots. This will take a bit more work than “guesstimating,” but it will be worth it.
The method used to measure the water supply depends on the source of the water. The measuring process differs between (a) city water systems, (b) water pumped from a well, pond or creek, or (c) water from a tank or pond located up a hill. The specifics of measuring these different water sources are rather complicated and could easily occupy all the space for this magazine article. For a helpful, highly detailed (and free!) tutorial on measuring your water supply, complete with an easy-to-use Design Data Form, check out the web page www.irrigationtutorials.com, which is the source of information for this article. Once you have measured your water you will have determined a Maximum Available Flow (GPM) and what is called “Static Pressure” (PSI). You need to write these values down, you will need them later.
Selecting Equipment
The next step is to select the irrigation equipment. There are multiple components of a sprinkler system and multiple options for each component. Here’s a look at the basics.
Backflow Preventer – You must have a backflow preventer on your irrigation system. In most places this is the law, everywhere else it’s just the smart thing to do. Usually the local authorities will prohibit certain types of backflow preventers from being used with irrigation systems, because they do not provide adequate protection. In some cases, the authorities will dictate the exact type of backflow preventer you must use.
Your landscape has all kinds of nasty things in it that will make you sick if you drink them. Thus irrigation water is considered a contaminant (health hazard) rather than just a pollutant (objectionable in color or odor). Irrigation water often contains toxic chemicals (fertilizers, pesticides, etc.) and animal waste. These things will come back up your irrigation pipes and into your drinking water if you don’t stop them with a backflow preventer. The manual or automatic valves that turn on and off your irrigation system are not sufficient to stop backflow. The purpose of the backflow preventer is to protect the system when the valve leaks, which all valves will do eventually. Saving a little money by skipping the backflow preventer will not seem so smart after you spend a small fortune on hospital bills (or funeral expenses) for a poisoned family member.
All backflow preventers must be installed correctly. Follow the instructions that come with the units.
Mainlines – The mainline consists of all the pipes from your water source to your irrigation valves. You will likely have two mainline sections, the existing house mainline that goes from your water source to the point where the irrigation system connects, and the irrigation mainline from the irrigation-system connection point to the irrigation control valves. In most cases I recommend using Schedule 40 PVC pipe with the letters UPC and NSHF stamped on the pipe for new mainlines. The requirements for the type of pipe are usually written into local laws. If your house mainline is polyethylene (a flexible black plastic that usually has a slightly oily feel to it), then you will probably want to use heavy-wall (rated 125 PSI) polyethylene pipe for the mainline also, however it is not as durable as PVC and you should check local codes to make sure it is still permissible.
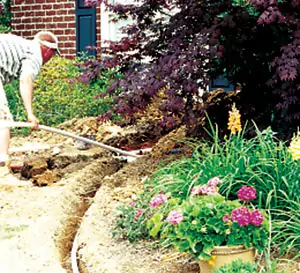
I do not recommend that you use poly pipe for mainlines if you have a static water pressure over 65 PSI. Normally the pressure rating of the pipe should be double the actual water pressure. You can also use copper or galvanized steel pipe for new mainlines if you wish. Copper is expensive, but a great choice as it is very durable. Galvanized steel is not such a great choice, because it corrodes from the inside and will slowly choke off the flow over time. If the water pressure is higher than 65 PSI and you want to use a polyethylene mainline, then you should install a pressure regulator at the beginning of the mainline to reduce the pressure to 65 PSI.
Any new mainline pipe should be installed at least 18 inches deep, or below the frost level, in order to meet code requirements. So, what size should the new irrigation mainline be? I wish there was an easy answer, but, unfortunately, there is not. You will have to guesstimate the size at this point. I suggest starting with a pipe the same size as the house mainline. Then calculate the total pressure loss in the mainlines and add it to all of the other pressure losses in the sprinkler system. If the pressure losses are too great, you may then need to increase the size of your new mainline. (More on pressure loss later.)
Valves – There are many different kinds of valves available. You will need at least two different types for your irrigation system. An Emergency Shut-off Valve should be installed at the closest point possible to the water source, that is, the location where you tap in for the irrigation system. Without this valve you will need to shut-off the water to the entire house when you want to work on the mainline or irrigation valves. The most commonly used valves for this purpose are “gate valves” because they are inexpensive. Unfortunately the cheap gate valves also tend to not close completely and fail after a short period of time. While a gate valve will get you by, I recommend using a “ball valve.”
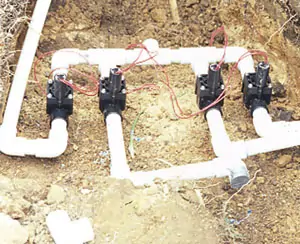
The second type, Control Valves, are the valves that turn on and off the sprinklers. You have three basic styles to choose from: Globe valves and Angle valves are available in any size and are commonly installed underground in a box or vault. Since neither of these incorporates a backflow preventer you must provide one separately. An Anti-siphon valve, available only in 3/4- and 1-inch sizes, is my recommendation for homeowners. The anti-siphon valve incorporates a backflow preventer into the valve. This saves a considerable amount of money, as backflow preventers are very expensive. The anti-siphon valve must be installed above ground and must be at least 6 inches higher than the highest sprinkler head. This means that if you want to use anti-siphon valves you will have to locate the valves at the highest point in your yard, and run a mainline to them from the water source (mainline is buried 18 inches deep). Warning: if you use an anti-siphon valve, all of the sprinkler control valves must be anti-siphon valves. Do not mix anti-siphon valves with globe or angle valves on the same system!
Sprinkler Heads – sprinklers heads are divided into two types based on the method they use to distribute the water.
Fixed Spray Heads spray a fan-shaped pattern of water like a shower nozzle. Most use interchangeable nozzles installed on the sprinkler, which determine the pattern (1/2 circle, full circle, etc.) and the radius of the water throw. Some specialty patterns are available for long, narrow areas. Spray heads are spaced up to 18 feet apart. They need between 20 and 30 PSI of water pressure to operate properly.
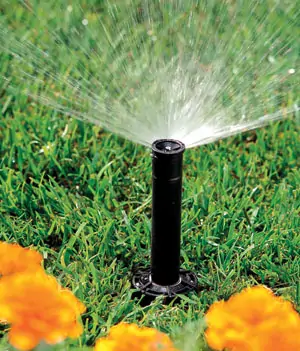
“Rotor” is the term used to describe the various sprinklers which operate by rotating streams of water back and forth over the landscape. The example which most people are familiar with is the “impact” rotor sprinkler, which moves back and forth firing bursts of water. You probably know this sprinkler best for the distinct sound it makes when operating – tooka, tooka, tooka, tic, tic, tic … The impact rotors are rapidly being replaced now by gear-driven rotors that are very quiet, lower maintenance and much smaller in size. The prettiest of these are the “multi-stream rotors” where multiple streams of water rotate over the landscape one after the other. Multi-stream rotors are fascinating to watch but typically are more expensive, work poorly in wind, and require much more maintenance. Rotors can be spaced from 18 feet to 45 feet apart.
There are rotors that can be spaced further apart but design with these should be left to experts. Rotors require a lot more water pressure to operate than spray heads. The water pressure rating at the inlet of the rotor head (in PSI) must meet or exceed the distance (in feet) between the heads. Thus, if you want to space rotors 35 feet apart, you will need at least 35 PSI of pressure at the rotor. The small rotors sold for residential use work best at 25- to 35-foot spacing.
Rotors are spaced farther apart and require less trenching, but cost much more per sprinkler. If the area to be watered is less than 18 feet wide then you should use spray heads. For most normal-size city residential yards, spray heads are the better choice. For areas less than 22 feet wide spray heads are generally less expensive. In areas larger than that, the costs are about the same for rotors or spray heads.
Accounting for Pressure Loss
When selecting the sprinkler equipment, you need to consider pressure loss in the irrigation system. An irrigation system consumes energy when it operates. The system uses energy in the form of water pressure. As the water passes through, each component in the irrigation system uses up a little bit of that water pressure. If water pressure runs out before the water makes it through the system, then the irrigation system will not work. So each loss of pressure must be calculated and adjusted if necessary to ensure that the system will work properly. This is done by trial and error.
Below is a Pressure Loss Table that lists items to factor into your pressure-loss calculations, such as sprinkler, valves, water meter, etc.
Pressure Loss Table
_____PSI – Water Meter
_____PSI – Backflow Preventer (not necessary with anti-siphon valves)
_____PSI – House Mainline (both before and after the water meter)
_____PSI – Irrigation Mainline
_____PSI – Valves
_____PSI – Elevation change (elevation change in feet x .433 = PSI.)
_____PSI – Sprinkler Heads or Drip Emitters (not less than 20 PSI)
_____PSI – Lateral Pipes (use 4 PSI )
_____PSI – Total Pressure Loss (add together the values above)
A quick note concerning Pressure Regulators: If you have a pressure regulator then you get to take a little shortcut. On your pressure-loss table you get to ignore the pressure loss for everything upstream of the pressure regulator. But before you decide to really take a shortcut and install the pressure regulator right before the valves, consider thatthe higher pressure may not be good for those upstream components. Generally, it’s smart to avoid pressures over 100 PSI in any portion of a PVC pipe sprinkler system and 65 PSI in a polyethylene pipe sprinkler system. When placing a pressure regulator on an irrigation system, it should be installed right after the main irrigation system shut-off valve at the place where it’s tapped into the house water supply.
Don’t forget the pressure setting of a pressure regulator must always be at least 15 PSI lower than the incoming pressure. So, if the incoming pressure is 80 PSI, then the pressure regulator must be set at 65 PSI or less. Otherwise the pressure regulator will not work accurately and will allow damaging pressure surges to pass through.
But aside from pressure regulators, how do you calculate the pressure loss of the various components? Well, there are a variety of methods to do so. With some components, such as the backflow preventer and the valves, you will need to consult the manufacturer’s literature to find the pressure loss.
Once you’ve filled in all the fields of your Pressure Loss Table, the Total Pressure Loss must be less than the static water pressure of your water supply. If the total pressure loss is less than this figure, then your sprinkler system is in good shape. If not, you need to increase the size of one or more of the components to reduce the pressure loss. For more detailed information on estimating pressure losses see www.irrigationtutorials.com. The website also offers pressure loss calculators for various sizes and types of pipes, as well as tips on how to deal with common problems such as too much or too little pressure.
Sprinkler Head Placement
The sprinkler manufacturer will provide you with an expected radius for the sprinkler head at the operating pressure you used in the Pressure Loss Table. This is the distance apart you should space the sprinklers. You can stretch this distance by about 1 to 2 feet, but that is all. The areas watered by each sprinkler must almost completely overlap to avoid dry spots. So if a sprinkler manufacturer says the radius of the sprinkler is 15 feet you should not space that sprinkler more than 17 feet from the next sprinkler in each direction.
To place the sprinklers start at the perimeter corners. Then add heads along the sides between the corners. Finally, add sprinklers in the center of the area. Remember, it is better to have too much overlap of the sprinklers than it is to have too little overlap. It will be very difficult to add more sprinklers later if you put them too far apart!
Sprinkler Zones
Once the sprinkler locations have been determined, divide the sprinklers into zones. A zone is a group of sprinklers that are all operated by the same Control Valve.
Rules:
1. The total GPM of all the sprinklers in a zone must not exceed the Maximum Available GPM you determined back when you measured your water.
2. It is best to put sprinklers in shaded areas and sprinklers in sunny areas in separate zones.
3. Do not put sprinklers that water shrubs in the same zone as sprinklers that water lawns (lawns need much more water; you’ll drown the shrubs if you put the shrub area sprinklers on the same zone with lawn sprinklers.)
4. Never mix spray-type sprinklers together with rotors on the same zone; they are not compatible. They must be on different zones.
Pipe Routing
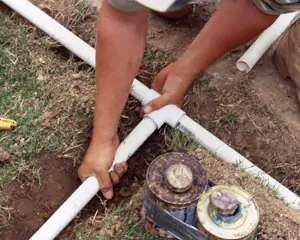
Run pipes from each Control Valve to the sprinklers that are in the zone operated by that Control Valve. Angle and globe valves may be placed anywhere in the yard, but anti-siphon valves must be grouped together at the highest location in the yard. The route of the pipes between sprinklers does not matter, you can run the pipe however makes it easiest for you to install. It is OK to branch pipes off to the side from another pipe to reach sprinklers that do not line up. You can put several pipes side-by-side in the same trench to avoid digging several trenches. Keep the pipes at least 2 inches apart. If you use PVC pipe I recommend you use “200 PSI” pipe rather than that labeled “SCH 40.” For polyethylene pipe use the type called “irrigation” pipe or tube.
Pipe Sizes
Lateral pipes are what all the pipes downstream of the control valve are called. Lateral pipe sizes are tricky. Every sprinkler system is different. The size should be based on how long each pipe is, and how much water is flowing through that pipe. The best way to do this is to go to www.irrigationtutorials.com and use the formula and tables found there.
Editor’ Note: Thanks toz Todd Brogden and Alfredo Trejo of Over the Mountain Sprinkler Systems (Birmingham, Alabama) for help with photography.


