

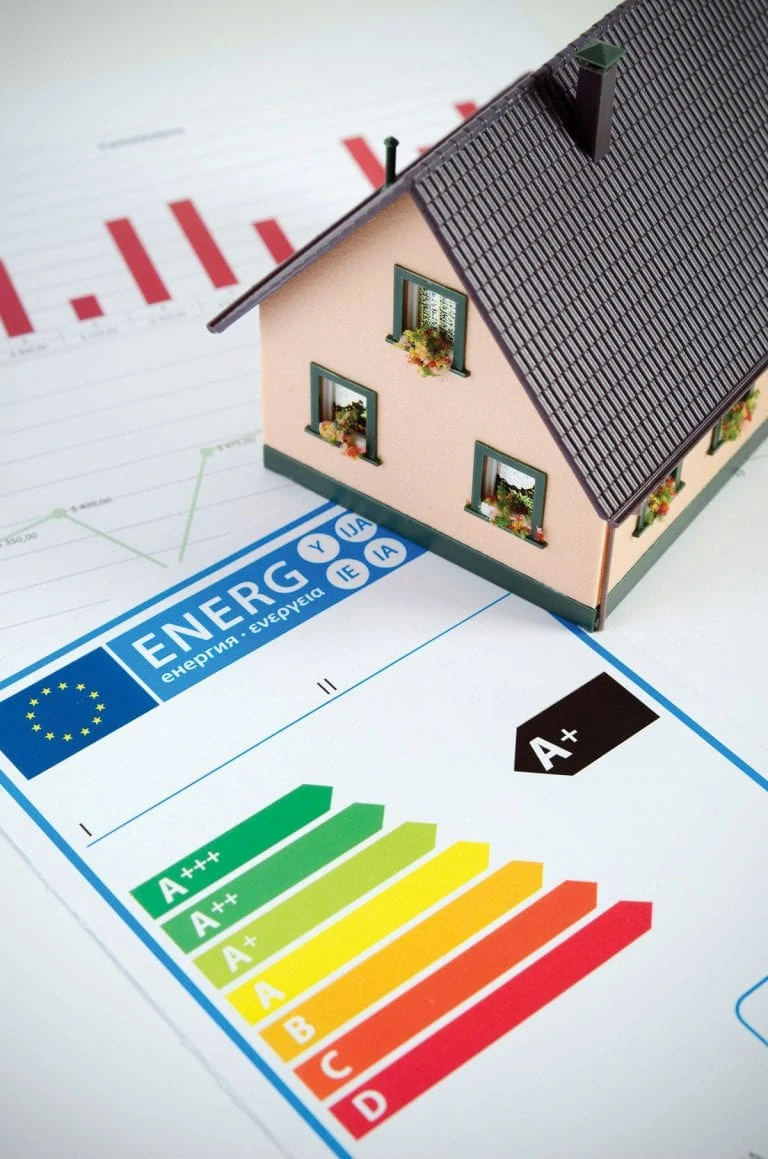
Having moved my family into a larger house, one of my first concerns was: How much will my utility bills increase to heat/cool the extra square footage?
I’m the dad after all, so it’s my job to follow my kids around and turn off all the light switches they leave on. “Close the door! Are you trying to air-condition the entire neighborhood?” is a chestnut I picked up from my old man and now use to chastise the people in my household.
In effort to head off trouble at the pass, I decided to examine the house for leaks in the building envelope, hoping to seal up any problem areas and reduce energy loss before I ever get the first power bill. Assuming your HVAC system is in good working order, the best place to start this process is getting to know all your windows, doors and attic.
SIGNS OF TROUBLE
Look for any cracks or holes around exterior doors, windows and electrical outlets. A good rule of thumb is that if you see any daylight shining through the joints around doors or windows, it’s a sign they need to be sealed. Another good test is to hold a candle near the panes of your closed windows. If you notice the candle flame flicker, then it’s a sign there is unwanted airflow which needs to be sealed. Apply a caulk/sealant where necessary to prevent air from escaping the home.
Easy DIY tip: During the summer, keep blinds closed to prevent sunlight from warming the house, and during the winter, be sure to keep blinds open during the day to allow sunlight to enter and heat the home.
Luckily, the windows of our new house seemed to be in good working order. The doors, on the other hand, needed some work. The back door had missing/deteriorated weather-stripping which was causing a draft, and around the front door I could see sunlight bleeding around seams of the jamb.
SEALING THE DOORS
The front door required a simple solution—new caulk/sealant along the seams of the jamb. I used the new Gorilla Glue Silicone Sealant in a white color to match the surrounding trim. Note that silicone sealant is typically not paintable, so if you plan to add paint later, make sure to select a caulk/sealant product that is specifically labeled “paintable.” For this application I didn’t need a paintable sealant, but the Gorilla product did offer the features I was looking for: a 100-percent waterproof, shrink/crack-proof, mold/mildew-resistant, non-yellowing formula that stays flexible over time.
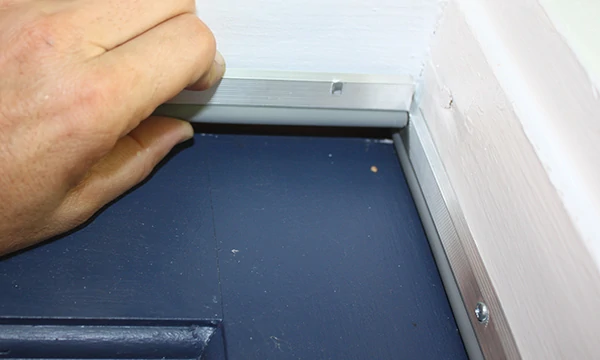
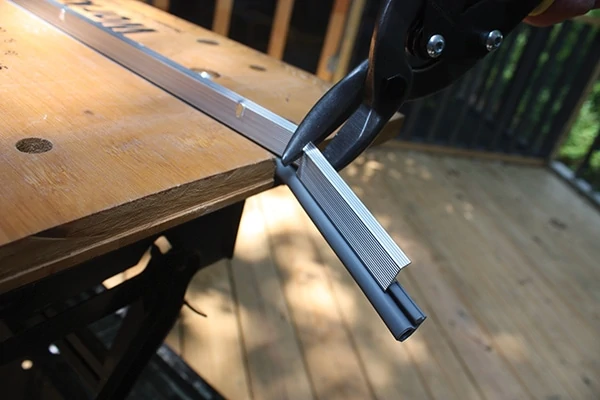
At the back door, I removed and replaced the old weather-stripping using an aluminum weather-seal that features a rubber bulb along one edge of its length. This rubber bulb compresses against the door to seal out air and moisture. All that’s required to install it is the weather-seal kit, a drill/driver, measuring tape and a hacksaw or metal snips. The kits are usually sold with three pieces, one for the top and two for the sides of the door. Any of the three components can be trimmed to size.
Beginning with the side pieces, close the door and press the weather-stripping firmly against it. You can usually drive the screws (included with the kit) directly into the door frame. (If installing in a metal door frame, you’ll need to pre-drill pilot holes with a 1/16-in. spiral tip bit.)
When attaching the strips, leave the screws proud without securing them tightly so the weather-stripping stays loose until all the screws have been started. Repeat the procedure for the other side of the doorway. With both sides installed, measure between the two strips to determine the length of the top strip.
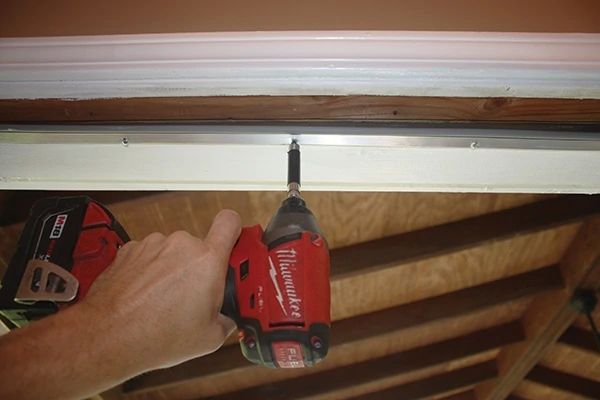
Install the top strip with screws just like the first two strips. Close the door a few times to check the seal and make minor adjustments. The oblong screw slots enable you to back out the fasteners, move the strip as necessary and then retighten until you’ve completely closed off the gap.
KEEP IT CLOSED!
Depending on your lifestyle and the living habits of the people in your house, you might need to think beyond sealing your doors. My wife and I have three young kids who have a mysterious aversion to closing our doors. The back door that leads to a screened porch is the most likely candidate to be left wide open several times a day. The new aluminum weatherseal won’t do much good if the door is standing open.
Our solution was to install a mechanical door closer on the back door—just like you see on standard screen doors. It’s a simple installation that we attached to the top, only requiring a few screws and a screwdriver, but it ensures the door will return to the big hole in the wall, not only conserving your conditioned air but keeping out bugs, too.
ATTIC NEEDS ATTENTION
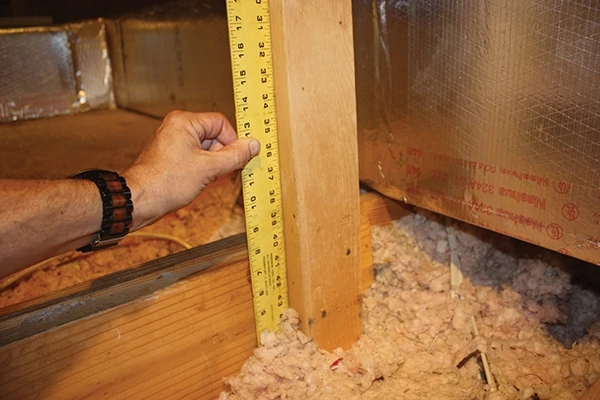
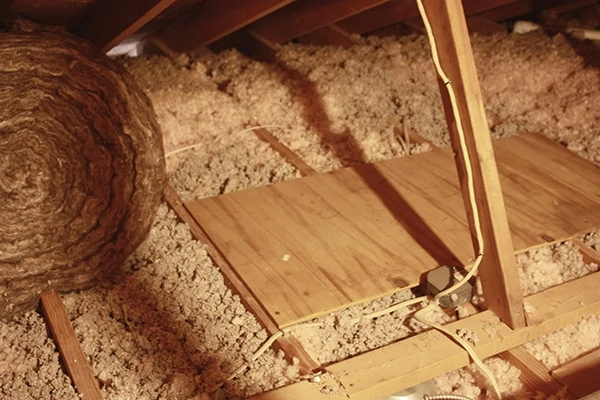
So far, so good. While examining the house, I’d only encountered minor issues in need of simple repairs … until I climbed into the attic. A home inspector had recently reported that the insulation to this house was compressed in the attic, but I was shocked to see just how little insulation was to be found and how poorly it was distributed across the floor. My guess, based on the crude plywood subfloor in parts of the attic, is that the previous homeowner had used the attic for storage—maybe stored bins of clothes that served as insulation but also smashed down the proper attic insulation it was sitting upon. Whatever the reason, the storage items were gone, the insulation was thin, and the attic needed a lot more product.
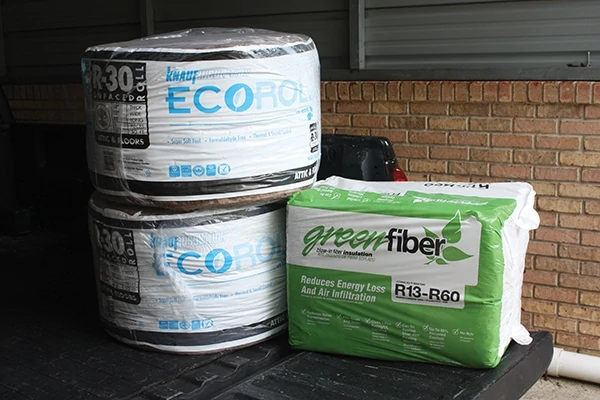
The existing blown-in fiberglass insulation was piled up in some areas of the attic but scattered so thin in others that you could see the ceiling drywall of the room below. I decided to supplement this with two types of additional insulation: more blown-in insulation plus some unfaced roll insulation.
If this had been a new attic with no insulation whatsoever, I’d have rented a blowing machine to apply the Greenfiber cellulose insulation I picked up at a local home center. For big jobs, the blowing machines can usually be found at the same place you purchase the insulation, often supplied at no additional charge to what you pay for the insulating material.
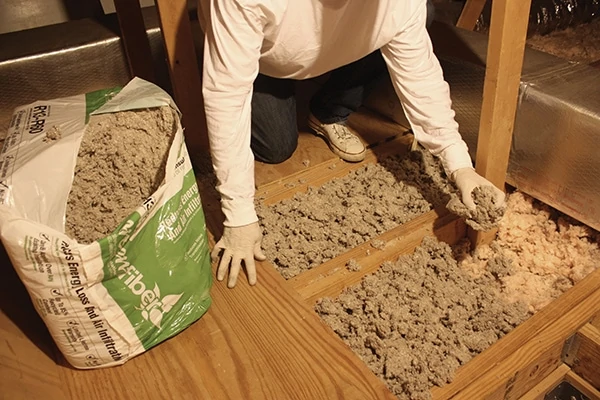
The drawback with a blowing machine, however, is that it requires two people to run the machine, and it’s not always an accurate means of applying the product. The stuff sprays everywhere, and I wanted to keep mess to a minimum and maintain order in the attic space. To accomplish this, my plan was to simply fill up the joist bays with cellulose so the insulation was level and the attic floor was basically flat. I would then follow up with layers of unfaced roll insulation.
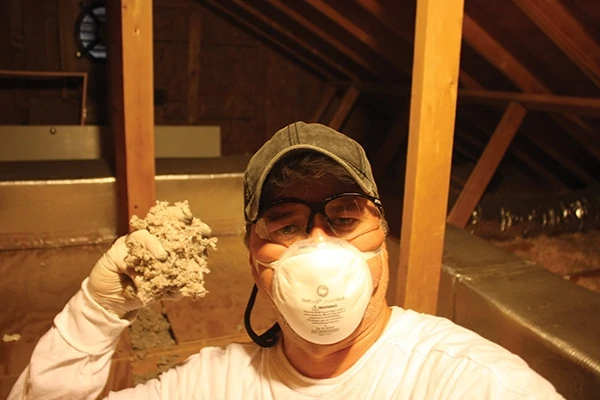
Since I didn’t use a blower for my blow-in insulation, it should probably be termed “loose fill” insulation that I strategically applied as needed by the handful. I recommend using eye protection, a face mask, gloves and long sleeves when dealing with cellulose or fiberglass insulation to avoid itching and irritation.
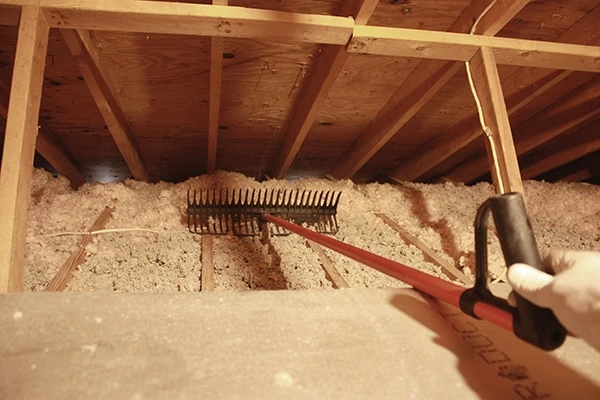
The cellulose material is very compressed inside the package, so break it up as you install it to stretch the product and to create lots of internal air pockets that will help achieve a thermal break. After filling the joist bays with cellulose, I had a flat attic floor but still needed more insulation, seeing as I now had roughly 5 inches of insulation and wanted about 12 inches on the attic floor.
I used the flat side of a mulch rake to screed the loose-fill relatively flat, knocking the stuff down between the joists to level the floor for the rolls.
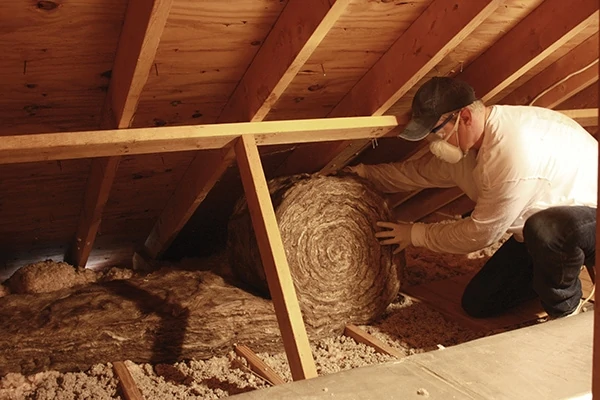
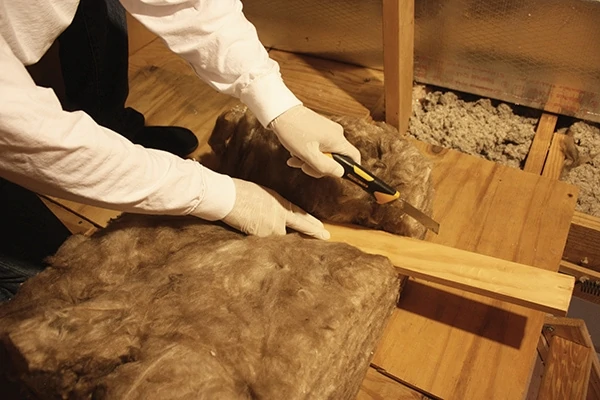
Unrolling fiberglass insulation can be an easy and inexpensive method to increase insulation levels. When the joist bay is full, install the new layer of unfaced insulation perpendicular to the first, covering the ceiling joists to reduce heat loss through the wood.
If you install additional fiberglass insulation over existing insulation, be sure to use unfaced rolls or batts. The facing acts as a vapor retarder that helps reduce the amount of moisture entering a wall, ceiling or floor. If you add a vapor retarder with another layer of faced insulation, any moisture that does get through the first layer may condense on the vapor retarder. This can cause water stains on the ceiling and could lead to mold and structural damage.
If you’re installing additional insulation near the eaves of a home with soffit vents, use soffit vent baffles to allow the vent to stay open above the insulation for proper airflow.

Also note that electrical codes generally require that insulation be kept at least 3 inches away from heat-producing fixtures. A common solution is to nail 2x blocking around the fixtures perpendicular to and flush with the ceiling joists. The blocking creates a small protective wall to keep the insulation away from the light.
And after you’ve finished adding attic insulation, complete the job by installing an attic access-hole cover and insulating it with batt or foam board insulation.
Side Note One
DRAFT CAP TO SAVE ENERGY
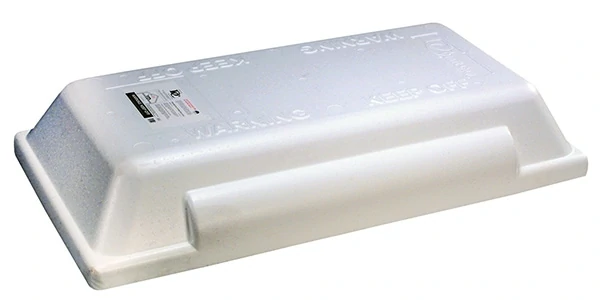
The attic stair opening is the largest gap in home insulation, increasing heat loss in the winter and heat gain in the summer. Made of durable dust-free expanded polystyrene foam, the Draft Cap will reduce heat loss and heat gain and help you save on your heating and cooling bills. Lightweight and easily installed in less than 5 minutes, the Draft Cap attic stair insulator satisfies all current energy building codes for insulation over the attic access panel with an R-value of +11.
Side Note Two
RECOMMENDED HOME INSULATION R-VALUES
Insulation levels are specified by R-Value, which is a measure of insulation’s ability to resist heat traveling through it. The higher the R-Value the better the thermal performance of the insulation. The recommended insulation level depends on the geographic area of your home. According to the Department of Energy, the warm, southern areas of the country should have enough attic insulation to achieve a value of R-30 to R-60. The northern, colder areas of the U.S. require attic insulation of at least R-49 for the system to be cost-effective. The amount of insulation required to achieve a certain R-value depends on the type of insulation being used. For example, 3-1/2 in. of fiberglass will achieve R-13, while 2 inches of rigid foam polystyrene achieves R-10. The R-value will be printed on the package of the insulation product so you can easily calculate how much is required. R-Values of individual products can be added to achieve recommended levels. An R-38 added to an R-11 results in R-49.
Side Note Three
WHAT IS A HOME ENERGY MONITOR?

Energy monitors connect to your electricity meter to provide information on how much energy your home is using and how you can make your home more efficient. Energy monitors offer a variety of features, from reporting the energy usage of individual appliances to recommending measures to increase efficiency. Whether you want to save money or reduce your carbon footprint, to reduce electrical usage your household must either lessen overall consumption as a whole or determine which devices are heavy users. Energy monitors allow you to track your home’s energy usage with much more detail than your generalized power bill, allowing you to see where the fat should be cut. Some home energy monitors allow you to track the cost of your energy consumption in real-time. Many home monitors connect to a mobile app that can send notifications about your appliances and warnings on abnormal usage.
