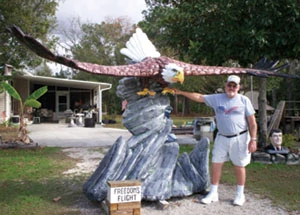
T.J. Neil is a concrete craftsman who has taken his work to a new level of artistry. When many people think of concrete, they may envision a dull, lifeless sidewalk slab, but Neil sees the potential for a soaring eagle, a roaring bear, or even a 65-foot long dinosaur. Extreme How-To spoke with Neil about his forays into concrete sculpture, some basic techniques, and where he’s headed today.
“The first statue I made was a wishing well for my father,” explains Neil. “Someone bought the well right off his lawn, so I thought there might be a few dollars in these concrete sculptures, and maybe I should sell them myself.”
A friend of Neil’s, who owned the Aqua Circus in Cape Cod, Florida, convinced him to create a concrete dolphin as a mascot. As he was building the dolphin, a local radio station covered the story and referred to Neil as a “sculptor.” The term stuck. The next thing he knew, the dolphin was featured on the front page of the newspaper, which sparked a great deal of interest in his concrete craft.
“These days, the power of the internet has really exposed my work to a lot of new people,” says Neil. “I get worldwide publicity, and that otherwise would be impossible.” In fact, Neil has recently authored a book, titled Making Concrete Sculpture, in which he shares his techniques for creating concrete works of art. The book is chock full of in-progress photos of sculptures ranging from fishermen, alligators, whales, sharks, horses, panthers, elephants, dragons and more.
Sculpting Basics
According to Neil, anyone can become a concrete sculptor, as long as they’re willing to practice, experiment and be creative. The overall design comes straight from the creator’s imagination, and a detailed sketch is the blueprint where Neil begins.
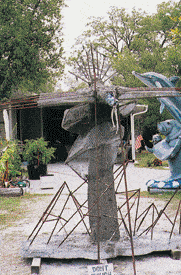
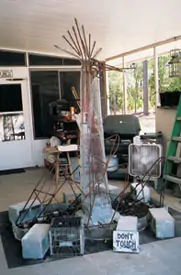
Of course, some basic engineering skills do apply. The process begins with an armature of rebar rods covered with galvanized lath wire. This serves as the skeleton of the structure. The wire mesh is secured to the rebar with black tie wire. Before building, Neil cuts hundreds of 8-inch pieces of black tie wire and keeps them in a coffee can. Every 3 inches on the armature, he bends the wires into an S, hooks them through the lath and around the rods, and twists them tightly.
Neil leaves strategic openings in the lath wire so he can add concrete. The base of each structure is poured solid with 8 to 18 inches of concrete, depending on its size. The larger the statue, the heavier the base. The rebar is housed in this concrete base, extending upward to be bent into the appropriate shape for the armature. This solid base is crucial for the strength of the structure, which is especially important if shipping the finished piece.
Much of the upper portions of Neil’s statues are hollow, but even the hollow areas have 2 to 3 inches of concrete over the lath wire. However, even in the upper portions, strategic load-bearing areas, such as the shoulder joints of arms, may be solid concrete for extra structural integrity.
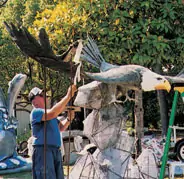
When sculpting, Neil holds the concrete material with a masonry hawk and applies it in successive coats over the wire with a variety of concrete trowels (point trowel, margin trowel, plastering trowel, etc.). As the coats begin to stiffen, each layer is scratched over the entire surface (Neil uses scrap lath wire to do this). This scratching process roughens the surface so the next coat of concrete has a strong bond with the coat beneath it. Neil also stresses the importance of allowing each coat of concrete, applied about 3/4-inch per coat, to fully cure before the next layer is applied.
“Let each layer cure for seven days,” says Neil. “Then put on another coat and let that one cure for seven days, too. Then apply another inch for detail and let that cure. Do this and you will have a very strong concrete structure.” Neil notes that concrete can absorb water up to 1-1/2 inches below its surface. This is why the statues require such thick coats of appropriately cured concrete—to protect the armature. If the interior rebar is exposed to moisture it can rust, and when it rusts, it expands, which can in turn crack the surrounding concrete. This is also why Neil suggests sealing and/or painting the sculptures with the highest quality exterior latex paint you can find.
“When painting, you first need to apply a base coat,” suggests Neil. “I put on a coat of plain white or gray to serve as a primer so the next coats will have a strong bond. When painting under the hot sun, you may need to thin the paint a little with water so the paint has time to soak into the concrete before it dries.” Neil mixes his paint right on the concrete structure, blending the colors for his preferred hue.
Recipe for Success
When it comes to the recipe for concrete, Neil suggests using large gravel in the base of the structure to give it strength. Medium gravel is used for the center of the structure. Small pea gravel is used in structural areas such as arms or legs.
For the non-structural areas, such as the finish coats, Neil uses a sand mix. He suggests coarse sand for the base coat, then medium-grade sand, followed with a fine sand mix for the finish coat. Neil prefers to mix his own concrete from sand, gravel and Portland cement. But for a novice sculptor, he suggests that bags of premixed concrete available at most home stores would be a good place to start.
What’s Next?
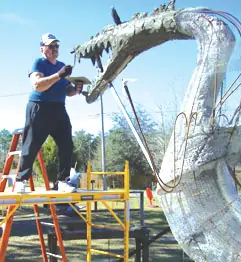
Soon after this interview, the EHT hometown became the proud exhibitor of a Neil original. Our magazine is head-quartered in Birmingham, Alabama, home to University of Alabama at Birmingham. The local university’s mascot is “Blaze” of the UAB Blazers, which is pictured on countless t-shirts and baseballs caps as a fire-breathing dragon. Neil was commissioned to construct the dragon from concrete, which was installed in front of the university arena as a new landmark.
“This dragon is about 10 feet tall and weighs three tons,” says Neil. “The dragon breathes fire, so we built a smoke machine inside the statue to make the mouth look like it’s smoldering.”
Neil at work on the Blazer dragon.


