On several occasions, homeowner Amy Harter wished she had dish storage in her dining room. However, there really wasn’t enough room for a freestanding curio or china cabinet.
It wasn’t until husband Scott started talking about getting things organized in the kitchen with some recycle bins that they started looking at the pantry closet as a flexible space. It just happened that the pantry closet where they wanted to put a cabinet with recycle bins also shared a wall with the dining room.
What if they could use the pantry closet space for both a kitchen cabinet and a display/dining ware storage cabinet in the adjoining dining room? With these thoughts in mind, Amy called Stan Davis of Schar Construction to come over and tell them if their idea would work. Soon afterward, Stan got to work on the conversion.
Stan noted their ideas, and did some measuring. The existing closet was under the first flight of stairs and had an opening only into the kitchen area.
The closet was deep enough to accommodate a nice built-in cabinet at the door opening on the kitchen side while leaving room for another built-in cabinet on the dining room side.
Stan made some sketches and got the cabinet design concept to the guys at Lonne’s Cabinet Shop in Springfield, Oregon. He scheduled an install for later that month.
Fitting In
There are three common methods to fitting built-in cabinets into an opening. The first method is to build the cabinet carcass or box slightly smaller than the opening the cabinet will occupy. The cabinet maker then adds a face frame, which extends out wider than the opening to cover the gap and any rough edges in the opening.
The second method is to build the cabinet so the face frame fits within the opening, and then use casing to bridge between the cabinet face frame and the wall surface.
The third method requires that the corners of the opening be finished and the cabinet built as a net fit, or with scribes around the outside that can be shaped exactly to fit the opening.
Davis chose method two for both the kitchen and dining room cabinets because he wanted to trim the cabinets with casing that matched the door opening between the kitchen and dining room.
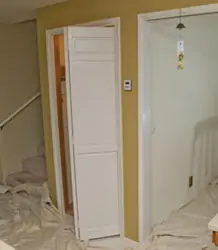
The homeowners were very happy with their new cabinets, which were installed by removing the bifold door, cutting back the shelving, re-routing a wire, framing an additional opening, then installing and trimming the cabinets.
How to Do It
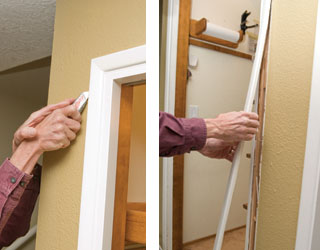
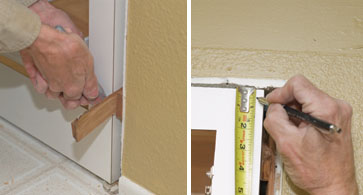
After removing the bi-fold doors, Davis used a utility knife to cut the caulking between the casing and the wall surface. This is an important step when removing trim, because the caulk can pull the paper face off the drywall requiring unnecessary repairs to complete the project.
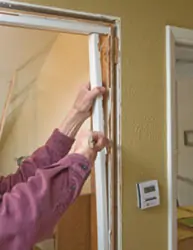
Even with the caulking cut, Davis took care not to damage the walls or floors while removing the casing. Once the casing was off, Davis made quick work of removing the bifold, track, half-jamb and full jamb.
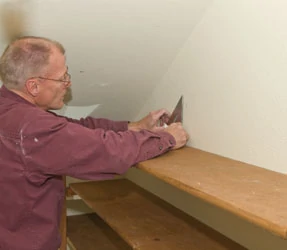
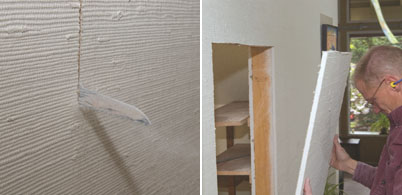
One of the interesting aspects of this project was that it still made use of storage behind the cabinets in the odd-shaped closet. One of the cabinets was designed to allow access through the back, so Davis marked the shelves to be cut so the remaining shelves could still be used.
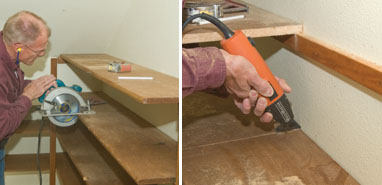
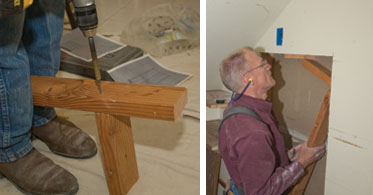
Davis started each shelf cut with a circular saw. He then finished each shelf cut with his Fein MultiMaster.

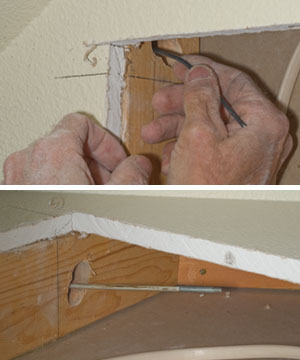
The bifold door opening would accommodate the kitchen cabinet, but an opening had to be cut from the closet to the dining room for the curio cabinet. Davis made all of the layout marks inside the closet where they would not be seen.
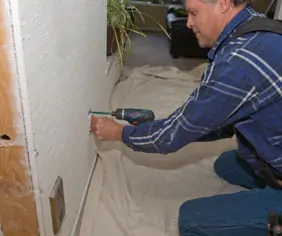
Davis used his old 9-volt Makita cordless circular saw to cut through the drywall because he could set the depth of the cut and stay out of any wiring that might be in the wall. You can never be quite sure what’s inside a wall until you get it opened up.
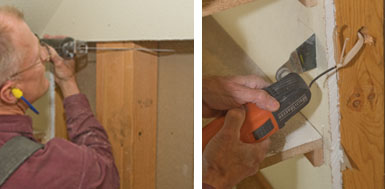
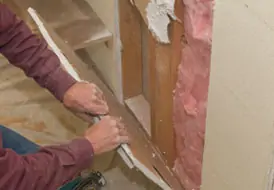
Davis used a reciprocating saw to cut the framing out of what would be the new opening into the dining room.
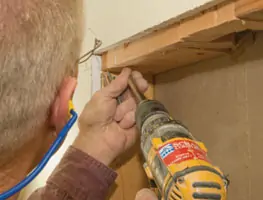
Davis cut in a couple of j-boxes to reroute the wiring. A j-box must be used anywhere you splice wires. He used one strand of 12-gauge wire with a hook bent in the end to hook and pull the end of his wire snake from the adjacent stud bay into the cabinet opening.
He measured, cut and attached a block to the vertical framing piece, which would make up one side of the cabinet opening. He then angled the framing pieces into the opening and knocked the vertical piece into position.
He used screws to fasten the new framing boards.

Once all the framing was in place, Davis used his Milwaukee Sawzall to cut the dining room drywall from the backside.
When viewing the drywall cut from the dining room side, you can see the sawzall blade caused no damage to the heavily textured wall paper. When he removed the drywall from the dining room side of the wall, you could see that most of the mess was on the inside of the closet.
Electrician Rocky Thornton came by to inspect the wiring and make all of the final connections.
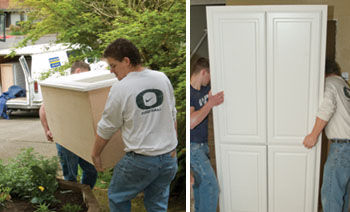
The guys from the cabinet shop showed up right on schedule. Experienced cabinet installers like Davis can usually talk the cabinet makers into delivering the cabinets not only to the house but right to the install location inside the house.
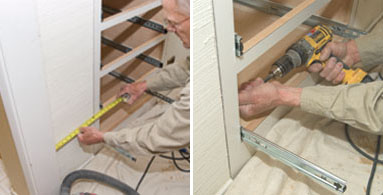
With the dining room cabinet in the opening, Davis checked the distance from the corner at both the bottom and the top of the cabinet. He anchored the cabinet to the framing with a drywall screw.
Davis filled the gaps between the cabinet and the framing with cedar shims where he wanted to use screws. He then cut off the shims so they were flush or a little inside the opening.
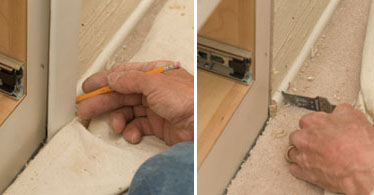
He made marks 1/2 inch from the outside at several points along the face frame to indicate where the inside edge of the casing should be. With a piece of casing held in line with the reveal marks, Davis marked the base board along the outside of the casing. He then cut the base, being careful not to damage the flooring or the wall surface outside the casing area.
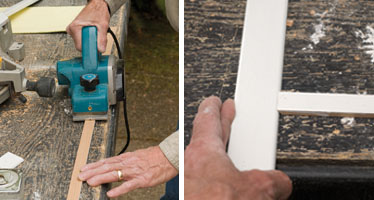
Davis used his Makita power planer to plane down a piece of trim stock to use as base shoe along the front of the kitchen cabinet at the floor. A little experimentation and a lot of experience helped find the right angle to match the base shoe to the trim. After checking the base shoe for length, he nailed it into position with an 18-gauge finish nailer.

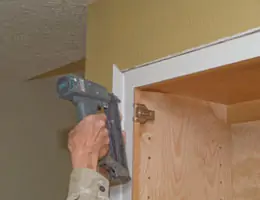
Davis measured the header piece for the cabinets at the short point of the miters. After making a 45-degree cut on the right end, he lined the short point of the miter with the edge of his tailgate liner, which provided a good hooking point for his tape so he could mark the short point for the left end miter. He nailed the casing to the cabinet face frames with 18-gauge finish nails and then through the casing and drywall into the framing on the thick edge of the casing with 16-gauge finish nails.
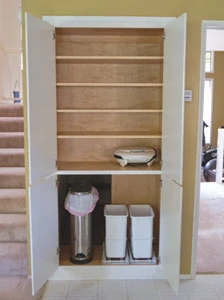
The kitchen cabinet features roll-out recycle bins and a trash can, which can be moved to allow access into the storage area behind the cabinet.
The finished project features built-in cabinets in two rooms that occupy space in one closet.
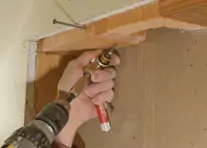
The Right Angle
One of the coolest tools Davis uses for the install is a Milwaukee Right Angle Attachment, which allows users to drill holes and drive screws in tight spots. The attachment can be used for corded and cordless drills and uses standard ¼-inch hex accessories. The rugged ball bearing, metal housing and steel gear construction equips this adapter to handle up to 235 inch-pounds of torque.