PVC is everywhere. Polyvinyl Chloride (PVC) is the most commonly used plastic piping material. It’s corrosion-resistant, cost-effective and promises a long service life. It can be used underground or can even be used outdoors if the pipe contains stabilizers and UV inhibitors and is painted with a water-based latex paint. PVC materials are also resistant to ordinary chemicals such as acids, bases, salts and oxidants. PVC pipe is made to conform to various ASTM standards for both pressurized and non-pressure applications, including drain-waste-vent (DWV) applications, sewer hookups, water service, irrigation and conduit.
Color Coded
PVC piping system components can be manufactured in a variety of colors, which makes it easy to identify the piping for its intended application. According to the Plastic Pipe and Fittings Association, a common color scheme (although not universal) is:
- White for DWV and some low pressure applications.
- White, blue, and dark gray for cold water piping.
- Green for sewer service.
- Dark gray for industrial pressure applications.
However, this color scheme has an exception: Much of the white PVC pipe is dual rated for both DWV and pressure applications.
Easy Installation
Another nice characteristic of PVC piping is that it’s easy to install and well within the grasp of a do-it-yourselfer. The following steps detail the process of connecting PVC pipe joints.
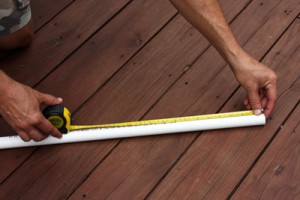
Measure. The ends of PVC piping will slide inside the pipe fittings up to the shoulder of the fitting. For this reason, when measuring the pipe, always measure the distance between the shoulders of the fittings at each end, and transfer this measurement to the pipe.
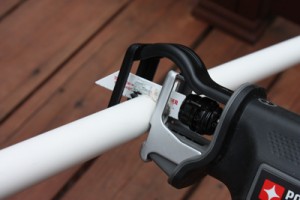
Cut. Make the cut as straight and square as possible. The cuts can be made with a standard hacksaw. In the photo I’m using a pipe-cutting recip saw from Porter-Cable.
De-burr. Use a utility knife or file to remove burrs from inside the pipe joint.
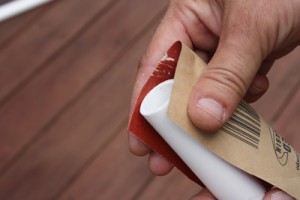
Clean. To ensure good adhesion and a strong, leak-free joint, I use a fine-grit sandpaper to lightly scuff the ends of the PVC to remove the sheen and clean away any dirt. Then I wipe with a clean rag to remove any traces of dust.
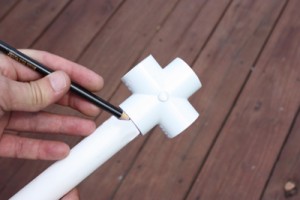
Dry-fit. Assemble the components to make sure everything is the correct length. The orientation of certain fittings, such as elbows, is critical to the plumbing system’s design. Make directional reference marks on the mating pieces for easy realignment during final assembly. Also, mark the depth of pipe that will be concealed by the fitting to guide where to apply the primer and PVC cement.
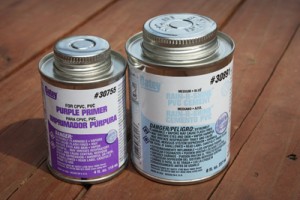
Required. Making the connections requires PVC/CPVC Primer as well as PVC cement. The cans of product usually include an applicator brush in the cap.
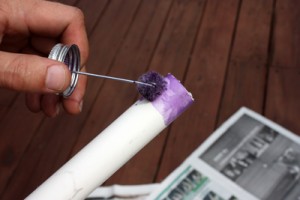
Prime. Apply PVC primer around the entire end of the pipe, as well as to the inside of the fitting. The primer temporarily softens a thin layer of the PVC material, which allows the PVC cement to create a strong, leak-free bond between the pipe and fitting.
Cement. Next, brush PVC cement over the pipe end and inside the fitting, completely covering the contact surfaces of the joint.
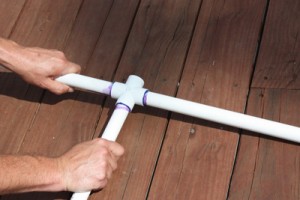
Connect. Slide the pipe into the fitting until it presses firmly against the shoulder. Give the pipe or fitting a 1/4-in. turn to spread the adhesive and make sure it completely seals the joint. Make sure your reference marks on the pipe and fitting are properly aligned. Hold the joint for at least 30 seconds as the cement cures.
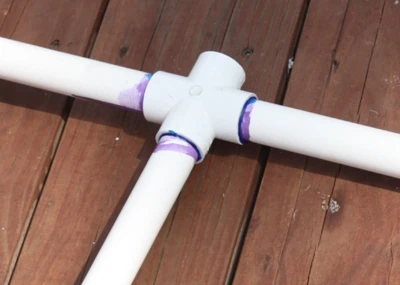
What the heck is that? This photo shows my finished PVC joints, displaying a variety of fittings, including threaded junctions, 90-deg. elbows, 45-deg. elbows and cross-fittings. If you’re thinking: “This looks like a crazy drainage system” … well, you’ve caught me. Although I made all the connections just as I would have done for a leak-free plumbing run, I’m actually using the PVC to construct a “skeleton” for a Halloween decoration. If you’d like to see more progress on the Halloween project (which will hopefully result in a large jack-in-the-box style scarecrow display), then keep checking this blog for more hair-raising updates…
— Matt Weber


