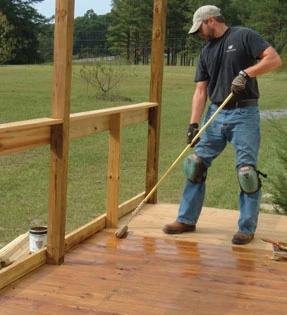
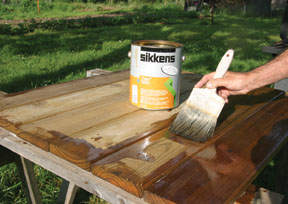
From fences and furniture to decking and siding, wood is one material that can be used for nearly anything related to the home, but requires some tender loving care to keep it looking good as new. The rule of thumb to protect your exterior wood is to clean and prep the surface, and then go to town with your preservative of choice. EHT takes a new look at some of the basics of exterior wood care, advances in wood-finish technology, and how to get the most from your topcoats.
Prep Steps for Outdoor Coatings
The primary reason to coat an exterior wood structure is to repel water. Although lumber is often treated to resist insects and decay, they’re still vulnerable to moisture. Moisture can cause wood to shrink and swell, stressing the fibers and causing the boards to warp, cup, split or splinter. Sealing the surface with a water-repellent finish can help prevent this and preserve wood for years.
The sun is another problem. The sun constantly radiates ultraviolet rays that gradually damage the wood at a microscopic level. Although clear seal coats are readily available as water repellent options, adding a pigment such as a wood stain can help protect the surface from this UV blast and fight the wood’s natural tendency to turn gray. But just like everything else in life, regular maintenance is critical. For more information on wood stain applications, visit Armstrong Clark
If your deck, fence or pergola is old and gray, the surface should be prepped before using a new finish. Remove any mildew, dirt, old coatings, etc. The old-fashioned way is to hand-scrub with a stiff synthetic-bristle brush. Is there a stain or sealer currently on the wood? Prep gray or clear-coated wood using an off-the-shelf wood cleaner with a base ingredient of sodium hydroxide. Depending on the condition of the wood surface, even sanding is a good idea. However, power-sanding will close the pores of the wood, which can prevent the new stain from penetrating properly. So if you choose to sand, you should follow up with a good wash to re-open the pores.
In some cases, a chemical stripper is essential for creating an even surface to which the new sealant can adhere. Check into the new biodegradable strippers that are safer, easier to use, and cut down on the harsh fumes of traditional strippers. If the high-traffic areas of your deck have worn down, but there is still sealant remaining in other areas, strip the entire deck before re-staining. Stripping is also important when changing colors. Leftover traces of an old pigment can affect the way a new color appears.
Once the wood is scoured, and stripped if necessary, then apply a deck-cleaning product with oxalic acid to brighten the wood. Just follow the directions on the product label. It’s a good idea to let the cleaner chemically agitate the surface for a few minutes (don’t let it dry), because some waterborne stains are tough to remove. The deck-cleaning solution may be followed by power washing at 500 PSI—but be careful. Too much pressure can cause the power washer to damage the wood, causing the surface to “fuzz.” Use only a low-pressure nozzle and work the water stream with the grain and never against it, which can damage the surface.
For new decks, many professionals recommend that new wood be allowed to acclimate to its new environment before staining. The wood needs a chance to release unstable sap, sugars and other residues, which take up space in the wood that the coating would otherwise occupy. Thirty days of seasoning is a minimum, but the duration also depends on the wood’s condition when the deck was built, as well as the weather. New, pressure-treated lumber can be very wet, and it needs to be completely dry before staining, especially if using an oil-based product as a coating. Hotter, drier air temperatures will condition the wood quickly, but wet weather will prolong the process. Complete drying of “green” PT wood could potentially take up to six months.

Film-Forming Sealants vs. Penetrating Wood Stains
With prep work complete, it’s time to choose your exterior wood finish. These fall into two major categories, based on how the product bonds to the wood.
A film-forming sealant bonds to the surface of the wood like paint or shellac. This protective film can provide a beautiful high-gloss furniture look, while still allowing the natural woodgrain to show through. These products form a very durable surface that prevents the wood from weathering. However, a high-quality sealant can be expensive, and while they look great, know that they will eventually have to be stripped off if refinishing the wood with a different product. Film-formers include many alkyds, latex-acrylics and varnish resins in oil- or water-based finishes. Pigments are added to the products to change the wood color and add UV protection. In the past, these film coatings have been known to crack as the wood expands and contracts during normal moisture cycling. However, in recent years technological advances have made great strides toward adding a high degree of flexibility and microporosity in these products, which prevents blistering and cracking and achieves a very handsome, durable satin finish. However, the best quality products are rather expensive at roughly $50 per gallon, but only require one coat to do the trick. Mainten-ance required for film-forming sealants is usually one coat every 18 months. However, eventually these sealants may have to be stripped before reapplication, because too many coats can result in discoloration.
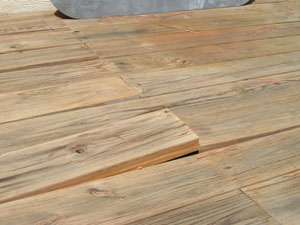
The next major category is a penetrating stain with water repellent. Actually, the industry prefers the term “water-repellent preservative,” because it has a preservative (mildewcide) that helps control mildew growth. Some products also contain ultraviolet light absorbers, stabilizers or blockers. Penetrating stains are available in both oil-based and water-based formulations. The resins penetrate wood pores to block out the damaging effects of weather while allowing the natural texture to shine through. These finishes offer pigment and protection, but there’s no glossy coat on the penetrating stains.
A current trend among sealant manufacturers is to offer products with a combination of drying and non-drying oils that provide two layers of protection in one product. For example, with Armstrong Clark’s Wood Stains, non-drying conditioning oils penetrate the wood fiber, rejuvenating the wood where the wood’s natural oils used to be. The drying oils stay at the surface and create a matte finish that is dry to the touch.
There are quality products in both the film-forming and penetrating categories, and your choice may boil down to personal taste: a glossy furniture-like finish or a more rustic, natural appearance.
Wood Finish: Water vs. Oil
Based on all the questions we get at EHT, there seems to be a lot of confusion regarding water-based and oil-based finishes.
The science behind the difference in finishes requires a course in chemistry, but in a nutshell it has to do with how the chemical particles of the product bond during the curing phase. Most water-based finishes have tiny particles of pigment and resin that adhere to each other very tightly as the finish dries, similar to a patchwork quilt. With oil-based finishes, the tiny particles actually fuse chemically together into one large sheet-like substance, which achieves a harder finish and is less likely to amber. Examine the product’s label for clues to the coating’s quality, keeping an eye out for anything that mentions “non-yellowing” properties.
Water-based finishes are generally heralded for their ease of use. Compared to oil-based formulas, they are easy to clean up, have a lower odor and are often less expensive. However, most water-based coatings require more coats and still don’t last as long before requiring re-application, when compared to their oil-based or “alkyd” counterparts.
Note: You’ll often see “alkyd” written on cans at the paint store. Alkyd coatings are a class of polyester coatings derived from the reaction of an alcohol and an acid or acid anhydride. The term alkyd is derived from “alcohol and acid, or anhydride” and refers to the dominant resin used in most oil-based coatings.
Although oil-based finishes are usually the more expensive option, the bottom line is that when compared to water-based coatings, the oil-based variety almost always outperforms them. Oil-based coatings provide more long-term, wood-preserving durability.
I should note some exceptions to this “water versus oil” rule. Some high-quality waterborne products have come a long way in recent years. These advanced waterborne finishes are formulated with water-reducible synthetic resins, and they bond like super glue for much better performance than other water-based finishes. Saver Systems, manufacturer of the Defy-brand wood stain, even offers a product fortified with epoxy resins, which is not a food source for mildew and algae like natural resin (oil-based) stains are.
Color Options
There are three main decorative options for deck finishes: clear, semi-transparent and solid (opaque) in a wide range of colors and tints. Older wood with a more weathered surface might need an opaque stain to cover imperfections. These solid stains, which coat the surface like paint, are the only variety to hide the grain and will also wear more slowly. However, once they do wear, the damaged finish will be very evident because the natural wood color will show through the otherwise colored finish. The wear from foot traffic is particularly noticeable with a solid stain, making them more suitable for vertical surfaces such as railings and pillars rather than floors and stairs. Using solid stains in a combination of bold colors and tones can create a unique artistic look.
Clear or semi-transparent coatings are popular options, particularly when the wood is new and worthy of showing off. Clear coatings will help protect from moisture and insects, but the wood will still weather to gray beneath the sun’s UV ray exposure. A semi-transparent stain with a UV-blocking pigment will help prevent this while also tinting the surface with a healthy, natural looking tone.
Coating Application
Not all coatings are applied the same way, so follow the instructions on the can. Usually a good oil-based stain can be brushed on, rolled or sprayed. Even a 12-inch car wash brush works well for large decks. Most pros would agree that brushing is best because the filaments thoroughly work the finish into the wood grain. Work wet; keep your coating moving and don’t let a spot sit and dry.
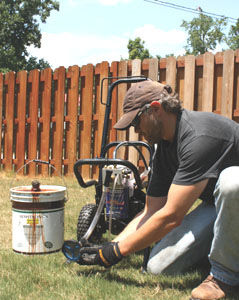
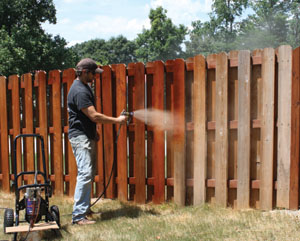
For very large jobs, such as staining siding or a fence, the fastest, most efficient method is to use an airless sprayer. For example, the EHT staff recently used Campbell Hausfeld’s new Extreme-Duty airless sprayer to coat a shadowbox privacy fence. An airless unit draws stain or paint directly from a paint canister and sprays at pressures up to 1,700 PSI. After completing the project, our staff estimates that spraying the coating was roughly 10 times faster than brushing alone. However, even when spraying, you should back-brush the stain into the wood grain to catch any runs and achieve the most thorough coverage.
One interesting new development in stain application comes from Krylon, known primarily for its extensive line of spray paints. Krylon exterior wood stain is the first and only exterior wood stain that comes in a spray can. Apply it with short even bursts for a smooth, durable finish that will hold up under tough outdoor conditions. Ideal for small to medium-sized projects, the Krylon stain protects against UV protection and repels water. Plus, it comes with an adjustable nozzle that can be oriented for horizontal or vertical fan spray, or any angle in between.
When applying any wood stain, the number of coats will depend on the product you’ve selected. With some coating systems, the overall finished appearance relies on the buildup of successive coats. Other products require only a single base coat, with further coats added to darken the tone. Also, check the label for weather-related instructions. Always avoid wet weather when applying, and most oil-based products should not be applied in direct sunlight. Although, one exception is the Armstrong-Clark line of coatings—the only oil-based coating that can be applied in direct sunlight and the heat of the day.


