With fall just around the corner, many of us can finally breathe a sigh of relief. Your air conditioning unit survived another year, keeping your family cool throughout the sweltering heat. However, just because the leaves will soon be falling doesn’t necessarily mean that your air conditioner should drop completely out of mind. With the cooler weather approaching, now is the perfect time to catch up on some standard maintenance for your central air conditioning unit.
Yearly maintenance not only saves you from a sudden air conditioning breakdown in the future, but it also saves you money on the cost of energy.
Below is an air conditioning maintenance checklist, courtesy of the Department of Energy:
- Avoid clogs by inspecting the drain channels in your unit.
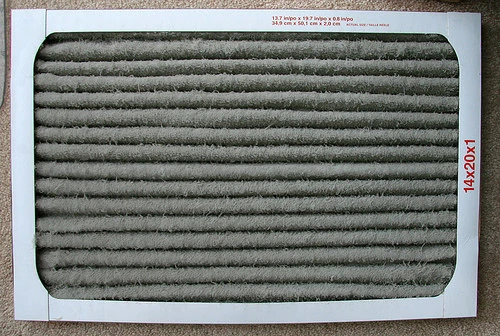
- Air conditioning filters should be habitually replaced. Don’t wait until they’re dirty—these make your unit more efficient, as well as keep your air cleaner.
- Your unit’s evaporator coils should be cleaned and checked annually.
Let’s look at each of these steps:
Cleaning the Drain
The first step in your air conditioning maintenance involves the unit’s drain channels. The drain is typically a PVC pipe located towards the rear of the unit. If left alone, gunk can accumulate and damage the effectiveness of your unit.
One simple trick from the Department of Energy is to use a stiff wire and occasionally feed it through the air conditioner’s drain channels to prevent clogs. If the unit is already clogged, the DIY network suggests using a dry or wet vacuum to purge the drain.
Change the Filter
First, turn off the power to the air conditioner before you change your filter. If you are unsure how to do this, simply call in an HVAC professional to help.
Most homes have a standard fiberglass filter that are disposable. Common sizes/kinds include:
- One inch thick, 14 inches by 21 inches on the sides. These should be changed every 30 days—even more often if you have pets that put a lot of hair and dander in the air.
- Pleated filters are popular for home use, too. They can be replaced every 45 to 60 days.
- Medium filters are 5 inches thick and come in a variety of sizes. They can last up to 8 months.
When you put your new filter in, mark it with today’s date (using a Sharpie or some other permanent marker) so you know when to change it again.
Make sure you install your filter with the airflow going in the correct direction. Also, make sure it forms a tight seal so there’s no air leakage.
Clean the Coils
Once the unit’s filters are checked off your list, the next item to look at is the evaporator coils. These may be just a little more difficult to locate, and are found behind an access panel that must be unscrewed.
Once you’ve found these coils, if they appear to be caked with dirt or rusty, it might be time to call in an HVAC expert. However, if they are not excessively dirty, there are a variety of coil cleaner products that can help, which can usually be found at an area hardware store. Additionally, look to see if the coil fins are bent. If this is the case, a “fin comb” can help. After obtaining a foil cleaner product, direct it at the coils and see it work through the unit. You can close the panel once your coils have been repaired, cleaned, and straightened.
After that is completed, there are just a few more things around the office or house to check in order to ensure the health of your air conditioner. First, inspect the area around the unit to make sure it’s clear. Then, check to make sure that the insulation isn’t letting out air, which would increase energy costs and cause the unit to work significantly harder.
Editor’s Note: A version of this article was originally published at the Star Service website. Star has helped maintain heating and cooling systems for more than 60 years.


