By Matt Weber
The purpose of caulk is two-fold. One purpose is strictly aesthetic, where it is used to close off joints in trim, woodwork, siding and more to provide a solid, paintable surface with no visible seams. The second purpose is to seal joints or cracks from the intrusion of air, water, dust, pollution, noise and even insects, which is why many High performance caulks are referred to as sealants. To serve these purposes the caulk must have a strong enough adhesive property to stay in place without cracking, which also requires some flexibility in the product. Some high-quality sealants also double as adhesives, but it is important to note that sealants are used to seal joints that move, while adhesives prevent the joints from moving. Understanding the basic properties of caulk will help you select the right type for your next project.
Weather Worries
For outdoor applications, weather can affect the joint size and surface of the material being caulked. If the weather is too cold, the surface will contract, causing the joints to expand.
If the weather is too hot, the surface could expand, causing the joints to shrink. As the weather changes, these contraction/expansion cycles can cause caulk to fail if the product does not have the inherent flexibility to move with the weather conditions. According to the experts at Sashco Sealants, the temperature range to apply caulk is 50 to 90 degrees F. Avoid frosty surfaces, which reduce the adhesive properties of caulk, and avoid hot surfaces, which contribute to blistering in caulk. The best practice is to apply caulk in the middle of the typical temperature range of your area, which will serve as a “happy medium” that reduces stress caused by thermal changes.
Prep Steps
Just like paint, the key to caulk’s performance is its ability to effectively bond to a substrate. Preparing the surface is the critical first step of any caulking application. If old caulk is present, cut it away with a 5-in-1 tool or a putty knife. A heat gun can soften old caulk for easier removal, and some chemical caulk removers work as well. The surface of the material to be caulked should be completely free of old caulk, grease, oils, fiber, dirt, rust, moisture or anything that will interfere with adhesion. Depending on the surface, debris and contaminants can also be removed using a wire brush, a grinder wheel or sand-paper. Oil and grease can be removed by wiping with a rag and solvent (avoid using soap).
Backer Rods
The proper way to seal a joint larger than 1/4-in. wide is to use a foam backer rod as a filler before applying the caulk. The backer rods are less expensive than caulk, so they provide a cheaper way to fill the empty space than using caulk alone. Plus, when caulk is applied over a backer rod, it forms an “hourglass” shape with large surface areas of adhesion at the sides of the joint. The hourglass shape of the caulk bead withstands joint movement better than any other configuration. Furthermore, because there is no caulk adhesion at the rear of the joint, the joint is less susceptible to stresses that cause early failure.
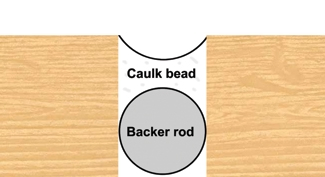
Installation of the backer rod typically requires nothing more than pressing the material into the joint to a depth that allows the caulk to form half the depth of the joint. Friction holds the backer rod in place until it is caulked, and the caulk is then tooled with a jointer, dowel or other tool to achieve the desired hourglass shape in the caulk bead.
Types of Caulk
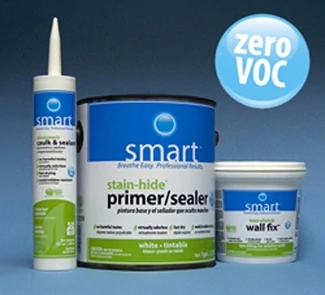
The right choice of caulk generally boils down to the circumstances of the application. For example, interior trim applications are not typically exposed to water and extreme thermal changes, so a basic acrylic caulk may prove sufficient. However, outdoor applications require a great deal more elasticity and adhesion. Other factors include the speed of cure time, ease of cleanup, ease of application, paintability and the presence of odor or noxious fumes.
Interior caulks are often acrylic-based products because the material is inexpensive, easy to apply and clean up, and it often works fine for simple installations. Also available is “siliconized” acrylic caulk that has more elasticity and adhesion than 100-percent acrylic. On the other end of the spectrum is silicone-based sealant, which does a good job of sealing out water and air when properly applied in an outdoor application. However, silicone is also very messy, hard to clean up and generally not paintable (although certain new silicone formulations can be painted). Aside from the spectrum of products formulated from acrylic or silicone, other high-performance caulks are manufactured as water-based or solvent-based products.
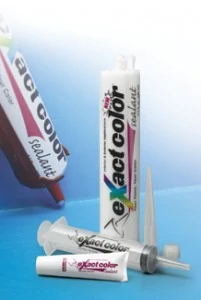
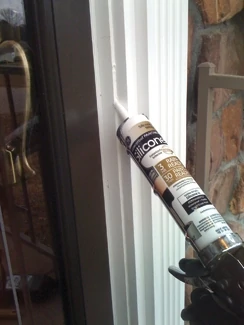
When selecting a product, a good rule of thumb is to care-fully inspect the packaging for its intended use. Many formulations offer special properties specific to certain applications. For example, “tub and tile” caulks may include a “mildewcide” to fight mold and mildew in damp environments.
Proper Application
Applying caulk is at first glance a simple process, but it can actually be an aggravating and messy affair. The following are some basic guidelines to help ensure success without the stress.
Nozzle cut. Most caulk tubes feature embossed markings on the tip, indicating where to cut the tip to achieve a bead of specific size to match the joint, typically from 1/8 to 3/8 inch. Cut the tip at a 45-degree angle to help direct the flow. Some products also have a foil seal on the end of the tube that must be punctured before using.
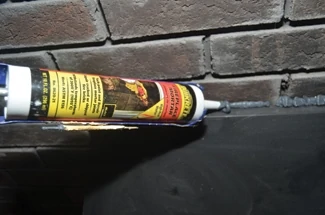
Dispensing. Caulks and sealants dispense differently depending on the type of product. Some products are thicker and dispense slowly, others are thin and squirt quickly. Practice application on a piece of paper to avoid accidentally creating a mess on the joint. Depending on the formulation, cleaning up a mess can be the most difficult aspect of caulking, especially when dealing with super-sticky silicone. The tidier the application, the happier you will be.
When dispensing the caulk, always pull the caulk tube rather than pushing. Pulling allows the nozzle to glide easily over tiny obstructions, whereas pushing can cause the nozzle to catch and disrupt the flow of the bead, creating dollops and mess.

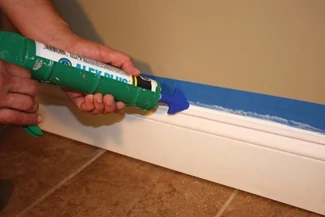
Masking. Some pros have enough finesse with a caulk gun that masking the joint may not be necessary. For everyone else, lining the joint with painter’s tape is a good idea. Doing so confines excess caulk to the masking tape, which can be pulled and discarded upon completion. Plus, when the tape is removed it creates sharp, crisp caulk lines for professional-looking results.
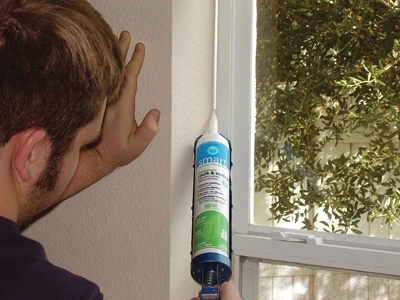
Applying the Bead. When applying the caulk or sealant, hold the gun at a 45-degree angle to the joint. Direct the angled nozzle so it forces the product deep into the joint to bond with as much inner surface area as possible. At the end of each bead, release the trigger of the caulk gun and pull back the plunger, which relieves pressure and prevents caulk from dispensing unnecessarily from the tube (a common source of mess). Apply about 3 feet at a time and then tool the bead before it begins to dry.
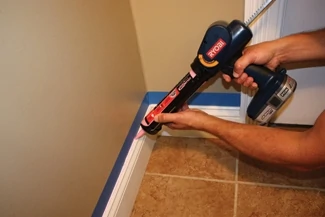
Tooling.“Tooling” refers to the act of shaping the bead for a good look and better adhesion. The process involves guiding a tool of some sort over the bead to press the product into the joint, remove excess caulk and create an even and consistent bead. Common tools for this job include simple household items such as a spoon or a dowel to form a concave bead. It can also be done by hand, wearing a latex glove and dipping your finger in water for less resistance. Also available are special caulk-tooling kits with simple rubber tools shaped to create specific joints sizes and shapes, such as a flush 90-degree bead, a 1/8-in. beveled bead, larger beads, etc. Keep a bucket of water and plenty of rags or paper towels handy because the excess caulk can accumulate quickly. Proper tooling should achieve a smooth, even caulk line of consistent size along the length of the joint.
Editor’s Note: Special thanks to Sashco for providing information for this article.
Caulk & Sealant Resources
Gardner-Gibson, www.gardner-gibson.com
Ryobi, www.ryobitools.com
Sashco, sashco.com


