A couple of weeks ago, I had mountains of tools and boxes piled precariously on a couple of undersized shelves. I inadvertently managed to knock a large wooden box full of fasteners off the top shelf, and on the way down it plowed a deep groove in my shin. It hurt like heck, my leg was a bloody mess, and at least five trillion screws were covering the floor. But lesson learned: I needed more storage space, or this was bound to happen again.
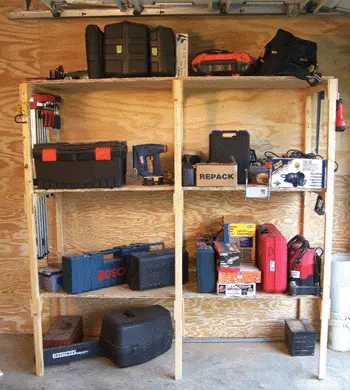
The utility shelves I built to solve the problem were primarily made of plywood and 2-by-2’s. It’s a simple design, and I completed it in a weekend. Now I’ve got an additional 36 square feet of elevated storage space occupying roughly 12 square feet of floor area—and no more deadly wooden boxes teetering above my head, ready to attack.
Getting Started
The first step is to gather your materials. My design required seven 8-foot 2-by-4’s, two 4-by-8 sheets of 3/4-inch CD plywood, one 4-by-8 sheet of 1/4-inch luaun and a box of 1-1/4-inch drywall screws. I used a scrap sheet of 3/8-inch plywood to cut the triangular gussets. There’s no sense in buying a full sheet of 3/8-inch plywood unless you just want to keep the scrap on hand for a future project (you’ll have a lot left over).
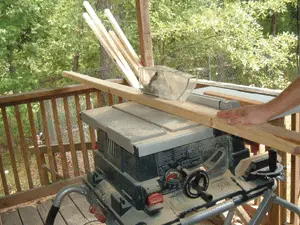
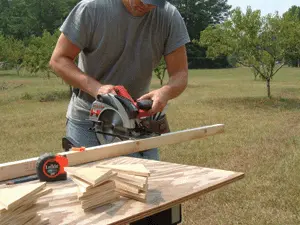
I was building the shelves 6 feet high, and 2-by-2’s weren’t available at the supply store. So I bought 8-foot 2-by-4’s and ripped them into 2-by-2’s on my table saw. I then cut 2 feet off their length with a portable circular saw. These 2-foot pieces serve as the cross-brace supports for the shelves.
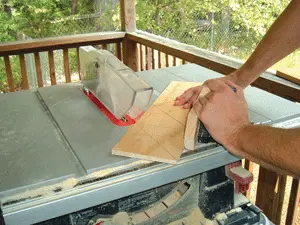
Next step is to cut a few 5-inch strips of the 3/8-inch plywood. I used a try square to mark cutlines on the strips for the gussets, which were simple triangular pieces, 5 inches on each side. I cut the gussets on a table saw.
Ladder Brackets
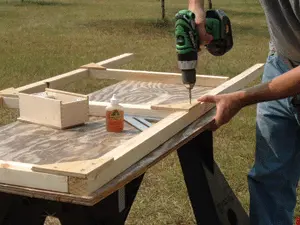
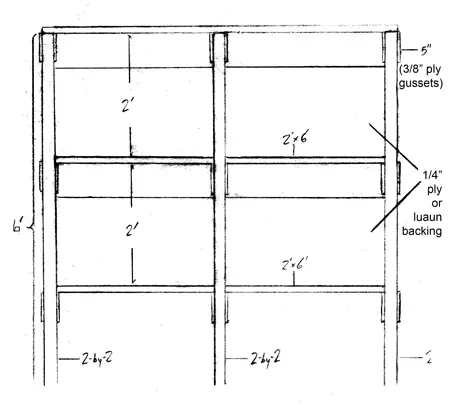
The three plywood shelves are supported by ladder brackets. Each bracket is constructed of two 2-by-2 legs bridged by three 2-foot-long 2-by-2 cross-braces. I spaced the cross-braces of the brackets 2 feet apart. I assembled the brackets by using a combination of Gorilla Glue and wood screws to anchor the gussets at each intersection of the cross-braces. Use a square to make sure you’re assembling the brackets at right angles. And measure between each cross-brace on each leg to ensure the braces are evenly spaced. These braces support the shelves, and if they aren’t square and equally spaced, the plywood won’t sit flat.
I then cut the plywood shelves to size. The shelves were 6 feet wide and 2 feet deep. Once assembled, the three evenly spaced brackets would support the span of the shelves, providing 3 feet of storage space unobstructed by the 2-by-2 legs. This was important because I was planning on housing a couple of large items on these shelves—a shop vac and miter saw, for instance. I needed about 2-by-2-by-3 feet of space to store these big tools (see diagram).
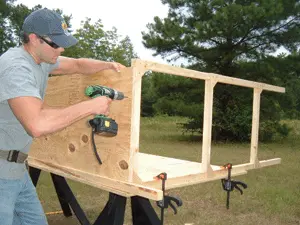
I assembled the unit by first anchoring the top shelf onto the top of the two side brackets, using five evenly spaced screws driven through the plywood and into the top cross-braces. Once these are attached, add the center bracket, double-checking that everything is still square.
Once the brackets are all attached to the top plywood shelf, you can easily slide the other two plywood shelves through the brackets and screw them onto each cross-brace. Again, make sure everything is square as you progress.
Assembly Options
As mentioned, the reason for spacing the brackets the way I did is because I had some specific large items I wanted to store. However, another option is to screw the brackets into wall studs (or concrete using masonry anchors), prior to installing the shelves. This provides stable support of the brackets while also allowing the convenience of having upright cross-braces on which to mount the shelves.
You can, of course, also alter the dimensions of the shelves to accommodate whatever you need to store. Just be conscious of spacing the brackets much wider than 3 feet if you plan for the shelves to support heavy items.
And, if you’re desirous of a more “finished” look, you could also recess the brackets into the shelves by notching the plywood so it fits around the legs. You’ll be sacrificing a bit of storage surface, but notching the plywood might help streamline the look. For my purposes these were strictly utility shelves—built for function, not form. I didn’t plan to enter these things in any sort of beauty pageant so I didn’t notch the plywood.
Reinforcements Arrive
After I’d installed the last shelf, my next move was to pile on a bunch of tools to see how sturdy this thing was. Well, it seemed to do the job, but by not having the brackets mounted into a wall, there was a little more shimmy in the structure than I wanted. I decided to reinforce it with a little extra strength.
For one thing, I added more gussets, attaching one on each side of each cross brace to support the shelves. This way I could confidently store heavy saws, drills, boxes of nails, etc. without fear of a critical failure.
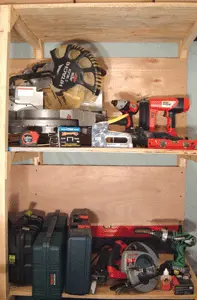
Then, to hold everything square and eliminate any “sway” at the brackets, I screwed 1/4-inch luaun backing onto the legs at the rear of the two lower shelves. This added stability and would prevent any small tools from rolling off the rear of the shelves. The backing would also protect the wallboard behind the shelves from any accidental dents, dings or gouges from the tools I intended to store there.
That completed the project, and all the materials cost me less than $60. Once you have the shelves placed in your garage or workshop, just load them with tools and call it a day.
As shown above, you can install 1/4″ luaun or plywood backing to add some extra stability. Or you can screw the rear of the ladder brackets into the studs of your garage or shop wall.


