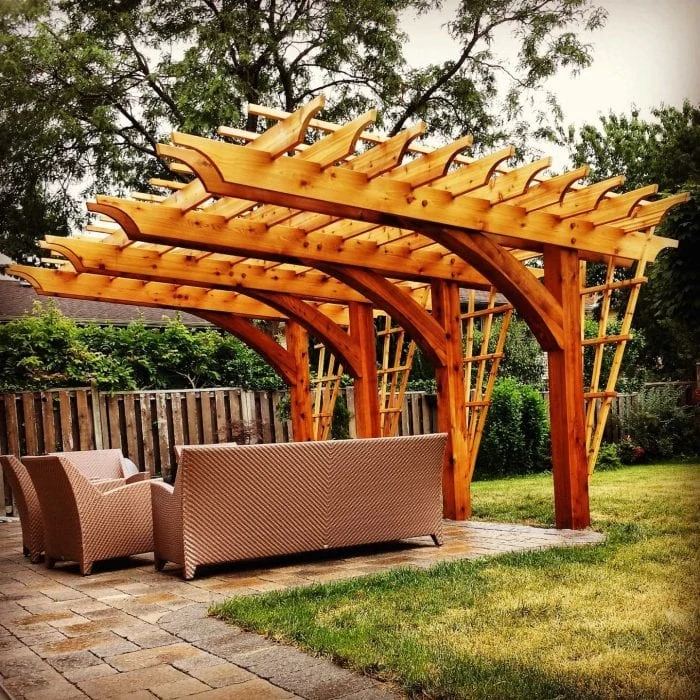
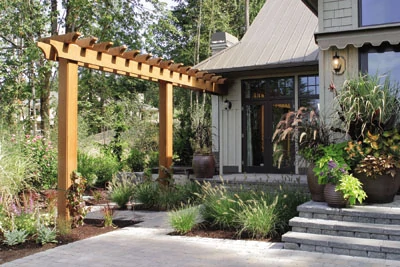
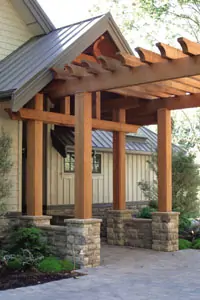
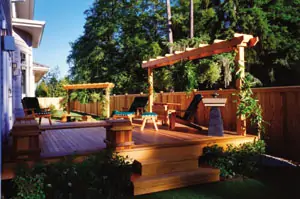
Pergolas have been adding character, elegance and value to outdoor living spaces and gardens for years. These stylish wooden structures are practical projects that can be built in a single weekend. Spring is an ideal time to consider outdoor architectural upgrades, like a pergola, as your appreciation for the effort will increase as plants grow and flowers bloom around it.
You may have seen pergolas and called them trellises or arbors. Like a trellis or arbor, a pergola can support vines or climbing roses and are often used as covered or open-roof gateways to homes, paths or gardens. Like a free-standing arbor, a pergola also can filter light with its canopy and bring everyday elegance to your yard or garden.
Before constructing your own pergola, the actual construction process has several involved steps and things to consider: selecting the site, project layout, material options, construction and decoration.
Site Selection
Consider attaching a pergola to your home, using it to shelter a path between the main house and an outbuilding, or simply to frame the view of another landscape feature. Remember, one of the greatest appeals of a pergola is its architecture – so make sure the site and size you choose is appropriate for its surroundings.
Layout
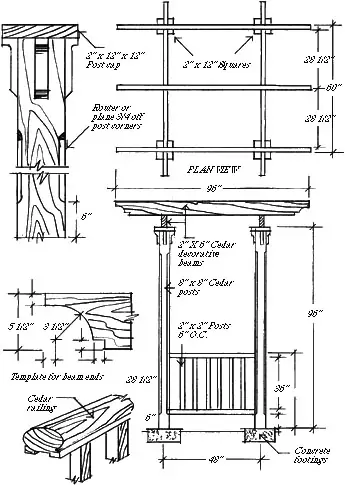
Take special care when deciding the proportions of posts and crossbeams. For instance, a set of 4-by-4-inch posts would be ideal with 2-by-6-inch overhead boards. Then, make sure the posts are vertically straight and even in height, and ensure the main cross beams are level and evenly spaced in parallel to each other – attention to detail is essential here.
Materials
There are a number of choices available, such as pressure-treated lumber and even vinyl kits, but one of the most popular building materials for wooden pergolas is red cedar. Many homeowners specify cedar due to its all-natural look, aroma and character that blends nicely with the natural surroundings. Cedar’s natural resistance to mold and mildew has long been recognized.
“Natural qualities of Western Red Cedar make it an excellent choice for a wide range of building projects both inside the home and outside the home – like pergolas,” says Jack Draper, Managing Director of the Western Red Cedar Lumber Association. “Unlike plastic or imitation wood products, cedar is one of the most environmentally-friendly building materials you can use. It’s naturally durable without the need for chemical treatment, dimensionally stable, resilient and lightweight.”
Western Red Cedar fibers contain natural compounds called “thujaplicins” that act as natural preservatives. As a result it will last without the need for chemical treatments. Draper explains that the even, consistent grain and low density make Western Red Cedar less likely to swell, warp, cup and twist than other soft and hard woods. As a result, it lies flat and straight. Cedar is also free of the pitch and resin found in other softwoods – a quality that makes it ideal for a wide range of finishes, whether you choose a lightly tinted semi-transparent stain or a two-coat solid color finish.
Construction
Prior to digging your postholes, remove all rocks, plants or sod that inhabit the area. These items can be strategically added or relocated after the pergola has been built.
First and foremost, it’s paramount the posts be put solidly into the ground or secured to concrete footings. You can pour these footings yourself or buy them ready-made from your local building-supply center. Regardless whether you build or buy the concrete footings, the foundation posts must be level and true for the pergola to look correct.
If you’re digging the postholes yourself, the holes should be at least 30 inches deep, depending on the frost levels in your specific location. In some areas of the country, you may need a deeper hole. Whether dry-pouring or not, you still need to support the post so that it remains level while the concrete sets. Use scrap 2-by-4’s until the concrete has set, which typically takes about six to eight hours.
Also, it is advisable to use a water-repellant finish that is specifically designed for contact with soil on the cedar posts. These finishes reduce water absorption and increase cedar’s durability, without changing the natural color and beauty of the wood. For added protection, round the top of the concrete footing so that it sheds rainwater away from the post.
Lastly, be sure your posts are long enough to provide enough headroom after they are sunk into your footings – the posts in this project are 8 feet long.
Once the posts are in place, add 12-inch square cedar post caps on top of each post. This step of the construction ensures the posts can handle the weight of the overhead canopy by dispersing the load more evenly, and it provides a nice finishing touch to the structure. Since we’re using Western red cedar to construct the pergola canopy, its low density will be easy to work with and lightweight so that load-bearing limits shouldn’t be an issue.
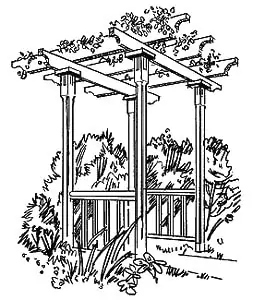
Now it’s time to add the overhead beams that will form the canopy of the pergola. In this case, we’ve decided to use three evenly-spaced 8-foot beams lengthwise, which provides a 20-inch overlap at each end, and two evenly-spaced 7-foot beams for the canopy crosswise beams, thus providing 12-inch overhangs on each end (see illustration). Should your specific pergola dimensions differ or if you would like to alter this overhang length, measure the distance from the outside edge of the posts and add the desired length for each end.
Once you’re sure all the cedar beams are cut to the proper length, align and secure the canopy to the posts. Since the pergola detailed in the diagrams will have the 8-foot lengthwise beams on top, secure the 7-foot crosswise beams to the post caps first.
Begin by setting the beam in place, carefully allowing for the correct overhang. Then pre-drill the beam and secure by toe-nailing it with stainless steel screws. (Note: When toe-nailing a screw, it’s important to pre-drill holes before you begin setting the screws – this ensures they will remain square and true.)
Fastening-system products are also available. Normally used for cedar decks, they employ metal clips and brackets to attach the beams to the posts so no fasteners are visible. Check your local home-improvement center to find out what’s available in your area.
Whatever fastening system you choose, repeat the alignment and setting process until the entire pergola is completed.
Decorative Touches
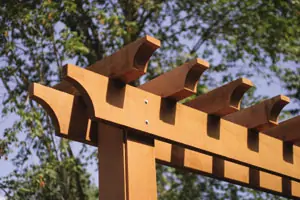
During the planning and design phase of the cedar pergola, most people choose to add decorative touches to the canopy beam ends. To create a decorative end, perfect your design on paper then use it as a template to transfer your design to the beam itself. Cut, and then sand the edges to create a smooth finish. Be systematic and symmetric in applying this decorative design to each canopy beam. The possibilities are endless here, but choosing decorative flair to complement both the surroundings and the architectural feel of your house will add to the appeal.
In addition to the canopy-beam decorative edges, consider routing or planing the post corners for more style. Routing 3/4-inch off the post corners provides a unique accent and another element of style to the structure. Also, gluing 2-inch thick accent fingerings onto the cedar posts adds another level of sophistication and turns the posts into stylish columns. See the illustrations for more detail.
Cedar pergolas are great for vines or other climbing plants, such as roses, as well as hanging baskets. If you don’t have a green thumb, you can also adorn the pergola with lights or decoration for any special occasion.
Pergolas can give an otherwise boring backyard some classical character as well as seasonal charm. They can display a unique architectural style and be the center of all your outdoor activities. Plus, you can build one in a single weekend. To begin planning your pergola or any outdoor project, talk with an expert at your local home improvement store.
Editor’s Note: This article and all photo and illustrations are published courtesy of the Western Red Cedar Lumber Association.


