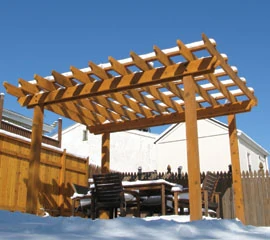
It depends who you talk to: I’ve heard them referred to as pergolas, arbors, colonnades, a trellis, and (no joke) “one of those garden thingies.”
Whatever they’re called, I enjoy building them. I like the balance of macro work (digging holes, cutting timbers) and micro work (awesome layout tricks, scroll cuts). There’s just enough of each to tickle my carpenter’s ganglia without sending me to Bedlam.
What’s more, after having built several of them I can tell you the ROI (return on investment) is awesome. A nice pergola creates a look and a space that enhances a backyard experience—even when you’re not eating dinner or playing with the kids beneath it. You can see them out the window, when walking in from the driveway, or as you mow the lawn. And while the pergola explained here is built as a stand-alone, weaving one into an existing patio or sitting area is also ideal. (See Sidebar, “Making the Connections”.) Then of course, there’s the outdoor living aspect: There is nothing like kicking back on a lazy summer evening under a pergola, dining al fresco, and spending time with family and friends. And, if you can safely weave in an outdoor fireplace situation—man, there’s a lot to love.
If you’re a builder or remodeler, building pergolas is typically pretty profitable. A pergola is practically the definition of a luxury item, and budgets usually enable me to use nice materials and take the time required to build them well. It’s a nice departure from razor-thin margins and brain-surgery retrofits.
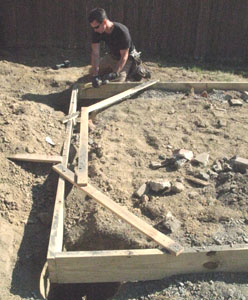
A key element to building this kind of project as a freestanding unit is full-size templating. The template is what I call a “sandbox.” It’s great. I use it to mark layout, confirm proper sizing and location of the structure, and to anchor the posts. When it comes time to trim the structure I can leave the sandbox or remove it. And, there’s no string to fuss with.
Defining Design
Proportion is key to designing a pergola that fits the space, especially in tight quarters.
There are four design rules I like to follow, otherwise pergolas can be more of an inductive (seat-of-the-pants) rather than deductive (following a prescribed plan) process. You don’t have to be Da Vinci, but it takes a decent eye to “Goldilocks” the proportions: Too skinny and tall looks like a tower; too short and wide looks like a table. The girder should be 80 inches minimum from the ground, the same as an interior doorway. If there’s a ceiling fan, I want 88 inches under those blades, if not more. Finally, for cantilevering past the posts, my feeling is that anything less than 12 inches looks less than graceful. The pergola shown here has 18-inch overhangs.
If you have to nestle the unit in a small space like a backyard nook, site lines from the house, interior windows and other egress points should be investigated and considered.
In a larger space, working in basic units (8 feet, 10 feet etc.) is a little easier because there are fewer reference points to show that something is out of balance or otherwise encroaching on another visual element of the landscape. And, I build in design elements so that I can make on-the-fly tweaks to the basic design as the unit comes together. More on that later …
Rough-Siting, Grading and Trenching
Rough-siting the structure is typically basic. Where I build there’s a 4-foot setback from the property line to the edge of any structure. Since this pergola is nestled in a corner, my rough layout was pretty much done for me by the existing fences on the adjacent properties. Nevertheless, I spent considerable time measuring from known control points located on the property. This showed me which fences were not built on the true property lines (who’s surprised?) and exactly where to site the footings.
There’s a big payoff to being careful and thorough here. For example, the fences built into the corner of the property weren’t square to one another either, so as a final filter to make sure the pergola’s footprint was right where I wanted it, I measured off the house’s back wall. Furthermore, I don’t want a neighbor coming to me and saying I have to move my pergola because it’s past the set-back.
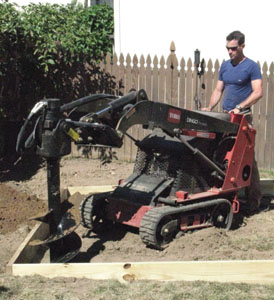
Once I knew the pergola’s footprint (within a few inches), I graded a level pad using a rented Toro Dingo and bucket attachment. With the level surface prepped I could proceed with final—or micro—layout. Note: Part of the reason for this excavation was that there was an existing brick fireplace, with footing, that needed to be demo’ed and carted away. Without so much obstruction, hacking out a reasonably small trench in the grass with a mattock and shovels would have been my excavation process.
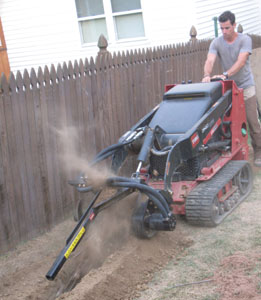
If you’re running power out to the structure and need to drop a trench (trench depth is 24 inches where I build), now’s a good time to sink that bad boy. Using the Dingo’s trencher attachment, I dug more than 30 feet of trench in about 20 minutes.
Micro-Layout
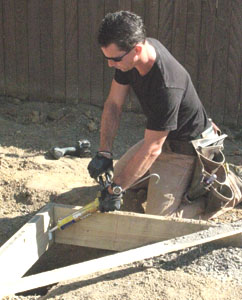
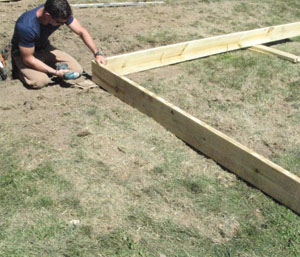
Micro-layout probably isn’t necessary on every job, but in this case every inch of yard space mattered. I also like to build my stuff as square as possible, so instead of running strings all over the place (that would inevitably move and otherwise infuriate me) for marking post holes, I built a big box out of 2-by-8 stock—the sandbox—that acts as a full-size template for layout and securing posts. The box’s interior dimensions are the same as the post locations’ outside dimensions (plus 1/4 inch for fudge). Next, I square it up and brace each end with an A-brace—a diagonal in each corner and a spreader to connect them.
Before positioning the box for final layout, I hacked out roughly an 8-inch wide trench about 6 inches deep, which I then half filled with gravel. This facilitates three things: The rocks provide ground water movement under the box (it stays in place on this job); using rocks to “shim” the box level is easier; and the sandbox creates a level border for the pergola “floor” within the pitched grade of the yard.
With a full-size template that I could easily move, I re-measured from the property lines and the house. To ensure that I could tweak one corner of the box without moving another, I positioned sticks between the outside edge of the box and the straight run of fence. When the sticks touched the fence, I was parallel to the property line in the East-West axis and I could make the final adjustments to the North-South axis more accurately.
Once the box was positioned, I could mark the center of each post hole using a nail and a hunk of caution tape or a carpenter’s pencil.
Posting Down
Once I’ve got all four post-hole centers marked and kicker sticks out to the fences (or, absent a fence, a fixed point like a steel pipe hammered into the earth), I then move the box, handling it by the cross-piece of the A-brace. Next, I drill 15-inch diameter post holes no less than 36 inches deep. I used the Dingo again and it took about 5 minutes to drill each hole. As I drill the holes, I drop the fill dirt towards the center of the pad to keep it off the grass.
Augering leaves loose fill in the hole bottoms, which is easily fixed by over-drilling and tamping the material with the blunt end of a digging bar or sledge hammer. This is also the point where my inspector wants to inspect the footing, so the minute I know I’ll be digging I call for inspection.
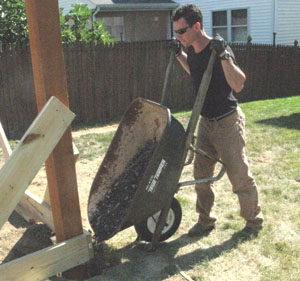
The final step is to dump about 4 inches of gravel into the hole and tamp it. This layer of aggregate facilitates water movement around the bottom of the post.
I then put the sandbox back on layout, which is easy to find because I left sticks in place to guide me, and then double-check for level in all directions.
Posting Up
With the footings inspected, now is when all this persnickety setup starts paying off.
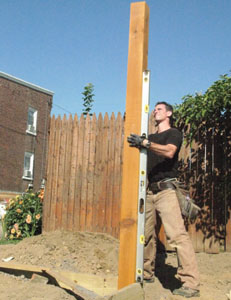
Before setting the posts I lay them out to make sure they’re long enough. One of my built-in design double-checks is running the posts high. Here’s how I measure them: 40 inches below the sandbox’s top edge + planned height to the bottom of the girder (in this case 80 inches) + girder width (7-1/2inches) + 12 inches for “fudge” factor. I set a post in each corner then plumb them in all directions. They’re held fast with a few screws through the sandbox into the post on each face. Also, if the box stays, I add construction adhesive before fastening.
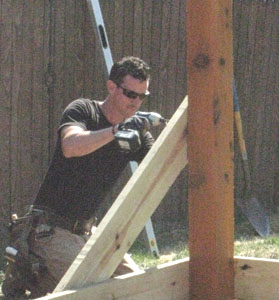
To keep the posts from twisting or warping (they can, especially treated posts) and to support them during construction, I screw 2-by-4 diagonal kickers. I want four of them at least 6 feet up on the post down to the middle of the sand box. Another best practice from WRCLA is to use crushed, tamped gravel as media to fill the post hole and secure the post. Also, I understand the Cedar Association wants no water trapped around the post but I’m personally comfortable (with rocks at the post base) pouring a 60-pound mooring of quick-setting concrete about 4 inches up from the post bottom. I haven’t found anything that delivers a more stable, faster way to build a footing.
Framing Layout
I get lots of mileage from the sandbox.
As I begin laying out and cutting the girders and rafters, I know my posts are where I intend them to be and, because I have an integral anchor point, they won’t move. Furthermore, I can climb on the structure during installation.
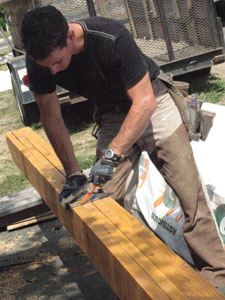
Rafters. Step One for the rafters is to crown each one, then cut them to length. I square rough-sawn stock on each end before detailing the rafter tail.
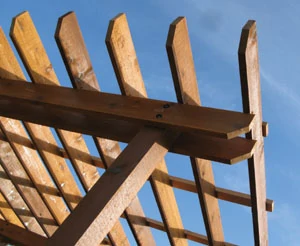
There are a bazillion ways to detail rafter tails and this is the place where you can really have some design-fun. Or, take it simple, like this basic but graceful chamfer.
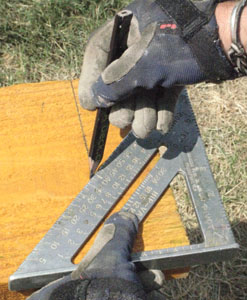
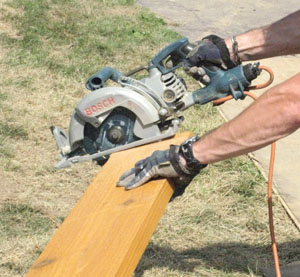
Cutting these on a miter saw is fast for sure, but you need infeed/outfeed support for whacking the ends off 14-foot stock. On the other hand, I laid out and made consistent cuts with my wormdrive. First, I square the end. To get my chamfer, I line up 40 on the Speed Square with the square line and scribe the angle. (Note: This isn’t a 40-degree angle; it’s just the position on the square where the angle—which is 45 degrees—looks best.) I then make a pattern and use it to trace the rest of my cuts on the girders and rafters. The four girders get the same cut the rafters do before I lay out the tops for rafter locations.
On the bottom edge of each crowned rafter I measure and mark the cantilever location on each side, so I don’t have to fumble with my tape during installation.
Girders. After crowning the girders, I set all four on edge—crown up—and lay out rafter spacing. If you’ve built the girders in a 16-inch matrix, you can simply pull 16 O.C. from one end, and end up with a full rafter on the other. If you have to get funky splitting them up in a different matrix, try starting your layout from the center and pulling from there to each edge. You may have to get creative with the spacing to make it work.
Next, I mark the inside of each girder for each post location. Because the posts are locked by the sandbox, I lay each girder up to the posts and trace the post locations right on the girder—we’re talking dead-on accuracy.
Before starting assembly, if the timing works, apply some wood preservative to the exposed end-grain at the cut locations. If not, hit it after installation.
Assembly
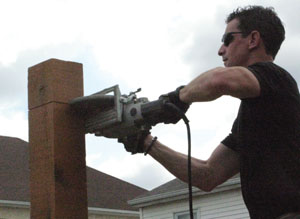
With the post tops running wild I can do a final double-check on the actual pergola height before it’s too late to turn back. Footing holes drilled to different depths, more stone versus less stone in the bottom of the hole, etc., can throw off rough post heights by inches. And, if need be, I can actually screw a board to the posts if the homeowner wants to see the final dimensions in real time, showing them what the actual pergola outline will look like. Once the final layout is settled, it’s the 8-1/4-inch wormdrive to the rescue—two passes on each post sizes it.
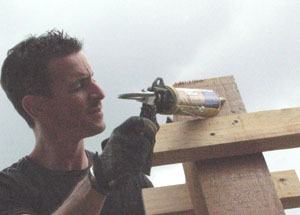
I measure up from the already leveled sandbox and zap the post tops 1 inch shorter than the girder top (the gap is for wire and conduit for lights/ceiling fan).
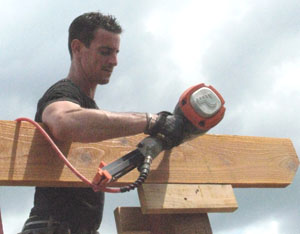
A 6-foot step ladder gets you close to the proper height, however, you could screw 2-by-6s to the posts then bridge those with a couple of 2-by-12s for staging. However you choose to get up there, do it safely.
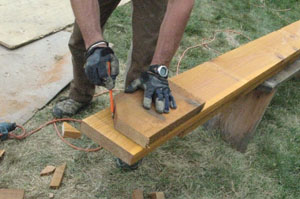
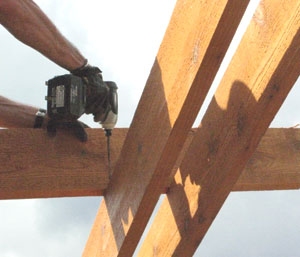
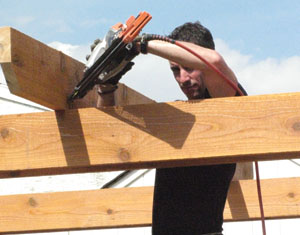
Installing Girders. I measure up from the sandbox to the bottom of my girder location and strike a light line. I tack a 2-by cleat below the line on each post and then dab some construction adhesive on the post. Next, I rest the girder on the cleat and tack it with gun nails or screws, making sure to set the nails in the corners such that they don’t interfere with through-bolts.
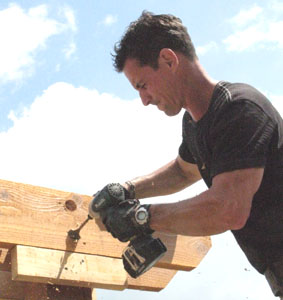
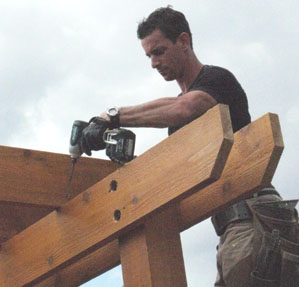
I lay the bolt heads out evenly on the girder. I then drill a small (1/4-inch) pilot hole through each girder and the post. With the hole drilled, I follow up with a boring bit or 1-1/2-inch paddle bit to relieve a space for the bolt head and washer on each side. Note: I primed and spray-painted the through-bolts black. I’m not sure if anybody but me notices, but I like it.
Installing Rafters. With the rafter bottoms and girder tops laid out, placing the rafters dead-on-money is easy, just line up the lines then toe-nail (or screw) through each rafter into each girder. This is soooo much easier than measuring everything from the top of a ladder.
Rafter Ties. Rafter-ties—2-by-4s running perpendicular to the rafters—stabilize the rafters and add another visual element to the system. Lay ‘em out; gun ‘em down. I used five on this pergola. Safety and Layout Note: I install rafter stays over the girders first. I think they look good there. Plus, if you start walking around in rafters without stays, expect them to tip over and for you to get hurt. With the first two stays in place, I then divide the space between them in half for a center stay. Divide the spaces left and right of the center stay in half, and you’ll have evenly spaced rafter stays with minimum math.
Landscaping
A pergola’s earthmoving work requires that you either get in touch with your inner landscaper, hardscaper, or mason—or that you sub-out those trades to finish the pergola. A beautiful structure built over a mud puddle just won’t win you any awards.
While a lot of pergolas get hardscape “floors” (your hardscape guy will love you if you’ve left the sand-box border for him), it’s not necessary. Others, on the other hand, are integrated into existing structures. And then there’s this one: The floor is grass—about as green as you can get. And, I hasten to add, installing sod instead of a hardscape clipped about $3,000 from the budget.
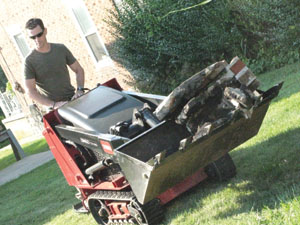
The Dingo played another significant role here, carting various media—crushed stone, fill dirt, topsoil, sod and bark mulch—all of which were required in bulk to re-landscape this project and tidy up existing planting beds.
Final Details
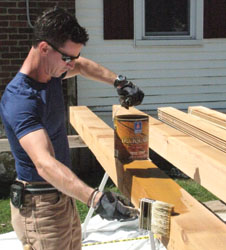
Double-extra-triple stain all those end-grains, especially the post tops and bolt holes.
For a lawn that’s been chewed up, I find the best medicine (at least where I live) is water, a fertilizer like Milorganite, and some lime. For areas that need to be re-seeded, I’ve had terrific luck with Scott’s PatchMaster grass seed/mulch mix and Scott’s seeds.
Furthermore, seed or sod needs water. Lots of water. I find it’s best to set up a spike sprinkler and leave it in position, using it regularly until the grass is established.
Whatever you call it—pergola, patio cover, or one of those garden thingies—your work remains to shelter and luxuriate a beat-down backyard with shadow and form only a structure like this can provide.
Editor’s Note: Mark Clement is a remodeler, live action trade show presenter, and author of The Carpenter’s Notebook
The Right Material
You can build pergolas from all flavors of material, from Cedar and Southern Pine to vinyl or hybrid structures of masonry, cultured stone veneers, steel posts, 2-by, 3-by and solid 4-by rafters—all of which can be left clear, stained, painted and so on. The point: There’s a lot of room for imagination.
The design scope on this project was decidedly refined with a natural feel intended to last. I used rough-sawn Western Red Cedar 6-by and 2-by—primo stuff. The material delivered the right look, and when properly detailed will definitely stand the test of time.
I could have installed the cedar au natural, but The Western Red Cedar Lumber Association (WRCLA) recommends pre-staining—with true oil-based stain—prior to installation. This extends the material’s service life, especially in ground contact. I used Sherwin Williams solvent-based DeckScapes with a cedar pigment. (Note: “Solvent-based” means oil, and oil does not clean up with water.) I could have used a clear finish, but I like the pigment, and the pigment provides more UV protection than clear stain.
Making the Connections
Many of the framing, cutting, and layout techniques used to build this freestanding pergola can be adapted to a pergola that covers an existing patio space and/or connects to the house. Here’s what I’m thinking when I approach such a project.
Posts and Patios. For a paver patio, you can often remove a few pavers at the corners and excavate for posts. Then replace the pavers, cutting to fit. On a concrete pad, life is probably easier if you simply use a Simpson Strong-Tie bracket to make the connection between the concrete and the post.
Decks. I’ve seen a lot of … how do I say this politely … contraptions intended to be pergolas woven into existing deck structures. Some use the existing guardrails as pergola posts while others go a different route. A rule of thumb for me is that I like to connect my pergola post to the deck framing directly—and add blocking between the joists to support it yet further. If I need to make any alterations to the guardrail, then I do so on a case-by-case basis. Bottom line: Make sure whatever you weave into the guardrail system meets your local building code.
Spans. Lots of people have questions about how far they can span a pergola girder. The answer is: There is no single answer. Pergolas only support their own weight. However, I’ve seen 2-by-8s spread 18 feet that grin like a smiley face. You need meat simply for the girder to hold itself up. Gravity never takes a break. I use a double 2-by-8 almost as a minimum, purely based on aesthetics. If I have to span more than a dozen feet, I’m going up to 2-by-10. If I have to span 16 feet or more I’m going 2-by-12 and I’m adding knee braces—angle brackets in each corner—to cut down the span if not an intermediate post. Bottom line: I like to trust my eye on this matter as much as my mind. I’m fairly adamant about overbuilding in the first place, but after a career in this field, I know that if it looks too slender or lean or wimpy, it probably is.
Connecting to the House. I often see pergola rafters on decks connected to the house via a ledger board—just like the deck. And because the ledger board is doing the same basic job as the deck’s ledger I detail it the same. I remove the house’s cladding, paper and flash the opening, then fasten. Simpson, LedgerLok, GRK, or other ledger screws are ideal in this application.
Low Maintenance Pergola Kits
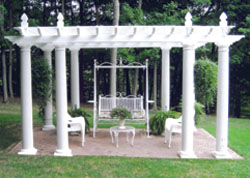
Unlike Mick Jagger, time is not always on our side. If constructing a pergola or patio cover from raw lumber, consider Vinyl Patio Kits from VinylPatioKits.com, to save time and energy. Manufactured from 100-percent commercial-grade virgin polyvinyl chloride (PVC) that can outlast wood patio covers, vinyl patio kits will never rust, chip or splinter. These pergola kits come standard with galvanized steel inserts in all support beams and support posts, which provide dependable and lasting stability that you can’t get with a pergola that uses all wood inserts. You’ll not only save time and money through the life of your vinyl pergola, you will easily add lasting, maintenance-free value to your home. Pergolas from VinylPatioKits.com do not require any staining, and the maintenance-free nature of vinyl means you’ll spend more time enjoying your patio and less time with costly upkeep. If your vinyl patio cover does get dirty, cleaning is easy; simply hose off dirt and debris with a garden hose. If need be, you can use a mild cleaner such as dish detergent.
Sun Or Shade, The Choice is Yours
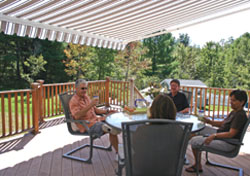
Retractable patio awnings are a wonderful way to expand your living space and save money on cooling costs. “They provide shade and sun protection when you want it, yet you simply retract it when you don’t,” says Don Buteau, president of NuImage Awnings, a national manufacturer located in Auburn, Maine. The solution is dyed acrylic fabric, available in over 45 of today’s most popular colors, which will not fade or deteriorate while providing more than 94-percent blockage of harmful UV rays. In addition, it will feel up to 20 degrees cooler under your awning. NuImage Awnings ships its entire patio awning product line completely assembled for easy installation. A retractable awning can easily be mounted to walls or roofs with the proper brackets. A typical model weighs about 10 pounds per foot of width. The key is to locate the studs or rafters and use high-quality lag bolts properly sized for the application. Cool comfort, plus energy savings, makes a retractable awning a great addition to any home. Learn more at www.nuimageawnings.com.


