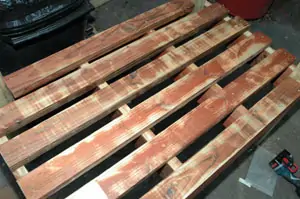
As someone who loves outdoor cooking, I have acquired quite a collection of grills and smokers. Several years ago I bought my first ceramic cooker and fell in love with kamado-style cooking. Several of the Extreme How-To staff also have ceramic cookers, and after comparing notes on the size of everyone’s outdoor cooking centers, I decided to build a cooking table for mine—because that would make mine the best and the biggest!
Ceramic cookers offer the aficionado of grilling and many advantages over other styles of grilling. One advantage is the ability to control temperature with greater accuracy, which allows even the novice Chef to serve up the best of meals. Another advantage is the ability to create a cooking temperature of above 750 degrees that will sear a steak instantly, sealing in the juices and creating a succulent piece of meat. Well-made ceramic grills also allow you to slowly cook meats without drying them out.
The thick ceramic walls provide outstanding insulation qualities, and ceramic’s ability to withstand high temperatures keeps the heated side hot, and the cool side cool. Think of a Space Shuttle and how the ceramic tile protects the inside of the Shuttle from extreme heat. Ceramic cookers work the same way, keeping the heat inside without transferring it to the outside. This makes the Primo Grill very efficient.
Now, the drawback to building a table to support a large ceramic grill is its weight. The vast amount of ceramic used to construct the grill makes it extremely heavy. (For more information on Primo Grills, check out the website http://www.primogrill.com
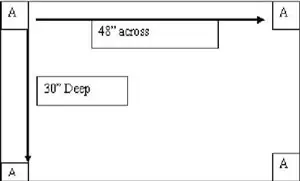
I built a table for the Primo XL and the weight of the grill alone is several hundred pounds. So instead of building the table out of 2 by 4s, I chose 2 by 6s and ran two 2 by 6 joists from front to back on 16” centers. The overall width of the table is 48 inches and the depth is 30 inches. This is how I built it.
View from above of the table layout
You will need a circular saw, tape measure, speed square, pencil and chisel, also a hammer may be needed to strike the chisel.
The cut list requires:
4 4×4 treated posts cut to 36” or cut to height of table top whichever you prefer (Part A)
2 2×6 treated supports cut to 45”
2 2×6 treated supports for the ends cut to 30”
2 2×6 treated supports to be used as joist cut to 27”
4 2×4 treated pieces cut to 48” (these form the interior decking that the grill rests on)
2 2×4 treated pieces cut to 38” (these fit between the two front and two back 4x4s)
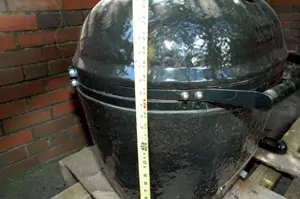
After cutting the lumber to the desired lengths as mentioned in the cut list, I measured the height of the grill’s cooking surface from the ground to create the ideal height of the base that would support the grill.
The height of the grill cooking surface measured 16 inches, I decided that raising the cooking height to 36 inches would be the most comfortable height for me.
The 2 by 6s for the front supports would need to be 20 inches from the floor, and once the 2 by 4 decking was fastened to the supports, I would have the desired cooking height of 36”.
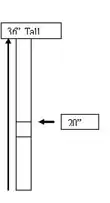
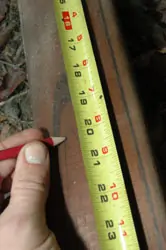
Marking the 20” height on the 4×4.
I mark the 20” height on all four 4 by 4s. I then measure the width of the 2 by 6, usually around 5.5 inches to 5.75 inches, these were measured to be 5 5/8 inches. I transferred the width to the 4 by 4s, using the 20” inch mark as the top mark and making the bottom mark at 14 3/8 from the bottom.
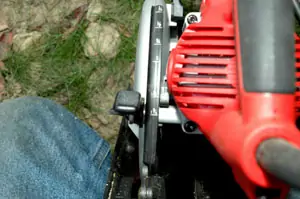
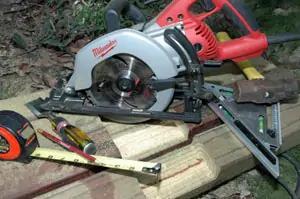
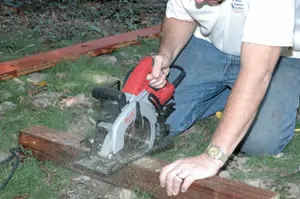
I adjusted the depth of cut to the same thickness of the 2×6, Milwaukee‘s Worm Drive Saw provides a depth guide on the adjustment seen here.
I then set my saw to the exact depth of the 2 by 6 thickness, in this case 1.75”. You have to measure your lumber as thickness does vary, because this depth could easily be 1.5”. Once you have adjusted the saw, set the saw flat on the board with the blade against the edge, the blade should just cover the bottom edge of the 2 by 6. Make sure the saw is unplugged when performing this, as you will need to raise the blade guard in order to see the bottom of the blade.
I am cutting kerfs in the 4×4 with my Milwaukee Worm Drive Saw, but a sidewinder saw will also work.
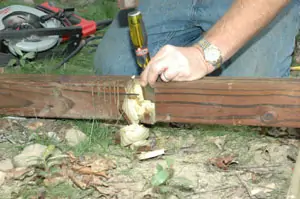
With the saw adjusted to the correct depth and the width of the board transferred to the 2 by 6, make a cut along both the top and bottom lines on the 4 by 4. Once these cuts are made, you will then make a series of cuts with little space between them. These are called kerf cuts. Once you have made these cuts, take a chisel to clean out the wood between the two outer cuts. Keep in mind, you are creating a channel for the 2 by 6 to rest in so be careful to keep your chisel perpendicular to the side of the 4 by 4. Once the wood is removed you will need to clean up the bottom of the channel. Your chisel, a rasp or sanding will do the trick.
I am chiseling out the small slivers of wood created by cutting kerfs in the channel using a Stanley 1.5 inch chisel.
Here you can see the finished channels. They are ready to have the 2x6s fastened to them.
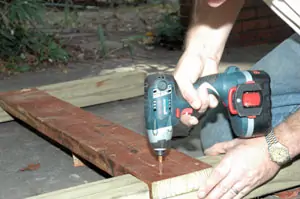
Line the outside edge of the 45 inch 2×6 with the outside edge of the 4×4, and fasten with decking screws. I used the Bosch 18 volt impact Driver to drive the screws.
By cutting the channels and fastening the 2 by 6s to the 4 by 4s this way, the heavy weight of the grill is supported by the 4 by 4. This method adds strength to the structure and allows the lumber to carry the vertical load, rather than using brackets, or relying on nails or screws to support the weight of the grill.
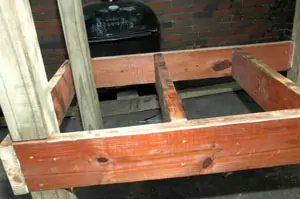
Here I am attaching the joist using 16” on centers as the distance between them.
Once the joists are attached, the structural elements of your outdoor cooking table are finished. For the base that will rest on top of the 2 by 6 structural elements, I chose 2 by 4s cut to length and sanded. In this project I used Top Choice Lumber from Lowe’s.
Here you can see the 2×4 decking boards installed.
I attached the decking boards with construction adhesive and decking screws. By taking the depth of the table, 30 inches and dividing, I spaced my decking boards equidistance apart, which gave me approximately 2 inch gaps between each board. With the decking boards installed, I am ready to begin the finishing process of staining and sealing, which I will cover in the next segment of the article.
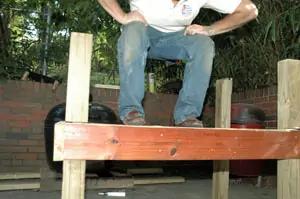
As you can see the base supports my 230 pounds without any deflection.
Product Suppliers:
Milwaukee Electric Tool Corporation
Bosch Power Tools
C.H. Hanson
Primo Grills and Accessories


