By Charlie Self
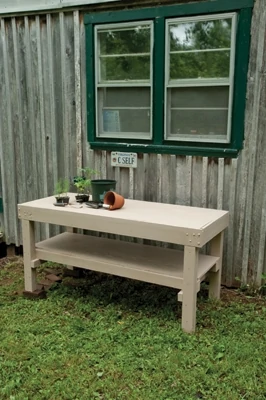
Here’s a heavy-duty garden bench for the DIY’er with a green thumb.
When it’s time to pot flowering plants, or even some food plants, most of us are on our hands and knees, scrabbling around for the tools we drop and spilling sacks of potting soil over the lawn or walkway.
There’s a better way, though it does take some wood, fasteners, paint and effort. A good potting bench may have hangers for trowels and other tools, a lower shelf for bags of potting soil and pots, and a top surface sturdy enough to take whatever is thrown at it over years of use.
My design is extra heavy-duty, so it may be the last one you ever need. It is also fairly simple, with a series of rabbets into which the top sits being the only cuts that can’t easily be made with a non-powered hand tool. You can make the rabbets using a router or a table saw. I cut mine with a table saw and Bosch’s 6-in. dado set.
Potting Table Top
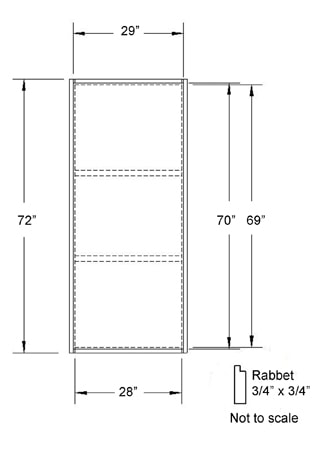
The outer frame is made from 2×6 with 3/4” rabbets along the full length of their inside edges. Four pieces are needed, two 28” long and two 72” long.
Internal supports are 2×6 ripped to 4-3/4” high. The plywood top is screwed to the center struts at approximately 12” intervals. It is fastened at the sides at the same intervals, and at the ends with 6” spacing.
Top & Top Framing Materials
3 pcs. 8’ 2×6 pressure-treated SYP
3 pcs. 8’ 2×4 pressure-treated SYP
1 pc. 3/4” 4×8 pressure-treated plywood
Fasteners as described in text
Kilz primer, 2 quarts
Valspar Porch & Floor Paint
(All material available at Lowe’s)
Outer Frame
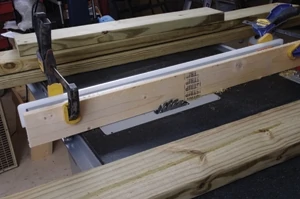
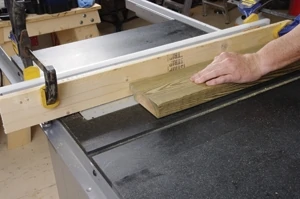
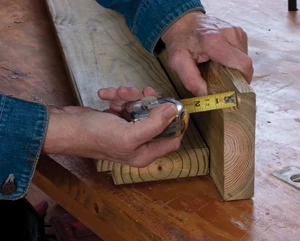
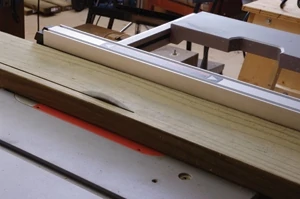
Start by selecting your 2-by-6s. Use the straightest you can find, whether PT or plain pine or fir. Using a table saw or router, cut the 3/4-by-3/4-in. rabbets on one edge of three 2-by-6s. If you haven’t used your table saw for rabbeting before, you may have to do as I did—clamp on a sacrificial fence. The outer blade just scrapes the fence, which saves the actual fence facing from being torn up. These sections of 2-by-6 become the outer frame, and the rabbet forms a shelf onto which the top fits.
Using pressure-treated lumber to build the top frame was almost a mistake; use regular 2-by-6 pine or fir lumber instead. I learned this after I assembled the top late one morning, and came out two days later to find that the 2-by-6 side boards had warped. Because the unit is going to be primed and painted, there is no real need for pressure-treated lumber anywhere but in the legs and plywood parts. The amount of warp I got wasn’t enough to justify buying more material and re-cutting the four pieces involved, but it may look a bit odd from one angle.
Remove the dado set, install a rip blade and take 3/4-in. off a fourth 2-by-6. That provides cross-bracing at the same height as the dadoed rabbets.
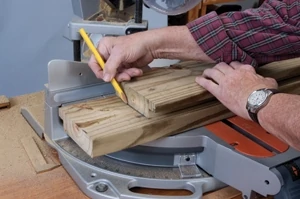
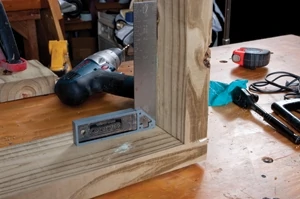
Begin final sizing by squaring up the ends of the three 2-by-6s. Check square with a good, accurate try-square. Cut the 72-in. long pieces first. The end pieces are 28 in. long. Assemble these with 3-by- 1/4-in. lag screws (use double-dipped, hot-galvanized lag screws). Use two screws at each junction, for a total of eight. Drill pilot holes for these, and for any other screw-thread fasteners used on this project.
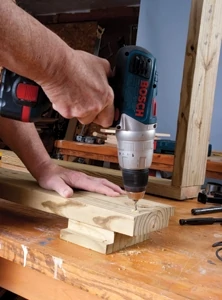
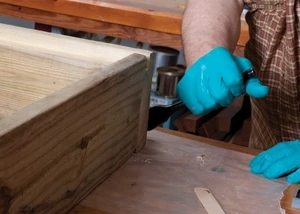
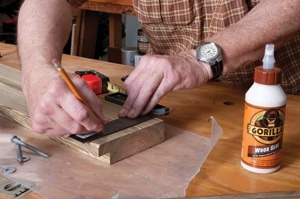
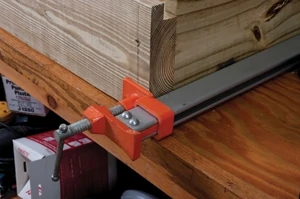
Use water-resistant wood glue to seal the ends of all cuts. The glue coat is in addition to a later coat of primer. Primer is essential with freshly treated lumber; this batch took two coats for good coverage. Hold the corners together with 36-in. clamps as you drill pilot holes. Drill two pilot holes per joint, going into the end piece as well as through the face. Pilot holes should always be at least one drill size under the fastener size.
Square each corner as you go. When all four corners are fastened, check the diagonal measurements. Diagonals should be exactly the same or so close as to make any difference meaningless—1/8 in. is probably OK, but less than 1/16 in. is better. If the diagonals are off, you need to track down the culprit and re-square it, which usually means taking the entire frame apart.
Measure in 20 in. from each end and mark for one edge of a brace. Do this on both sides of the long top dimension.
Cut two center braces to 28-in. lengths from the piece you’ve already ripped to 4-3/4 in. wide. Clamp those pieces between the sides, mark 20 in. from each end piece, squaring them to the sides. Seal the ends with wood glue. Drill 1/8-in. pilot holes and drive 3-in. galvanized screws, two per joint. Keep the frame top side up on your work surface for this operation so the braces have their tops level with the rabbets. Using my old work bench keeps me from having to kneel for most assemblies, which makes this kind of work a lot easier.
Give it Some Legs
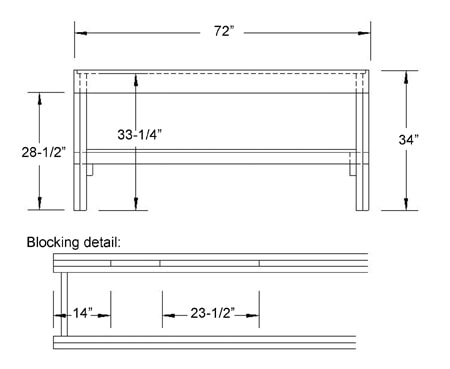
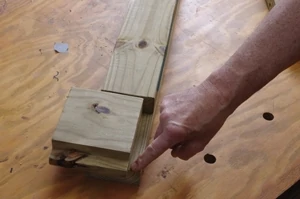
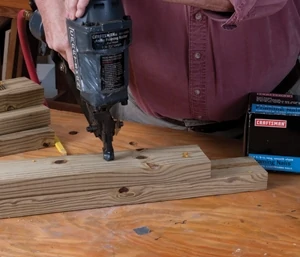
Now, set the top assembly aside while you assemble your legs. Find your straightest 2-by-4s, and cut four pieces 33-1/4 in. long, and four more at 28-1/2 in. in length. I assembled these with a bead of polyurethane Gorilla glue and 2-3/8-in. nails. Use a pneumatic nailer, or go to screws. Unless you’re an expert with a hammer, pressure-treated Southern Yellow Pine is not a place to start learning. You’ll bend a lot of nails if you do. A pneumatic nailer is much easier and works well with even a small compressor.
Turn the top frame bottom side up on the bench or other work surface to install the first leg. Reach under to make sure the top of the leg is level with |or slightly below the bottom of the rabbet. If you’ve measured accurately, leg installation is simple. Using a small clamp, secure it in place and drill three through-holes in a triangle pattern. The holes must be 1/32- to 1/16-in. larger than the carriage bolts used (I used 1/4-by-3-1/2-in. carriage bolts). Plus, the pilot holes are drilled all the way through two layers of 2-by material, so make sure you have a long enough bit in the drill.
Potting Table Framing
Legs are 2x4s, joined with screws or nails and glue. Gorilla Glue was used because of its waterproof properties. Leg and shelf braces are 2x4s. The outside 2×4 of each leg is cut shorter than the inside to support the top frame. The lengths are shown below.
Blocking shown below is variable: I had scrap 2×4 that let me stick a 14” piece at each end, with a longer center blocker. The front blocking was just a long 1×4. Fasten with nails and glue.
Make sure the top frame is completely square. Pressure-treated lumber doesn’t provide furniture-quality dimensions, so each corner needs care to keep the entire structure square and rigid.
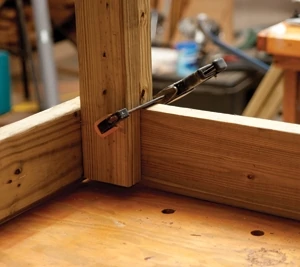
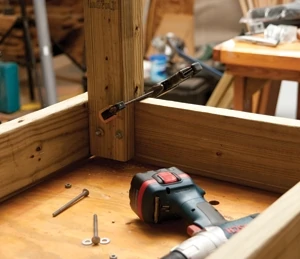
The round head of the carriage bolt remains on the outside as you tap the bolt through its corresponding hole. When all three bolts are in place, slip a flat washer and nut on each one, and use a deep 11mm socket on your ratchet wrench to turn it snug. Don’t turn it as tight as possible—the use of lag screws and carriage bolts allow the frame to shift a bit without need for leg levelers. This bench is designed for outdoor use, where the ground is uneven. When you do put it in place, let it settle for a day or two, then tighten all lag screws and carriage bolts.
Repeat the procedure at all four corners. (Note: The photos show that I placed my bench where one end had to be built up, a consequence of not asking my wife where she wanted the bench before I built it. I used patio pavers to elevate the very low end.)
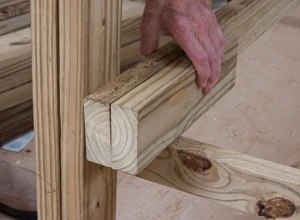
Next, place 2-by-4 leg braces. Use drive screws or 2-3/8-in. nails from a pneumatic nailer.
I placed the shorter braces first, and then ran the longer braces using the nailer.
Surface and Shelf
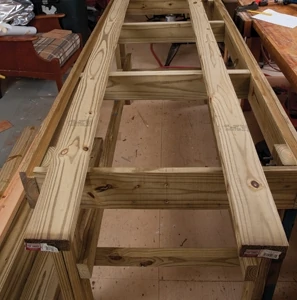
Flip the assembly onto its legs, preferably on the shop floor. At this point, moving the assembly is a lot more enjoyable for two people than for one.
I used a 19-in. wide plywood cut-off for the lower shelf, with some help from extra material. I ran a combination of full and partial 2-by-4s to support the shelf and make it a good fit.
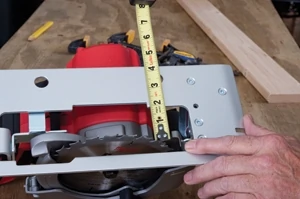
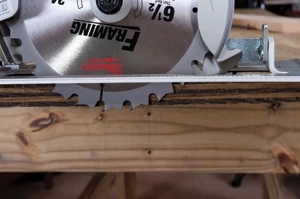
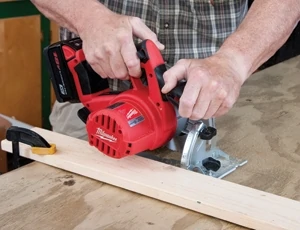
Cut the plywood for the top and shelf to size using a cordless circular saw or table saw. You can use two scrap 2-by-4s to elevate the plywood from the top frame, then clamp a board in place as a guide for a circ saw. To do so, measure the distance from the edge of the saw’s base plate to the blade’s tooth edge. That’s the allowance you need to remember when you place the guide board. Clamp the board at each end, keeping the clamps spaced far enough that there is no interference with saw motion. For the cleanest cuts, set the blade depth just barely beyond the thickness of the board. This also means you can use and re-use your old 2×4 work boards, as it takes many cuts to ruin them.
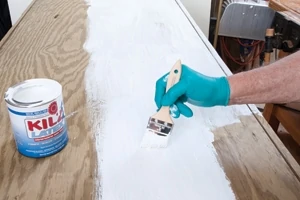
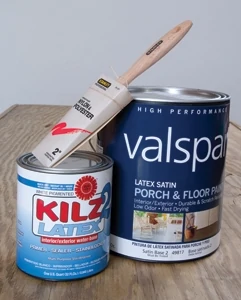
(At this point during assembly, I should have painted the leg interiors and the shelf with two coats of primer and one coat of paint. I didn’t.)
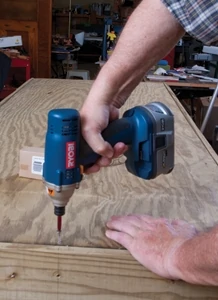
I finished the installation of the bottom shelf, using 1-1/2-in. drive screws, and then installed the top. I used 1-1/2-in. screws there, too, in both cases using only enough to make sure the plywood wouldn’t curl or cup when it got wet again. Screws were placed approximately 10 to 12 in. apart.
Then came the fun. I had to paint the bottom shelf and inner legs with the top shelf already in place. I got two coats of primer (I prefer Kilz2) on the assembly, and then did the same for the top. Next, the whole assembly and the top got two coats of Valspar Porch & Floor Paint. Both Kilz2 and the Valspar paint are latex-based and easy to clean up. They are supposedly fast drying, too, but during the construction of this bench, rain was a constant companion. The four coats of liquid took six days to ensure proper drying between coats.
Basin Feature
I added one extra feature. If you have no need for a basin, then don’t bother. We were discarding an old smoker, in which the chip bowl was in very good shape. I sanded off the rust and coated with Krylon rust-resistant paint—three coats will hold it for the next year or two. The result is a 13-in. diameter lift-out bowl that makes room for mixing soils before potting, or for any other super messy job. To clean the bowl, just lift it out and wash.
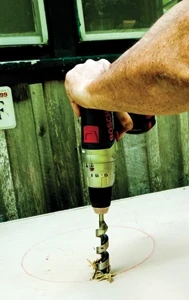
Bowls need not be steel, but it is more durable than plastic. Plastic dish pans work, as do old-fashioned wash-up bowls with a white porcelain coating (although the porcelain does |chip over time). Most farm stores have the bowls, and most any major department store has a colorful selection of plastic basins. Adjust your measurements to the shape and size of the bowl you locate, if you decide to add this feature.
Measure from the side at least 24 in. to check one dimension of the rim. Do the same on the other side of the bench top (measuring both from the underside). This gives you the center diameter in which to cut the circle … or other shape. Roughly, size limits are 18 in. in diameter, or any other dimension if you use a square or rectangular bowl.
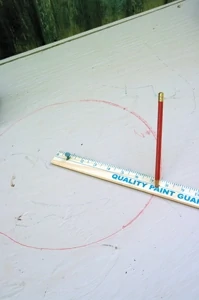
I marked the center of my table and made a rough compass to make the 13-in. circle (see sidebar). My actual bowl width is 15 in., with a 1-in. lip all around, so support is good, and you can hide a few minor slips with the basin rim. I decided to stay with the drop-in/lift-out method, so I added two coats of primer and two more of the Valspar paint to the exposed plywood edges.
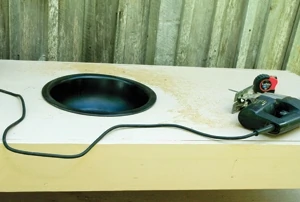
Drill a hole large enough to easily accept a jigsaw blade. A jigsaw easily cuts the 3/4-in. pine plywood.
Coat the edges. I may recoat the top again after all is done. As you can see, smudges were the results of my moving tools around a bit carelessly.
At this point, back off and take a look at possible tool hanging sites. I suggest using the bench for part of a season before adding any hooks. That lets you be certain of placing the tools where you need them, not where I think they look good. I’m leaving that chore to my wife!
SIDE NOTE 1
Materials
3 pcs. 2x6x8’ PT lumber
4 pcs. 2x4x8’ PT lumber
2 pcs. 1×4 PT lumber
1 pc. 3/4” x 48” x 96” PT plywood
12 pcs. 3-1/2” x 1/4” carriage bolts
20 pcs. 1/4” flat washers
8 pcs. 1/4” x 3” lag screws
12 pcs. #8 x 2-1/2” flathead drive screws
16 pcs. #8 x 1-1/2” flathead drive screws
(for top)
2-3/8” nails for pneumatic nailer
Gorilla polyurethane glue
Gorilla waterproof wood glue
Two quarts Kilz2 primer
One gallon Valspar floor paint
SIDE NOTE 2
Quick DIY Compass
The compass is nothing more than a 20-in. long piece of cheap yardstick. These yardstick compasses have a great many uses. To make one like mine, cut the wood at 20 in. and then drill a 1/4-in. diameter hole at the 1-in. mark. Then, drill a 3/8-in. hole half the distance of your desired diameter from the first hole. For example, on this particular job I drilled the second hole 6-1/2-in. from the first hole (which achieves the 6-1/2-in. radius needed to make a 13-in. circular cut). Using a roofing nail as the center marker, tap it lightly into the 1/4-in. pivot point, and rotate a pencil in the outer hole to mark a good, clean cut line.


