

Hit the Road for Fun with this Cool DIY Welding Project
By Blair Weilnau
Your go-kart dreams can easily become reality with a welding machine, steel and a little elbow grease. There are lots of go-kart plans on the internet, and creating your next project is right at your fingertips. Is this go-kart for fun? For hobby? For racing? Or is it your next father-daughter or father-son garage project? Dream big, and customize your go-kart to best suit your needs.
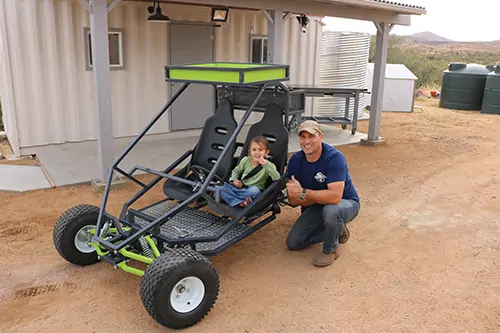
Forney Industries teamed up with Joe Mooney from Homesteadonomics to create an off-road go-kart for Mooney to use around his homestead. Mooney wanted a two-seater with suspension to easily navigate his mountainous desert property.
Not all plans are perfect, and some tweaks and adjustments may be necessary. Keep in mind, you can always make it your own and add your own spin on a purchased plan.
Tools and Materials
- Forney 190 MP welding machine (ITEM# 324)
- .030” MIG wire (ITEM# 42286)
- 1¼” and 1” square tubing (ITEM# 49531 and ITEM# 49528)
- Dry saw
- Angle grinder (ITEM# 1901)
- Cutting and grinding wheels (ITEM# 71819 and ITEM# 71925)
- Heavy-duty magnets (ITEM# 70715)
- C-clamps (ITEM# 70225)
- Paint marker (ITEM# 60310)
- Drill
- Welding helmet (ITEM# 55709)
- Safety glasses (ITEM# 55432)
- Welding gloves (ITEM# 53410)
- Flame-resistant jacket/apron/sleeves (ITEM# 57203)
- Go-kart plans (optional)
Project Prep
When metalworking and welding, safety is important. Always remember to protect yourself with a flame-resistant welding jacket or apron and sleeves, welding gloves, safety glasses and a welding helmet. Protecting yourself from harmful arc flash and sparks is crucial.

Create your own go-kart plans, or download your favorite online plan. We decided to use the plans from Spidercarts and build “The GrandDaddy” version (you can download this plan and more at Spidercarts.com). This two-seater dual suspension kart was just the design Mooney was looking for, and would allow his family to join in on the fun. Mooney could also easily customize these plans and add additional features to make it his own.
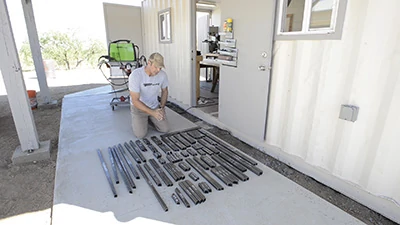
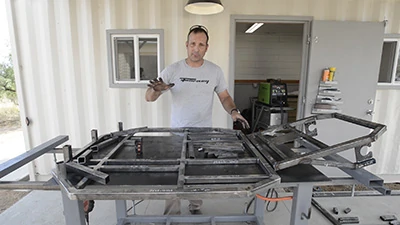
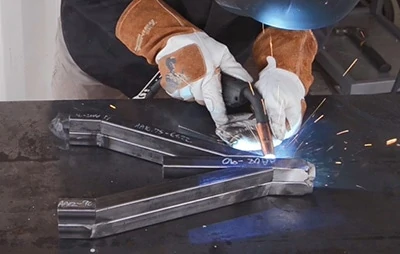
For this build, the first step is to cut all the pieces according to plan. It doesn’t hurt to purchase extra material in case of a wrong cut or you find you need additional steel. Use a paint marker to label each individual cut piece so they are easy to identify for assembly. Follow the rule of thumb to measure twice and cut once to save a lot of time in the long run. We used a dry saw to cut more shallow and common angles (45 degree and 22.5 degree angles). For the steeper and compound angles, an angle grinder is great to get that custom fit. Cut all pieces to length as described in your plans and lay them out with the labels facing outward. Double check your plans and make sure you have the correct parts and pieces.
PRO-TIP: Scribe your metal before cutting. Use an angle-finder to help set angles before you cut them.
PRO-TIP: Use heavy-duty magnets to help align your metal and ensure your angles are straight.

Step by Step Assembly
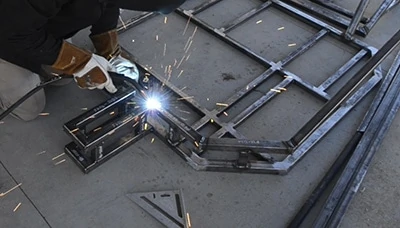
Your pieces should all be laid out and labeled. It’s easiest to start with the main base frame and build the go-kart up from there. For convenience, we pre-drilled all the holes our plans called for, especially in areas that would be harder to get to once welded together. Some of the holes needed were for the brake and gas pedals as well as the seats. Your plans should help you determine what pieces should be drilled. After you’re finished drilling, you’re ready to tack weld the pieces together.
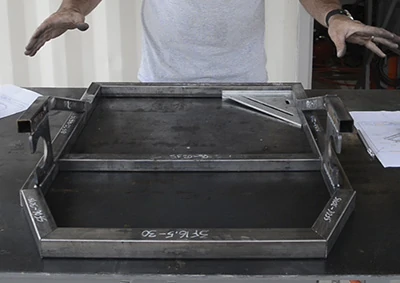
Find the most level and flat surface available to assemble and construct the chassis. This will help to ensure the chassis is level and square. If you notice your pieces don’t fit flush together, check for metal burrs on the ends of the metal. These will appear after cutting and can easily be grinded off.
Make sure to set your machine to the recommended settings for the metal you’re welding. Our Forney 190 MP was set to 45 amps, 18.9 volts in the manual 2T mode. Always remember, start with tack welds. Tack welds temporarily hold your pieces together and can easily be ground off if a mistake is made. Once you ensure your pieces are square, finish with complete welds to properly secure the metal together.
If something doesn’t line up, double check your measurements.
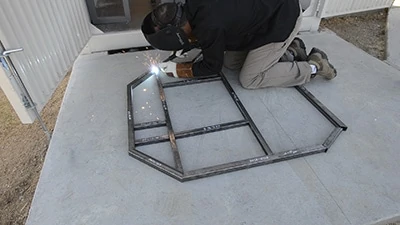
PRO-TIP: To prevent the heat from warping the metal, don’t weld too long in one spot.
PRO-TIP: Use a square or a carpenter’s square (they’re much larger) to help ensure angles are lined up appropriately.
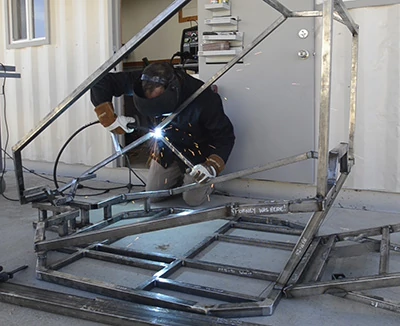
After the main frame base is welded together, build the rear subframe base. This will be the frame that holds the rear bracket for the axle and the engine. Tack weld first and complete with full welds. The rear subframe base will also receive two angled pieces of tubing that will hold brackets for the rear axle, but start with making the rear subframe axle supports. We first tack welded the axle supports flat, and then tilted them up and constructed the rest of the frame to those. Finish with complete welds.
Next, we tack welded the front uprights to the main frame and then the rear uprights to the back of the main frame. Then, we tack welded the front and rear top rails. The side rails are compound angles which made this a more challenging aspect and required two people; one person to hold the metal and the other person to mark (scribe) the angles and cut them by hand. After it’s tack welded and in place, use complete welds to finish.
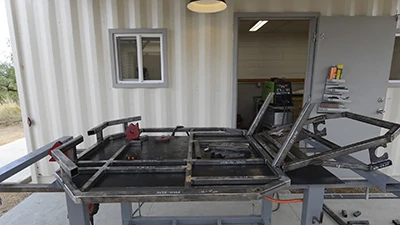
Next, we tack welded the front suspension block which is comprised of the 1-1/4-in. square steel that essentially created a rectangle. Having this front suspension block in place helped us set and adjust the top roll bar assembly. Finish with complete welds.
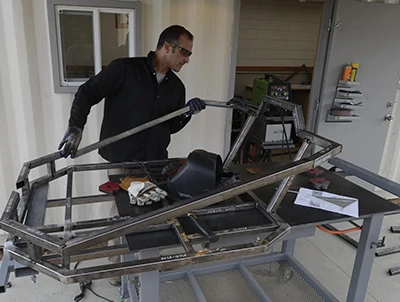
The rear roll bar assembly and the front roll bar assembly were the next steps. We started with the rear roll bar assembly and tack welded it as one piece, then we set it on top and tack welded it to the rear top rail. We then welded the front roll bar assembly together and tack welded it to the front of the suspension block. Finish with complete welds. We hand-scribed our angles to get custom fits to join the front roll bar and the rear roll bar. This was cut with an angle grinder, similar to the side rails.
We installed angled support pieces from the side rails to the roll bar, and then installed the dashboard support. The dashboard support provides the mounting location for the steering column and any other switches you might want to add.
Next, we tack welded brackets to the front suspension block to hold the front suspension. Then, we welded the front upper shock brace to the suspension block. This piece resembles a “W” and will serve as the mounting point for the shocks.
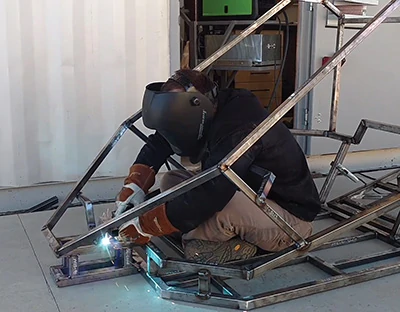
At this point, most of the frame should be complete. Build the front suspension A arms. These arms were made in two matching sets, for a total of four arms. Build these as matching pairs. The lower arm will get a shock-mount bracket welded to it. A matching shock-mount bracket was also attached to the upper portion of the front suspension block assembly.
PRO-TIP: Once you have one arm assembled, dry fit the second arm to mimic it. All ends should line up accordingly.
Mount the pivot points to the rear sub frame assembly and the rear of the main frame. Attach shock mounts between the rear subframe assembly and the rear uprights of the main frame.
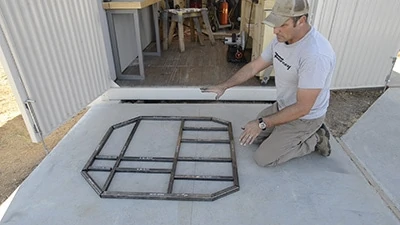
We added baskets to the go-kart for some additional functionality. This will be useful on Mooney’s homestead but is not necessary. Make the go-kart your own and add what would best suit your needs.
Double check the frame and make sure all welds are complete and sturdy. Grind welds where you see fit. That completes your go-kart chassis. Your purchased plans will assist you with mounting the tires and engine placement. Electrical systems and styles vary, and are completely up to you. We encourage you to research your options and follow the manufacturer’s instructions for installation.

Whether it be around your homestead, racing your buddies at the track, or just some bonding time with your kiddo, a go-kart has many uses. You can make it as simple or complex as you want, but just remember to have fun!
Editor’s Note: Blair Weilnau is the Copywriter at Forney Industries, one of America’s most established family owned welding and metalworking product companies. For more information, visit www.forneyind.com. Check out Homesteadonomics on YouTube for more project videos.
