

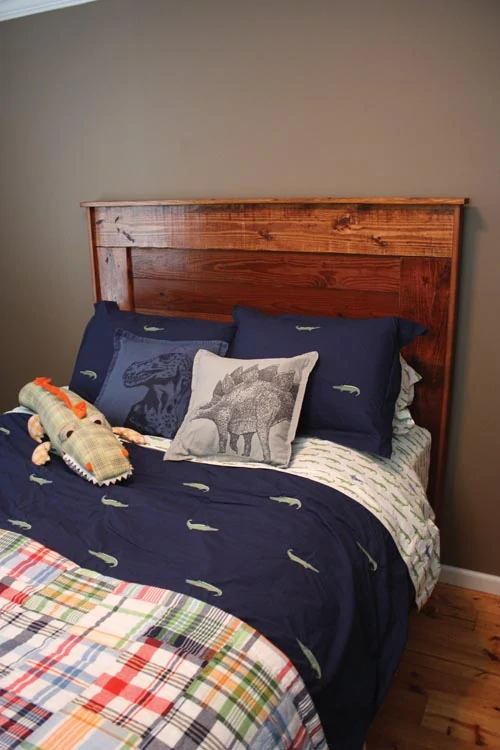
This rustic-style bed is a new piece of furniture I made from some very old materials.
By Matt Weber
My grandmother owns a house built sometime in the 1940s which has been in our family for decades. The house was formerly used as a residence, then as a barn and finally just for storage. It was recently slated for demolition, so I decided to rob it of its usable materials. The interior walls were clad with tongue-and-groove pine that had a rich, distressed quality. This slow-growth pine has tightly spaced rings for a warm, detailed character that enhances its dimensional stability, so the boards stay straighter and the grain is less likely to check than much of the lumber available today.
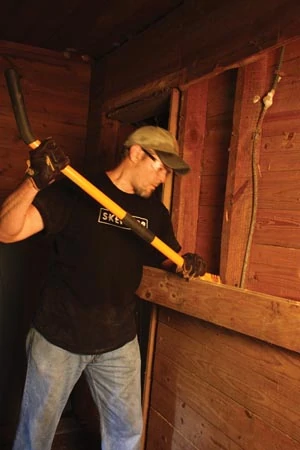
I pulled the boards off the wall studs using a couple of heavy- duty pry bars, including a Gutster Demo Bar typically used for deck demolition.
I was collecting the boards to make the bed’s headboard for my three-year-old son. Not only did this beautiful wood have that distinct character, but I liked the idea of repurposing a memento of my family’s history in a project for our next generation. I guess I’m sentimental.
Here’s how I built the bed.
Bed Frame
I used new lumber for the bed frame, since it would basically be invisible beneath the bedding. Plus, I needed the supporting strength of 2x lumber, and the T&G boards were only 3/4-in.thick.


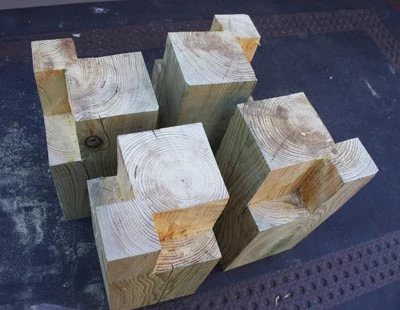
For my design I cut the bed posts from an 8-ft. 6×6 and notched each one to receive the 2×4 bed rails. You’ll need seven 8-ft. 2x4s; four for the rails and three for the cross-members.

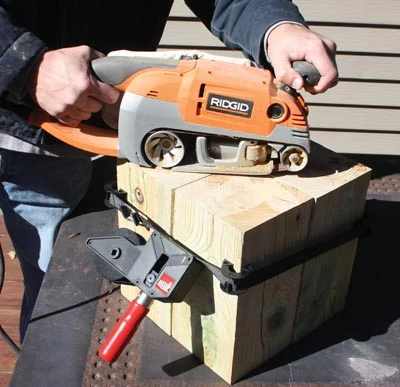
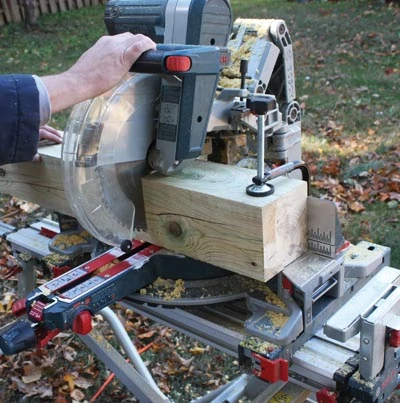
First, carefully cut the 6×6 as square as possible into four equal posts, measuring the height you prefer for the bed frame (minus the thickness of the plywood top). My posts were 11 inches high. A 12-in. sliding miter saw is ideal for cutting the 6×6, but you can get the job done with a circ saw if you finish the cut with a hand saw or recip saw.
The end of the posts must be cut in the same plane so the bed will sit flat. To make sure they matched, I strapped the posts together and sanded the ends even with a belt sander.

Next, the posts need to be notched to accept 3-1/2 inches of each bed rail. These 2×4 notches should be made so the rails fit into the posts flush with the tops and the outer edges of each 6×6. (See photo for notch orientation.)
To make the notches, I marked off the waste areas using a Speed Square and cut away as much as possible with a circular saw. I finished the notches with a hammer and wood chisel.
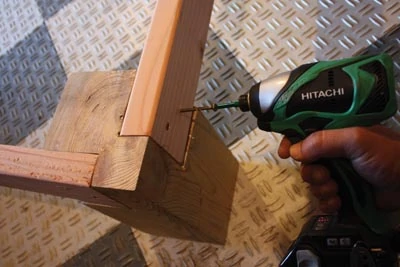
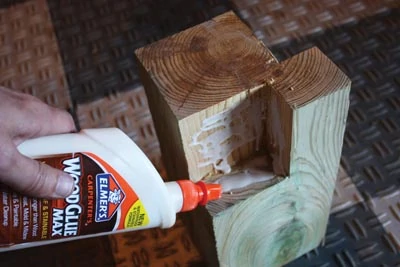
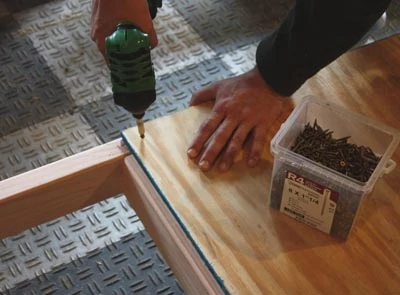
The outside dimensions of the bed frame should match the size of bed you’re trying to build. This was a queen size, so my frame measured 60 by 80 inches. I cut the four 2×4 bed rails to length and fastened them into the notches using a combination of screws and wood glue.

The center cross-member mounts at the midpoint between the side rails and flush with the tops. From each side I drove two
3-in. wood screws through the 2×4 rails and into the end grain of the cross-member. The other two cross-members are spaced evenly between the rails and fastened in the same way.
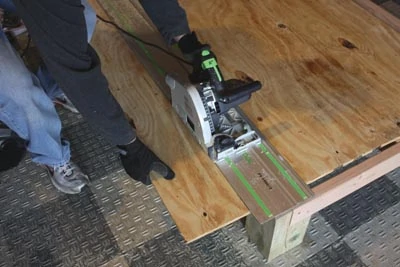
Once the skeleton was complete, I covered the entire frame with two sheets of 1/2-in. plywood, screwed down every 18 inches over the 2x4s and cut flush with the outer edges of the frame. Locate the joint between the sheets on center of the middle cross-member.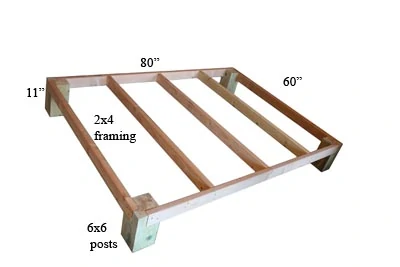
Note: Since I now had a large, sturdy platform sitting in the floor of my shop, the bed frame, I used it as a makeshift work table, providing a convenient support surface for cutting the plywood.
I cut the sheets using a circular saw with a rip guide. When cutting, it’s important to support the sheet on both sides of the cutline, so one side doesn’t fall away and tear out the wood as the cut is completed.
I finished the bed frame with wood stain and two coats of polyurethane.
Headboard
The finished surface of the headboard was comprised of mostly the old T&G boards, along with three lengths of new 2×8 (see diagram p. 78).
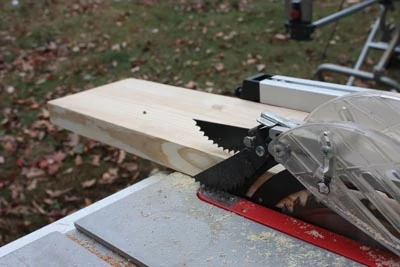
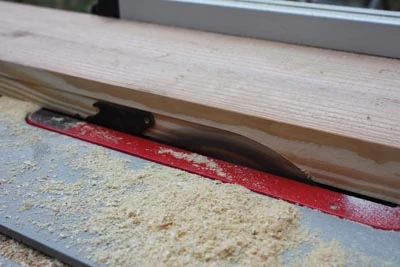
I ripped the edges of the 2x8s square on my table saw to eliminate the rounded corners. I then ripped a 3/8-in. rabbet along one edge of two 2x8s (the legs of the headboard). The 2x legs will frame the 3/4-in. T&G boards, and the rabbets will conceal the butt joints.
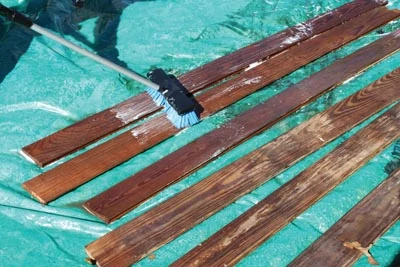
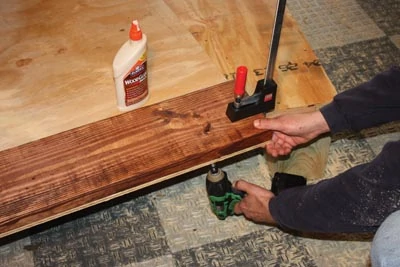
Because the new 2x8s and the old boards looked differently—the purchased boards were much brighter and not as worn—they required different treatments to achieve a matching look. I stained and distressed the 2x8s to match the old wood. If this is the case with your project, I recommend pre-finishing the wood to match prior to assembling the headboard.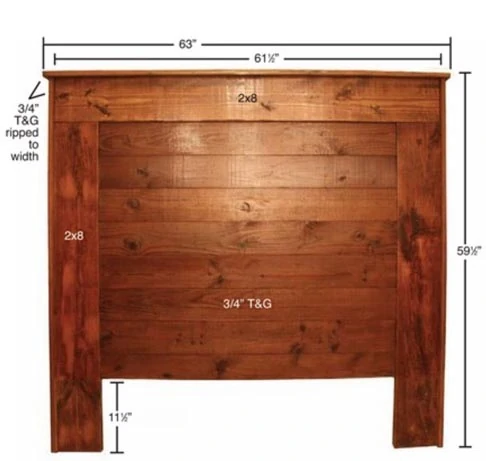
Construction of the bed’s headboard began with a 4×8 sheet of 1/2-in. plywood. I used the sheet’s entire 48-in. height but trimmed its length to 61-1/2 inches.
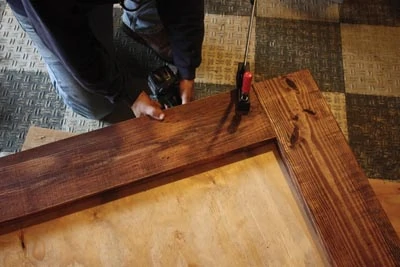
I mounted a 61-1/2-in. 2×8 across the top of the plywood, flush with the edges, and screwed and glued it from the back with cabinet screws.
Beneath the upper 2×8 I installed two perpendicular 2×8 legs,
butted flush with the first |2×8 and aligned with the plywood edges. Make sure to orient the rabbets of the 2×8 legs facing inside. The legs are screwed and glued from the rear, and extend beyond the bottom of the plywood the same distance as the height of the completed bed frame. In my case, the legs extended 11-1/2 inches.
At this point it helped to turn the entire headboard upside down. This allowed me to slide the old T&G boards (cut to length), down between the legs with their end joints concealed in the rabbets. I aligned the groove of the first T&G board flush with the 2×8 cross-member and fastened from the rear of the plywood. Next, I slid the second T&G board, joining its groove onto the exposed tongue of the first board, and fastened from behind. As I progressed in this fashion, only a couple of the boards required muscle to lock the T&G joints. When necessary,I tapped them together with a rubber mallet and scrap T&G block to prevent damage to the boards. For the most part, the old joints connected easily.
I ripped the final T&G board to width and screwed it on to complete the field of the headboard.
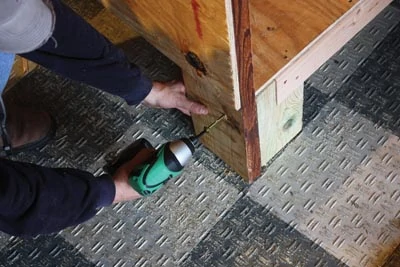
I then flipped the headboard back upright and mounted it to the bed frame to hold it upright and sturdy. The headboard should be centered on the bed frame. I fastened the legs to the 6×6 posts using two offset 4-in. RSS structural screws on each side. The RSS screws from GRK fasteners are designed for heavy-duty applications like fastening a deck ledger to the side of the house, so they have the strength to cinch up a very tight, strong connection between the bed components.
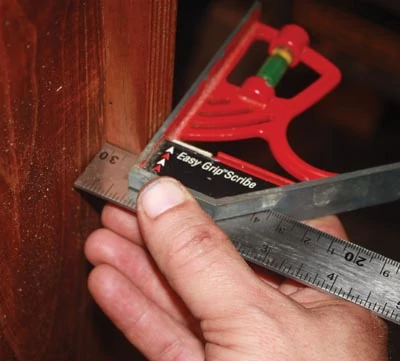
To give the headboard some shadow lines and a more finished appearance, I wrapped the edges of the headboard in 3/4-in. trim that I ripped from the old T&G. First, I ripped two trim boards wide enough to conceal the edge of the headboard, plus a 3/4-in. reveal. I aligned the rear of these two side pieces with the back of the plywood and used a combination square to keep the 3/4-in. reveal consistent at the front. The trim boards began at the floor and ended flush with the top of the plywood. I fastened them with wood glue and finish nails.
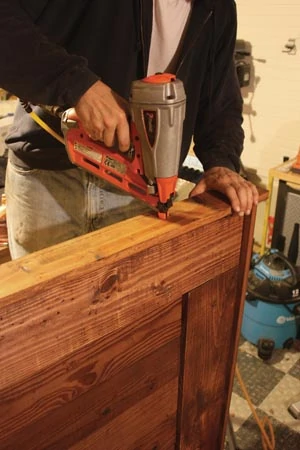
The last step is adding top trim board, which creates a kind of narrow mantle shelf on the headboard (but deep enough for a TV remote). The top shelf should be cut 1-1/2-in. longer than the headboard to create a 3/4-in. reveal over the trim boards on each side. The shelf should also be ripped 3/4-in. wider than the side trim boards to create a 3/4-in. reveal at the top.
I fastened with glue and finish nails.
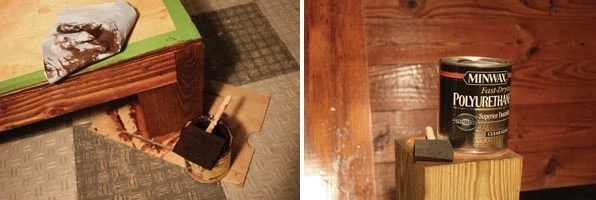
Once the headboard was complete, I coated the entire assembly with three coats of gloss poly-urethane.
The finished product was a very sturdy—and heavy—rustic-style bed. To move it indoors, unscrew the headboard from the frame, call a friend with a strong back, and lift the two pieces separately.
I was so impressed with the rich look of the repurposed wood that I now have a running list of other projects I think would look cool with reclaimed lumber: night stands, fireplace mantels, wall shelves, door trim and more. It’s time to make another trip back to that old house.
Side Note
Matching Stain & Appearance
Using both reclaimed lumber and new store-bought lumber posed an unusual challenge: two significantly different shades of wood for the same project. Sometimes, two or more shades of wood are deliberately used in woodwork to achieve contrasting colors for decorative purposes. That was not the case here.
The old reclaimed wood was less than 6 inches wide, but I had designed the headboard to be “framed” by a 2×8 border, which was a lumber size that wasn’t readily available at the old house. My solution was to supplement the old T&G boards with new wood purchased at Lowe’s. However, the new 2×8 had a much brighter color tone than the darker, weathered look of the old boards, and I was tasked with figuring out how to make the two materials match.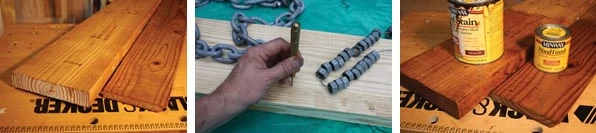
Conveniently, I had a number of old partial cans of wood stain in a number of color tones laying around my shop from previous projects. So I used a scrap board of new 2×8 and a scrap board of reclaimed T&G and applied different color stains to each. Eventually I arrived on a pretty close match. When using a darker “mahogany” stain on the 2×8 and a lighter “Ipswitch pine” stain on the reclaimed boards, the two dissimilar boards looked convincingly as though they came from the same batch of old weathered lumber.
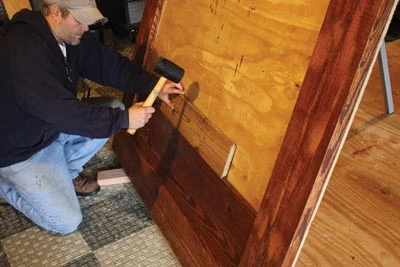
To further add to the distressed aesthetic of the new lumber, I beat up the surface with hex nuts and a trucker chain prior to staining. To match the reclaimed pine, I even added some characteristic termite holes to the 2x8s using a punch.
Once the project was assembled, the wood had a rich, rustic appeal that effectively tied together the look of the headboard.
– M. Weber
