By Mark Clement
Need to store stuff for a while, maybe longer? Here’s a quicky-tricky rolling rack that’ll hold everything—and then some.
So here’s an ironic situation:
As part of a master bedroom upgrade, one of my tasks was to increase its closet storage—from near-zero to total-hero. To do that, however, I needed … storage.
I mean, really. There’s already no storage but to complete the project I need more storage—while I build new storage. Um….AHRRGG!
Challenge. A big part of the challenge is that the home being remodeled is occupied and being upgraded one bedroom at a time. While each room is renovated, the home’s occupants hopscotch between finished and unfinished bedrooms, leaving me nowhere to hide anything out of the way while I build.
Solution. The solution was to hide the things that needed storing in plain sight—and to make the hiding place mobile.
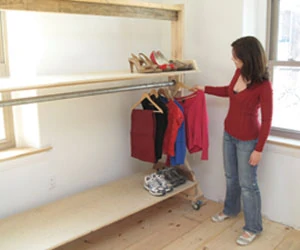
To that end, I designed and built a big, beefy rolling storage center to temporarily house the clothes, shoes, hats, ties, and whatever else so the multi-week project could get underway.
Result. The result was an inexpensive, rock-solid solution that enabled the homeowners to access their things—from both sides of the rack if need be—and access lesser-used items stored on the “back side” of the rack, like plugs, vacuum cleaner, out-of-season clothes, etc. It also became clear while I was building the rack that a bedroom build-out isn’t the only place a system like this would work. It’s also ideal in a garage setting for storing all manner of items from hockey bags, to gardening supplies, to kids’ toys. And because it rolls, seasonal items that are less frequently used can be stored behind it without being trapped.
Materials & Tools
This customized rack is a simple structure made from 2-by-6s and ¾-inch sheet stock. It rolls on 2-1/2-inch swiveling, locking casters, and the entire thing is held together with 2-1/2-inch deck screws and 1-5/8-inch drywall screws.
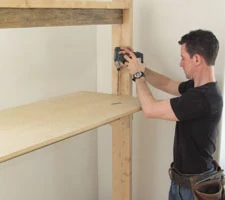
I cut all the pieces on my slide compound miter saw, though they could also be sized using a circular saw. I fastened everything using my cordless impact driver. I used my Starrett ProSite protractor to map the one funky angle in the whole thing. I cut the steel conduit closet pole with a recip saw and metal cutting blade.
Layout & Design
The basic design is this: Two uprights (they look like an upside down Y) on each end form the vertical structure. The uprights are bridged by cleats and 2-by-6s (stretchers) on edge. The cleats and stretchers also form the shelf supports, which are then topped by sheet stock. I also ran a 2-inch electrical conduit to accept hangers.
While project is scaleable (i.e., you can make it longer, shorter, smaller than the one shown here), I needed this one to roll between rooms inside the house. That means the door openings governed height and width. And so I didn’t have to cut every board to a custom size, I made it 8 feet long and could still roll it around. This also had the added benefit of creating enough lineal space for the things that needed to be stored—and every inch of it was used!
The finished dimensions of this rack were 8 feet long, 28 inches wide and 77 inches high. It was also four-tiered—a lower shoe shelf, a closet pole at 48 inches, a mid-shelf shelf at 51 inches, and a top shelf at 76-3/4 inches.
Safety Note: I felt the height-to-width ratio was about maxed out here. In other words, we got maximum stability and maximum height. I would not build one much taller than 77 inches without adding commensurate width.
Construction
I love stuff that I can blast together, the instant gratification of going from plan to complete project is fun. This is one of those. You can make it dovetail-detailed if you want (say if you were planning to have it for a long time or wanted to practice your woodworking skills), but I needed more function than form so I got some straight 2-by-6s and 2-by-4s and went to town.
Leg Assembly
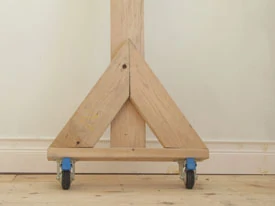
Each leg (and upside-down Y structure) is comprised of a base, two angle braces, the upright and two casters.
Begin by cutting the base to length—28 inches in this case. Then cut each angle brace to a total length of 28 inches. On one end, cut a 30-degree angle; on the other cut a 60-degree angle (see “Mapping Angles” Side Note 2).
On a flat surface like a workbench, pilot and countersink a hole then connect the angles with a screw from one side, forming a triangle without a bottom.
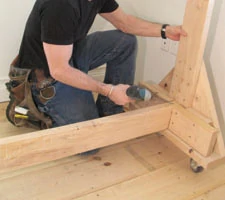
Hold the 2-by-6 base perpendicular to the triangle and fasten the base to the braces. (If you looked at it from the side, it’d look like an “L” with the long side laying flat on the bench). Screw from the underside using three screws for each angle brace.
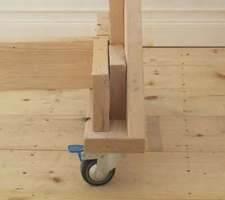
With the base assembly in the same orientation (although you may have to move it from a table top to the floor), fasten the upright to the base. Make certain it’s centered on the assembly. I do this by marking the center of the base, then the center of the upright. Once the lines line up, I know I’m on the mark. And since you’re fastening the upright inside the base assembly—this raises it 1-1/2 inches from a flat surface—it helps to tuck a block under the unsupported end of the leg to keep everything on an even plane.
Install the casters—and lock them! This trick will help keep the wheels from rolling later when you might not expect it.
Frame Assembly
This is where you run the 2-by-6 stretcher from one leg assembly to another, turning the individual parts into a unified whole.
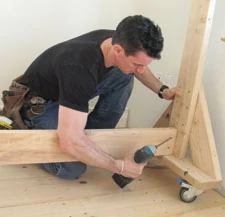
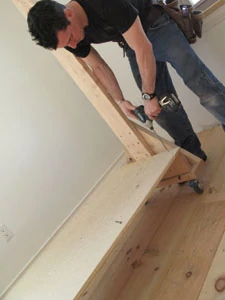
It can be done working alone, but having a helper for just a few minutes is easier. If you’re working alone, screw the upright to a wall so it stays put. Prop up the 2-by-6 stretcher on a block. Pre-drill, countersink and toe-screw the end of the board into the center of the upright. Repeat for the other side.
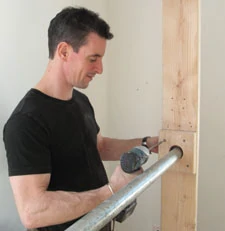
If you have a helper, have them hold the upright vertical while you work. It’s much easier, and you don’t have to pre-drill and run toe-screws through the end of the stretcher, because you can face-screw through the outside of the upright. With the bottom stretcher securely fastened, the unit will stay put and you can start putting the rest of the parts in without worrying a piece will tip over.
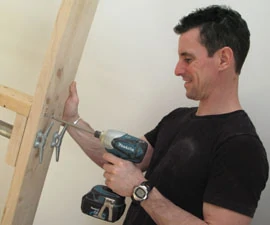
At each base, fasten two 6-inch 2-by-6 blocks to pack out the angle braces flush with the upright. Then, on either side of the stretcher, fasten 8-inch blocks as shelf supports.
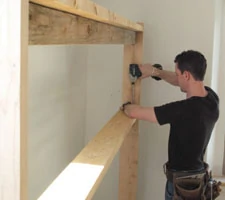
Measure and mark 48 inches up from the base for your closet pole (galvanized steel electrical conduit).
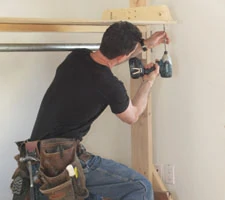
Then, 1-1/2 inches down from the top, fasten a 2-by-4 stretcher on edge to each upright (again, a helper helps here). Place a 2-by-6 stretcher on-the-flat across the top. Face-screw through the upright.
Next, make and install closet pole sleeves, and pole (see Side Note 1).
Using the top of the sleeves as a cleat, install the second 2-by-6 stretcher, again, on-the-flat.
Note: If this will be a long-term or permanent shelf—or exposed to a lot of humidity that can sag engineered material—I recommend installing a 2-by-4 cleat above the center shelf and fastening the shelf to it from the underside.
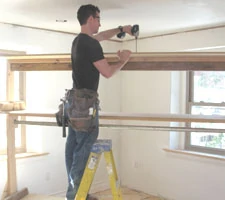
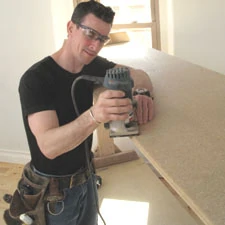
Cut and install plywood shelves. Fasten with drywall screws. To save a few bucks, I used 5/8-inch underlayment. It’s massively dense and heavy as far as sheet goods go, but it is inexpensive as far as sheet goods go, too. And, despite what I said above about blowing this together, I couldn’t resist routing a nice edge to ease the hard corners of the shelf stock.
Editor’s Note: Mark Clement is a live-action tradeshow demonstrator, remodeler, and author of The Carpenter’s Notebook, A Novel. Visit www.FormalFarmHouse.com.
Side Note 1
Closet Pole Sleeves
For the closet pole sleeves, cut a 2-by-6 12 inches long. Then, 3 inches down from each end, mark the center of the board.
Use a hole saw or 2-1/2-inch plumber’s bit (or whatever bit you have that is larger than your closet pole diameter) and drill out the holes.
Cut the piece in half, forming two sleeves. Install one sleeve on an upright and fasten using one screw through each corner of the sleeve.
Note: Conduit usually comes in 10-foot lengths. I trimmed mine to size—just a hair under 8 feet—using a recip saw and metal cutting blade, no fuss, no muss.
Slide a sleeve over the other end of the pipe. Insert the pipe into the sleeve already installed.
Raise the pipe and second sleeve. Be careful not to let it fall out of the first sleeve. Fasten on the layout mark.
–M.C.
Side Note 2
Mapping Angles
There are only two angles to map out on this project. And if you’re building the rolling rack as it’s shown here, 30 degrees on one end and 60 on the other adds up to 90 and gets halfway to a right triangle. If you want to tweak your own angles or simply double check your work, here’s a no-number way to do it:
Use a framing square and strike a straight line. I registered mine off the edge of my workbench.
Mark the center of the base. Cut a 30-degree angle on one end of a 2-by-6 and leave it about 40 inches long.
Align the center line of the base and the square line on your bench. Place the 30-degree cut on the base, flush to the end.
Register the framing square off the edge of the base and mark the projection on the wild, or long, end of the angle brace. Cut.
Note on cutting: 2-by is far from furniture-grade stock, and if you’re making cuts with a circ saw, don’t expect angles to be perfect. They should be good, but not perfection, unless you’re dressing very dependable stock and making angle cuts with your cabinet table saw.
–M.C.
Side Note 3
Disassembly
If you’re using the Storage Solution Rack as a temporary measure, you’ll be taking it apart. The key to safe disassembly without dropping pieces in a finished room is to reverse the order it was assembled. This includes holding the uprights fast as you take the stretchers off. The pieces are tall, can fall over, or otherwise get away from you. If your head is on that collision course, it is likely to hurt more than an ouch.
Side Note 4
Double Duty—Two More Things to Like.
If you have absolutely nowhere to store items during a room remodel, the Storage Solution Rack still works—you can use it right in the room under construction; just be sure to wrap it in plastic to keep the dust off. And because it is mobile—even loaded—you can move it around as necessary. How custom a solution is that? It’s even better that I can repeat this technique on other projects. And last but not least, I was able to keep and reuse all that 2-by material, which keeps me rolling. And that’s the name of the game.


