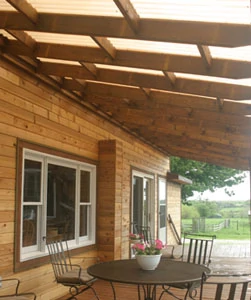
Decks and patios are a major source of America’s entertainment and relaxing enjoyment, but they can be hot in the summer sun. They can actually be dangerous if they reflect the sun’s ultraviolet rays. And running your grill during a rainstorm that arrives the same time as your guests can be a real frustration. One answer is a sunroof over your patio or deck. If designed properly, a sunroof can cut the summer sun, but still allow winter sun rays to warm the house. The sunroof shown is a typical do-it-yourself project, placed over a wood deck, although sunroofs can also be constructed over patios as well.
End View
Use the Right Materials
Because these projects are always exposed to the weather, the sunroof shown was built of Wolmanized Residential Outdoor wood to match that of the deck. The wood is southern-pine, pressure-treated with a copper azole preservative. This produces long-time protection against termites, decay and has a lifetime limited warranty. The wood was also “re-dried”—an extra feature that provides extra benefits at a small cost. When wood is pressure-treated, it is saturated with a liquid solution of preservative. As the wood dries, it shrinks. That’s normal for wood. Treated wood can be re-dried at the treating plant; this may be done naturally through air-drying, or more commonly, in a kiln. If re-drying is done, this is indicated on the lumber’s end tag by ADAT (for Air Dried After Treatment) or KDAT (Kiln Dried After Treatment). Drying makes the wood lighter in weight, ready for immediate painting and able to meet building codes (when applicable) for dried material. Perhaps more important, factory drying is done under controlled conditions, unlike the drying that takes place in a project when one side of a deck may be exposed to hot sun while the other faces moist earth. As a result of the uneven drying, the lumber can warp (twist, cup or bow).
Detail House Wall
Not all wood treaters offer re-drying, and many dealers do not sell it because of the extra cost. However, it is an option worth consideration for homeowners who wish to avoid exchanges and warped lumber, or who wish to paint their wood without waiting 6 to 12 months for it to dry.
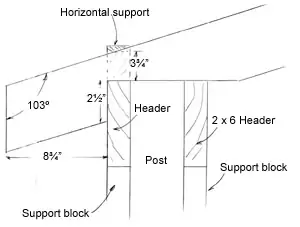
Rafter End Detail
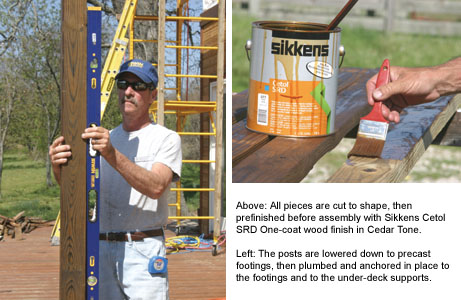
The framing of the sunroof was finished with Sikkens Cetol SRD one-coat wood finish in Cedar tone to match the existing deck and blend in with the Western Red Cedar siding of the house. Sikkens is an easy-to-apply, one-coat oil and alkyd resin formula that provides protection from exposure to sun, rain, sleet and snow. And it also acts as a barrier to ultraviolet sun rays, providing further protection and longevity to the wood. Treated wood must be absolutely dry before Cetol SRD is applied—a main reason for the re-dried wood. The finish was applied to each board and allowed to dry before construction. This not only kept the mess from the deck, but provided extra protection to all the wood surfaces.
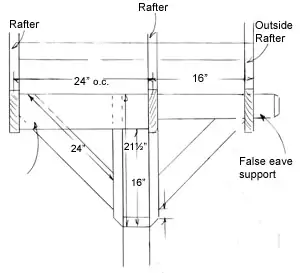
End Post Detail
The covering for the sunroof is Sequentia Super600 from Crane Composites. The company has several products, and it’s important to consider your area’s year-round weather conditions when choosing a covering. The amount of snow, rain and wind you receive, as well as the intensity of the sun and range of temperatures are all factors. The house shown is in the Missouri Ozarks where the saying is, “If you don’t like the weather today, just wait, it will change tomorrow.” And it does, with temperature ranges from over a 100 degrees F to well below zero. And heavy rains, heavy snow, hail and high winds are all common. Sequentia Super600 is a heavy-duty, commercial-grade fiberglass with a 20-year warranty. It features heavy-duty fiberglass reinforcement and has UV-resistant properties. The Sequentia line-up comes in clear plus six colors; white, terra cotta, sky blue, yellow, graphite, green and beige. Terra cotta was chosen to blend with the treated wood finish and the Western Red Cedar siding. The color is a beautiful translucent that provides moderate light transmission and low heat transmission.
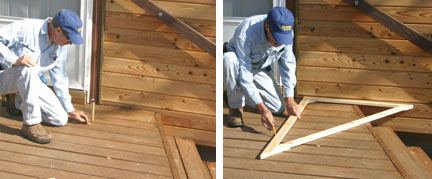
Right: A homemade 3 x 4 x 5-foot square makes it easy to lay out post locations square with the building.
Plan the Right Design
The homeowners wanted a sunroof that would not only provide shade for relaxing and entertaining on the deck, but also provide more protection to the exposed south wall of the home and the large amount of glass in the window and two patio doors. The owners, however, enjoyed the solar warmth created in the winter, so the roof was designed to provide some sun reflection during the low-angle sun location of the winter months. The result is a sunroof that begins at 10 feet high on the house wall, is 8 feet high at the outside edge, and extends 10 feet from the building. The sunroof shown is 40 feet long. This also allowed for using standard materials, including 10-foot panels of Sequentia Super600 roofing. Before you begin construction of your sunroof, make sure to check local building codes on similar construction, materials and specific construction details. Also check for local zoning requirements and any permits needed.
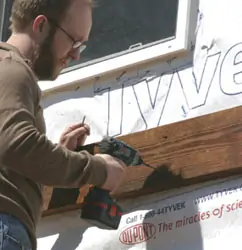
Getting Started
Construction of the sunroof framing is fairly straightforward, but it’s extremely important to get the framing square with the building. Otherwise the panels may not align properly, increasing or decreasing in the distance they extend from the rafter front edges. To determine the exact location and proper 90-degree angle for the corner posts in relation to the house wall, use a plumb bob on the wall to locate the first outside rafter.
Two methods can be used to ensure a square construction. The first is to locate the corner post locations with a tape measure, and then measure diagonally between a corner post and the opposite starting point on the house wall. Measure the other corner post diagonally to the opposite starting point on the house wall. Adjust the post locations until the measurements are the same. You can also use the “triangle” or “3-4-5” method. Measure 4 feet on the house wall. Attach a string line at the starting point and with someone holding the string line, measure and mark 3 feet out from the house wall on the string line. Move the string line in or out until the measurement between the two is 5 feet. Extend the string line to the outside location of the corner post. This creates a 90-degree angle.
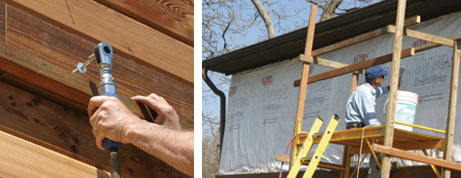
Right: In the case shown, the house was being resided with Western Red Cedar. After ledger board installation, the siding above the ledger board is installed.
Because I frequently lay out buildings, I’ve constructed a lightweight wooden triangle of those measurements. I can lay out the squared building quickly and easily with the triangle. Manufactured squares are also available for this chore.
Once the corner post locations are determined, run a string line between them and mark the inside post locations.
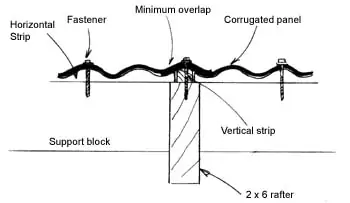
Roof Panel Detail
Support & Framing
The posts should be set on slabs and footings, and supported according to local building code regulations. In the project shown the posts were run through the deck to concrete supports below, and fastened to the under deck cross-member supports as well. The posts should be fastened to concrete slab/footings using approved steel anchor bolts. Use a 4-foot level and temporary bracing to hold posts in a plumb, upright position during construction. In the project shown, once the posts were plumbed they were anchored to the under-deck supports. You might wish to check into the Bigfoot Systems concrete tube forms for pouring supports.
Roof Blocking Detail
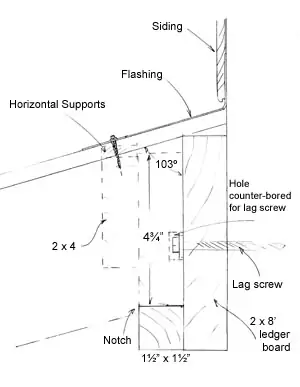
The house end of the rafters is supported on a ledger board. Remove the house siding from the ledger board location. In the case shown, the house was being resided and siding was installed up to the ledger board location. The ledger board was installed, leaving space for the roof covering and flashing, and siding installed above the ledger board. The bottom siding board is temporarily fastened in place in order to insert the metal flashing needed for the roof covering. The ledger board was leveled using a string-level for initial location, and then a 4-foot level to adjust as needed. Three-inch deck screws were used to initially fasten the board in place, and then lag screws were installed into the 2-by framing of the house wall. If fastening to masonry walls, use appropriate wall anchors. The fasteners should be installed on 16-inch centers as required.

Right: Starting holes are bored through the deck, and a saber saw or jigsaw is used to cut out openings for the posts to fit down through the deck.
All fasteners used with pressure-treated lumber must be corrosion-resistant. Phillips II High Performance DuraFast Coated screws recommended for pressure-treated lumber were used for all construction fastening. After years of pressure-treated lumber construction, these are my recommended fasteners. The box comes with a driver head that matches the screws and there is very little head stripping. A 2-by-2 support strip is fastened to the bottom edge of the ledger board to provide support for the rafters.
The project shown is attached to a bungalow type house that has 4-by-4 eave supports on the gable ends. To blend with the house, a “fake” eave support was constructed and screwed to the outside posts. The first or outside rafter rests on the outer end of this support. The remaining rafters are supported by headers fastened in place to both the inside and outside of the posts. These were located with their tops 8 feet from the deck. They must be level, and you will probably need two people for this chore. Two-by-four supports are added to the inside and outside of the posts to hold the headers. A 4-by-4 diagonal brace fastened to a 2-by-4 support piece anchors the headers to the posts and provides bracing and support.
As with laying out square, getting the first rafter laid out and cut properly is extremely important. I like to use a “scrap” but straight board to cut the first rafter. It should be cut and tested, cutting until you get the correct angles and cuts. Once the trial rafter is cut, and temporarily installed, again make sure the rafter and house wall are perpendicular or at a 90-degree angle. Mark the location, remove the trial rafter and use it as a pattern to cut the first rafter. After cutting, recoat any cut ends with protective finish. Install the vertical panel support strips on the rafter tops using galvanized nails. A finish or brad nailer and galvanized nails makes this chore easy.
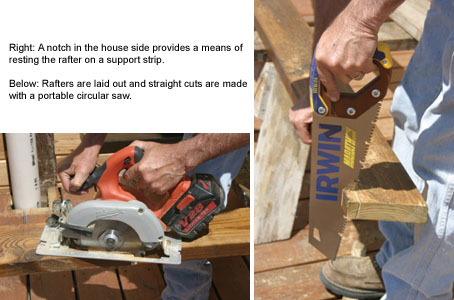
Temporarily install the first and second rafters. The rafters are located on 24-inch centers. The outside rafter is anchored in place with a screw from the underside of the 2-by-2 support block into the underside of the rafter end. A 22-1/2-inch filler block is placed inside and next to the outside rafter. Fasten the inside rafter against the filler block with a screw from the underside of the support strip. Use a scrap piece of roofing panel on the outer end to test for fit and precise rafter location. Check on the house end as well. Then slide the flashing up under the siding and test it on the roof panel and rafters. Once adjusted so it all fits properly, permanently anchor the rafters in place with screws through the rafters and into the filler block. An outside filler block is also required and a horizontal cross strip must be fastened to the top of it. The outer ends of the horizontal cross strips must match the crown profiles of the vertical edge strips. Again, fasten with brads or galvanized finish nails.
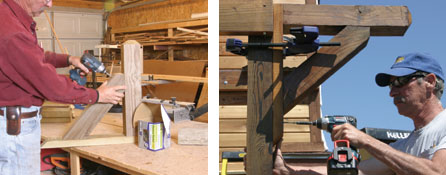
Right: The false eave supports are fastened to the outside posts.
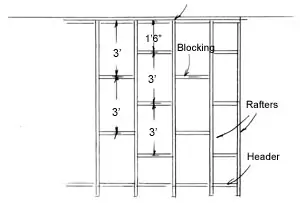
I fastened the filler blocks in place by first pre-drilling pocket-hole screw holes on the back side using a Kreg Pocket Hole tool. Anchor the block between the two rafters and then screw the rafters into the filler block. From this point on, it’s a matter of positioning a rafter, then screwing it to the outer ends of both filler blocks. Interior filler blocks, again topped with horizontal cross strips, are placed between the rafters, spaced as shown in the drawing titled Roof Blocking Detail located five paragraphs above.
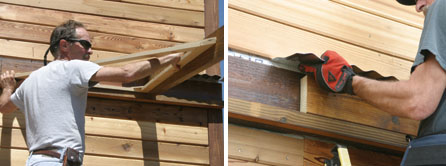
Right: A house-wall filler block is installed and then the flashing installed.
You can install the rafters, then cut and fit the individual interior filler strips in place, but on a job of this size, I found it more convenient to “pre-assemble” the components. First, all filler blocks were cut to precise lengths using a Ridgid Exactline Compound Miter saw supported on their new Miter Saw Utility Vehicle support. The Repeat-A-Cut fence and a stop block made it quick and easy to cut all strips to precise lengths, as well as the horizontal panel support strips. All strips were then fastened in place. The interior support strips were fastened to the rafters before erecting the rafters. This was easier for the location than working from a ladder. The rafters were fastened in place, and the loose ends of the interior support strips were anchored to the mating rafter. You may need two people to lift and fasten these assemblies in place.
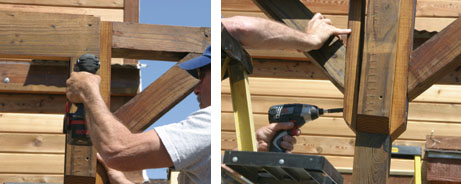
Right: An inside support block with a 45 degree diagonal 4 x 4 fastened to it is anchored to the post.
An additional 2-by-4 filler block with horizontal cross strips is installed against the ledger board and serves as an anchor for the end of the corrugated roof panels and the metal flashing.
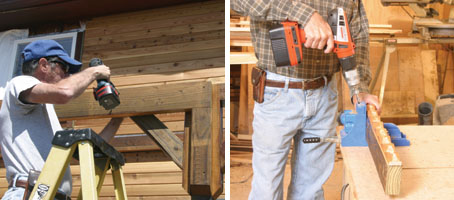
Right: The outside filler block has pre-drilled holes using a Kreg Pocket Hole tool. Horizontal panel supports are cut to length and fastened on the outside filler block and the inside filler blocks anchored to the tops of the headers.
Roof Assembly
Install the first panel, making sure it fits precisely over the vertical support strips on the rafters. Start the first panel at the leeward end of the run and work windward. Provide a minimum of one corrugation overlap at the sides. Provide 8-inch end-laps for roofs with pitch less than 4/12; 6-inch end laps for pitches greater than 4/12. Fasten the crowns of the panels at every second corrugation. Fasteners with armored neoprene washers are recommended. Space fasteners 6 to 8 inches on-center along the panel edges, and 12 to 16 inches on-center for intermediate rafters and blocking. To avoid deflection of the panels, tighten the screws until the washers will not rotate, and then tighten one more turn. Avoid excess burrs on drilled or punched holes to protect the neoprene sealing face.
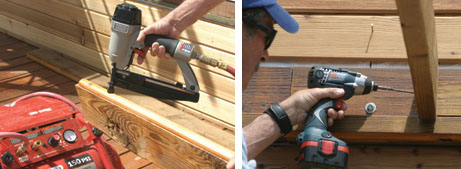
Right: The rafters are anchored to the ends of the inner and outer filler blocks.
Always predrill panels and molding strips before securing them to your framework to prevent cracking or splitting. To help ensure a weatherproof roof, apply a small amount of clear sealer at each hole before installing the fasteners. Under no circumstances should panels be allowed to support undistributed loads such as the weight of a human body. Use only approved roof ladders and planking.
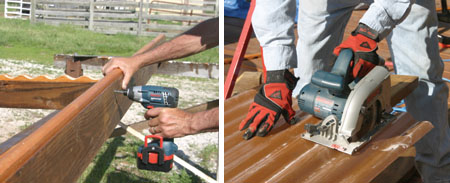
Right: The corrugated paneling is easily cut using a portable circular saw with blade turned backwards.

Now it’s time for a cool, relaxing drink under your new sunroof.


