Construct a Laundry Room Shelf System for under $200.
By Rob Robillard
Laundry Rooms are moving up in the world. When I was growing up, the laundry machines were always in the basement—that’s just where they lived! While the basement location might have been an afterthought with the advent of indoor laundry, it did have some benefits, such as, less noise and less damage in the case of a burst water hose.
Over the last 20 years with the introduction of laundry machine drain pans, water shut-offs and stainless steel braided hoses, there has been a growing trend to move laundry upstairs or onto the bedroom level. The advantages of locating your laundry upstairs is that you eliminate carrying loads of laundry up and down the stairs. When you stop and think that most of the dirty laundry is generated from the bedrooms (clothes and bedding) and the bathrooms (towels), it makes sense to place it near to that location.
Designing A Laundry Closet
Laundry rooms always seem to collect clothes, clutter and cleaning supplies. For that reason, you will want to hide it from view at times.
We often add laundry closets, not rooms, to our client’s existing living spaces. In these situations, we are looking for a spot that will be out of the way and functional. Many times, we find ourselves retrofitting existing closets or building a new laundry closet. In the latter case, if space allows, I always advocate for a wide enough closet for the machines and try to include space for shelving. When shelving is involved the closet often becomes wider than a normal size door, so we finish the closet with a set of double doors to close off the space.
Create Elevated Laundry Storage
Elevated storage keeps potentially dangerous cleaning supplies out of reach of young children and pets. But it offers more than that; being organized makes any job easier, including laundry.
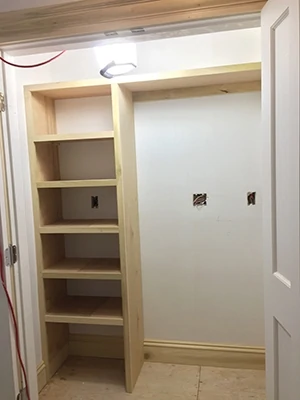
On this project, we built our laundry room in a large unused hallway. We built a closet with inside dimensions of 32-1/2 x 62-1/2 inches. Our client was planning on purchasing a stacking washer/dryer unit and wanted storage shelving for laundry, cleaning supplies and towels.
After leaving ample room for the 28-in. laundry machines, we had approximately 24 in. of space to the left of the machines to build vertical shelving, plus a top shelf that spanned the entire closet.
Choosing Materials
For our shelving unit, we decided to use 3/4-in. Birch plywood for the shelves and vertical side panels. We used solid Poplar for the face frame, cleats and nosing. We chose Birch plywood because it has a smooth, quality finish on both sides, and the wood grain finishes very well. We like to use Poplar because it’s durable, inexpensive, has no knots and also finishes well. Birch plywood in my neck of the woods costs around $70 a sheet. Poplar is cheap.
Sizing Material
My lumberyard has a panel saw, so I had them rip the two sheets of plywood into four 24-in. wide pieces. Not only did this allow for easier carrying and transport, but it eliminated the step of my having to cut it down to a narrower width. That saved me time.
For the shelves to be secure, we usually install 1-1/2-in. wide cleats on the wall to support them using two finish nails per stud. The problem for this project was that the cleats were not long enough to hit enough wall studs for proper fastening.
Instead of using wall anchors, we decided to use vertical poplar cleats on both sides of the shelves. This design essentially creates a plywood box, and the poplar gave use solid nailing throughout the entire length of the cleat. This also allowed us to use narrower cleats, which meant that we could hide them behind our 1-1/2-in. shelf nosing.

Laying Out The Shelves
We knew the size of the stackable laundry machine units, so we added 8 inches to determine the top shelf height. We wanted to allow plenty of air space for ventilation, at the top and sides.
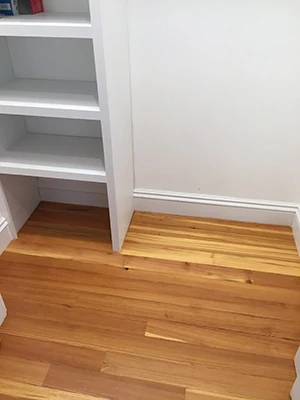
Working from the top shelf location downward, we started to lay out our shelves. Knowing that the client wanted a laundry basket on the floor, we allowed for 17 inches between the bottom of the first shelf to the finished floor. (Note that the flooring was not finished at this point, so the thickness of the flooring to be installed had to be calculated).
We the cut our two vertical plywood sides to the height of the top shelf (minus the 3/4-in. top shelf), and then laid out the five equal shelf locations. We ended up with 10-1/2-in. spacing between shelf nosings. (We based our spacing off the 1-1/2-in. shelf nosing; the actual spacing between shelves is 11-1/4-in.)
Applying the Cleats
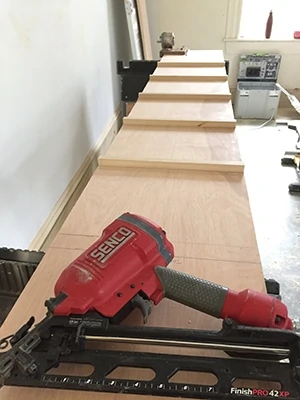
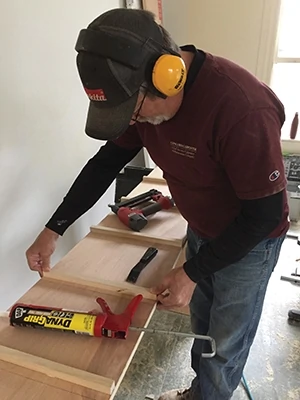
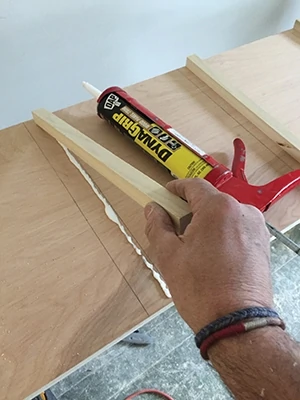
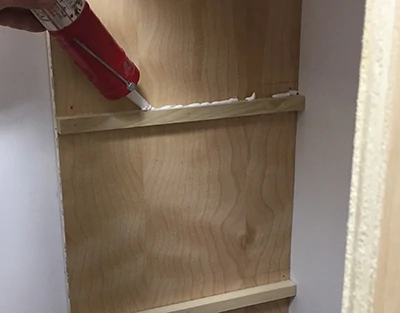
Once we had our shelves laid out, we started cutting cleats. For the shelves we needed 10 cleats, measuring 3/4×3/4-in. cut to the depth of the shelves. The cleats, like the shelves will be the same depth as the vertical plywood panels. We used DAP Construction Trim and Panel Adhesive and brad nails to fasten the cleats onto the plywood sides.
Cutting the Shelves
We cut five shelves using a circular saw and rip fence. The shelves were left at 24 in. and cut to the same depth of the cleats and vertical plywood sides.
Installing the Vertical Plywood Sides
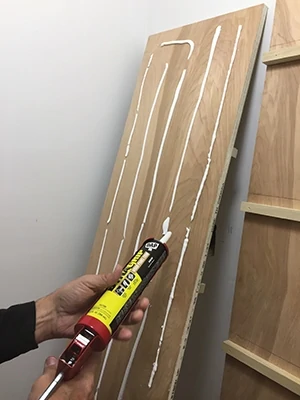
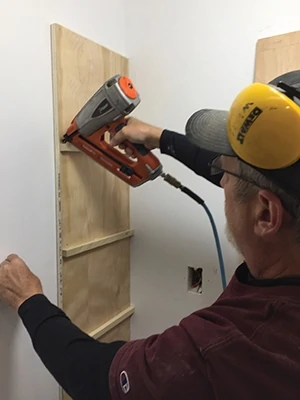
We installed the inside wall vertical panel first. We used the DAP adhesive and glued and fastened the panel to the one wall stud we could with 2-1/2-in. finish nails.
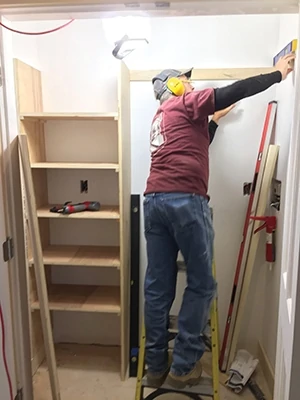

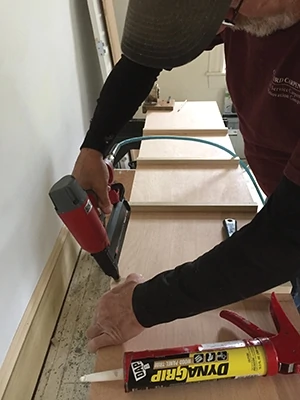
To install the other panel, we used two short shelves as spacers, fastening them to the shelf cleats with DAP adhesive and brad nails. Once those two shelves were secured, we installed the remaining shelves the same way. The top, longer shelf was installed and fastened to the tops of the vertical panels, as well as a wall cleat spanning from the shelf unit to the opposite closet corner. This cleat was longer and wider than the other cleats (1-1/2 in.) and was fastened to the wall studs with two finish nails per stud.
Applying the Face-frame
The face-frame is 1-1/2-in. Poplar wood. We installed the long parts first, which was the two verticals and top shelf nosing. We followed with the five shorter shelf nosings.


Install the Baseboard
A 1×10 baseboard and base cap was installed last and helped lock in the vertical panel on the back side. On the front side we toe-nailed finish nails into the subfloor to hold the panel in place until the finished wood floor locked it in place.