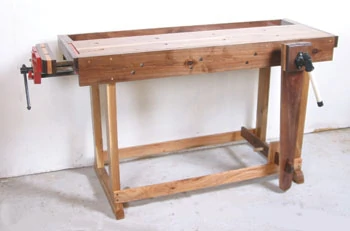
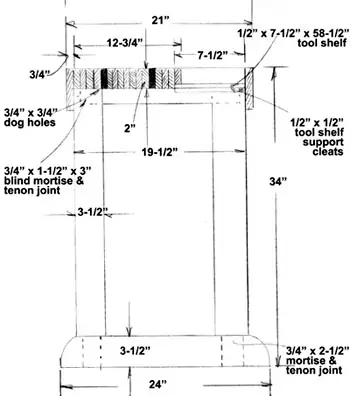
A good, solid workbench is a basic of any woodworking shop, and although workbenches come in many different styles, types and sizes, a “classic” workbench style has evolved. Typically, these benches have both a front and end vise with dog holes in the top, as well as in one or both of the vises. These hold pieces of wood to plane, carve, route or for other chores. A recessed tool shelf is also often included. The bench shown is a combination of traditional European styling with a bit of styling from an old-time bench I bought many years ago at an auction.
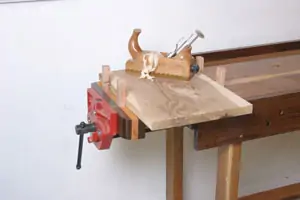
A purchased Jet woodworking vise acts as the end vise. It has a quick-release lever so it can be pulled in or out quickly and easily. It also has threaded holes in the jaws. This allows adding the bench-dog wood option.
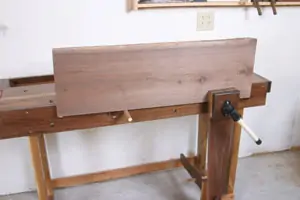
The front vise is hand-made, using a bench screw and handle from Woodcraft. This vise also has an adjustable “foot” that allows you to adjust the vise to hold non-parallel surfaces. Dog holes in the front of the bench provide a means of holding doors or stock to be planed.
Note the bench shown is constructed for the method in which I work. You may wish to reverse the vise locations if you work from the other direction, especially when planing on the front vise.
Benches of this type range from smaller than the bench shown up to monster benches 8 feet long and 36 inches deep. You can readily adapt the construction techniques to suit the bench size you desire. A bottom shelf can be added to store items. Heavy items on the shelf will actually provide weight to help hold the bench solidly in place, although even the small bench shown is quite heavy and solid. You can also add drawers or shelves if desired.
A major key to these workbenches is to construct them of dense, solid hardwoods to provide rigidity and also a smooth, hard-surfaced top. Typical woods include oak, maple or ash. The bench shown was constructed of both oak and walnut. Although walnut may seem extravagant, I had some extra hanging in my barn (curing in the rafters), so I decided to build an “Extreme Workbench.”
Start Construction
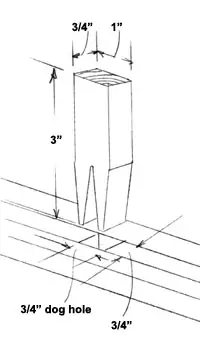
First step is to glue-up the working top. This is constructed butcher-block style, gluing 2-inch strips side to side. First rip all strips, then joint their edges smooth. The dog holes in the top are created by first cutting strips to allow 3/4-inch spacing and gluing them on one of the top strips. Clamp them solidly in place and allow the glue to set overnight. Then repeat for the second row of dog holes.
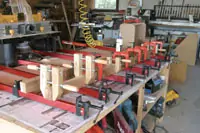
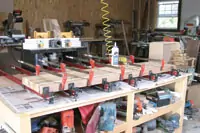
Lay a newspaper on a smooth, flat work surface and position bar clamps in place over the newspaper. Make sure all strips are cut to the correct length. Then dry-lay the strips in place, leaving the clamps loose. Remove the second strip and apply glue to its side surface. Position in place against the first strip. Repeat for all other strips, including the dog-hole glued-up assemblies. Make sure you don’t get glue in the dog holes. Once glue has been applied to all strips, tighten the bar clamps. Tighten them all equally and make sure the strips are all lying flat and positioned correctly end-to-end. Allow the glue to set overnight.
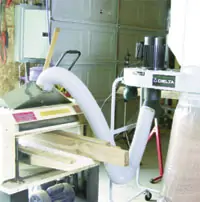
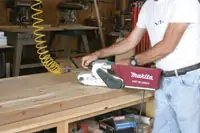
Once the glue has set up, remove from the clamps and use a belt sander with coarse sandpaper to level the strips on both top and bottom. If you have a planer with a 13-inch cut, you can run the assembly through the planer, but again you should first sand off dried glue beads because they can dull a planer blade. Sand or cut the ends smooth.
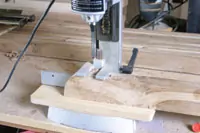
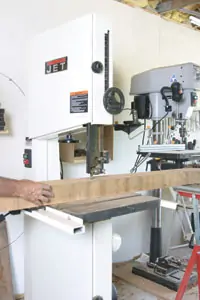
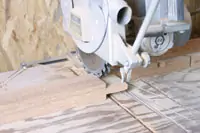
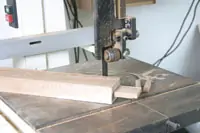
The next step is to make the leg trusses. These are made from 2-inch-thick stock and the first step is to plane and rip the stock to the correct thickness and width. Then cut the rounded ends on the feet using a bandsaw. Use a disk or belt sander to smooth up the cuts. The leg assemblies are constructed using mortise and tenon joints strengthened with screws. The screws are countersunk and for decorative purposes I used walnut plugs in the oak portions and oak plugs for the top walnut aprons. The mortises are cut first, using a mortising machine, a mortising chisel in a drill press, or by boring concentric holes in the mortise area, then cutting the corners square with a chisel. Once the mortises are cut, the tenons are then cut to match. These can be cut with a handsaw, on a table saw or radial arm saw. I used a Freud dado head on a radial arm saw to make the initial cuts. Then I used a bandsaw to cut off the sides of the tenons. It’s important to carefully cut the tenons to match the mortises. The tenons should be fairly snug, but not a tight fit to allow for glue clearance. The tops of the legs also have “blind” mortises cut in them to accept the tenons of the top support pieces. Note the leg frame next to the vise must have a notch cut in it to allow the rear vise screw assembly to move past it. Position the vise in place to determine the depth needed and cut the notch using a dado head, or handsaw and chisel.
Dry-fit all mortise and tenon joints to make sure the assembly fits. Then apply glue to the sides of the tenons and assemble a leg frame. Make sure the legs and foot stretcher are square and then clamp securely with bar clamps. Repeat these steps for the opposite leg frame.
Upside-Down Assembly
From this point on, the workbench is assembled upside down, and you really won’t know what it looks like until you finish and turn it back over.
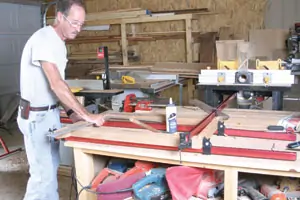
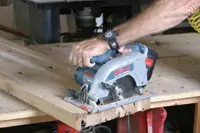
If using a vise, you can mount it in one of two ways. The vise can be mounted directly to the end of the bench top, or it can be recessed in a slot with a wooden apron fastened over it, such as on the workbench shown. If using the latter method, mark the thickness and width of the back jaw of the vise. Use a portable circular saw to make a pocket cut for the slot. Then finish with a very sharp fine-toothed hand saw, such as the Irwin Pull Saw. Place the vise down in place on the underside of the top. Note you may have to shim it to make the vise top edge flush with the bench top edge. When satisfied with the location, fasten the vise to the underside of the top with 2-1/2-inch lag screws and washers.
The tool shelf is positioned on a rabbet cut in the bottom edge of the back strip. This can be created after the top is glued-up by using a router, or you can create the rabbet before gluing up the top. I used an old Stanley rabbet plane to make the cut. The shelf is a piece of 1/2-inch-thick oak, or it could be plywood if desired. Position the tool shelf over the rabbet on the upside-down bench top, working on a solid, smooth surface. Fasten the shelf down in the rabbet using glue and wood screws. Use glue sparingly so it won’t leak out to the upper or finished side. Predrill the oak shelf board to prevent it from splitting out.
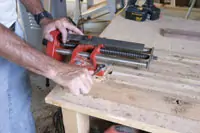
Position one leg frame assembly next to the back of the vise. Move the vise in and out to make sure the screw and vise assembly doesn’t catch on the leg-frame top support piece. If it does, remove material until the vise works properly. Fasten the leg frame securely to the underside of the solid bench top with 3-inch lag screws and washers. Fasten the opposite leg frame in place in the same manner. Slide the assembly slightly off the work surface until you can reach the underside of the tool shelf assembly. Predrill and anchor the shelf to the outer edges of the leg assembly with a wood screw in each. Then slide the entire assembly back onto the work surface. Cut the rear apron to the correct width and length. Fasten it in place to the leg assembly with countersunk wood screws and glue. Use wood plugs to cover the screws.
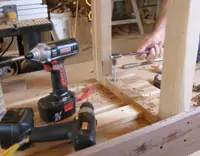
Next, cut a wooden cleat to fit down on the underside of the tool shelf and fasten it to the rear apron with glue and countersunk wood screws covered with wood plugs. Note that glue should also be applied sparingly to the underside of the tool shelf. Cut the front apron to width and length. This one has dog holes spaced to hold a 3/4-inch round dog. This allows you to clamp a piece of stock, or even cabinet door, in the front vise and rest the end on a wooden dowel dog. Bore these holes using a forstner bit in a drill press. Cut the end aprons and fasten them in place to the solid ends of the bench top and to the front and back apron, again with glue and countersunk wood screws covered with wooden plugs.
Finishing Up
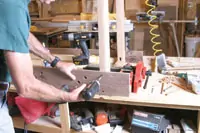
At this point you’re ready to turn the bench back upright. You’ll probably need some help for this chore. With the bench upright, cut and install the lower front and back feet braces, again fastening with glue and countersunk wood screws and plugs. You now have a finished working bench; however adding a few extras makes the bench more versatile. A double-dog face to the vise provides more holding options. Create this by gluing-up three boards the width of the solid bench top. Leave dog holes to match those in the bench by using wooden spacers, spaced 3/4 inch apart for the center board. Glue and clamp and allow the glue to set overnight.
Sand the top and bottom surfaces smooth, and remove any glue lines. Then round the outer ends on a bandsaw. Sand the rounded ends smooth. To fasten the dog-face to the vise shown, the wooden assembly was clamped in the vise and a punch used through the outside of the bolt holes in the vise to mark the bolt-hole locations. The bolt holes are then bored and a temporary wooden plug hammered into the rear of the holes. A forstner bit is used to counterbore for the bolt heads and washers. The dog assembly is anchored to the vise with bolts and washers through the assembly and into the vise face.
Clean-out ramps on the ends of the tool shelf allow easy sweeping out of dust and chips. These are made by gluing-up stock to make the thickness, and then cutting at a 45-degree angle on a table saw. Cut to length and glue in place down on the shelf board and against the end aprons.
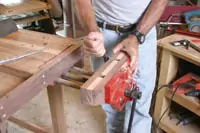
Fasten in place with countersunk bolts into the threaded vise holes.
The front vise is made entirely of wood. It also features a dog-hole assembly, aligned with the end dog holes on the bench top. The bottom is also adjustable in or out so you can clamp odd-shaped objects in it. First step is to anchor the bottom dog-holding brace assembly in place. Then cut the vise to length and width. Glue-up the dog-hole assembly on the outside of the vise piece. Then bandsaw a relief on the bottom edge and cut the vise to the shape shown. Anchor the vise to the bench with the vise screw and with a bolt through the bottom dog-hole assembly.
Several coats of polyurethane will provide a durable finish to your new Classic Workbench.


