A Handy Way to Tote Your Tools
By Monte Burch
In days past, most carpentry and trim or finish work was done with hand tools, and carpenter’s carried their tools to the site in a handmade wooden box. My dad, a finish carpenter who specialized in trim work and cabinetry, had several boxes with a variety of tools—one box for his planes alone. These days a great deal of carpentry and trim work is done with power tools, but a toolbox of selected hand tools is still invaluable. A toolbox also makes a great organized place to safely store your tools in the shop, as well as tote them to the job.
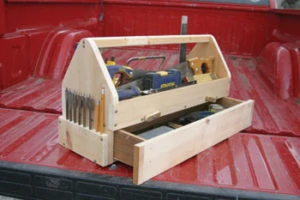
The box shown is a compilation of several boxes I’ve built, some from teaching 4-H woodworking, as well as some ideas from a few of Dad’s boxes. The box shown is made of white pine to keep the weight down. If it’s to be a workshop box, you might prefer to make it of a finer hardwood. The box shown is also fairly simple to build, but you could use hand-cut dovetail joints and other construction as a showcase for your work. The box is sized to hold a framing or carpenter’s square as well as a 2-foot level and a variety of tools.
Construction
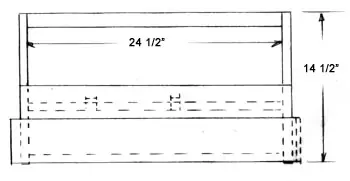
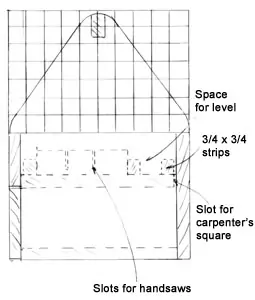
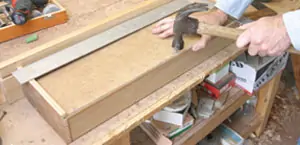
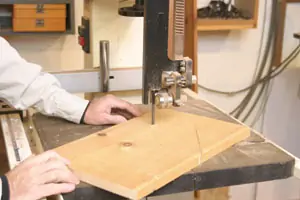
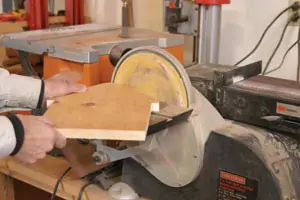
First step in construction is to enlarge the squared drawing and create a pattern for the ends. Using a saber saw or band saw, cut the ends to shape. Note the sides are notched into the ends. Sand the cut edges smooth. Cut the top divider piece to width and length. Note it is 3/16-inch less the width of the end pieces. Fasten it in place between the two ends with screws or finish nails. The divider fits flush with the front of the tool box, leaving an open space in the back to allow for a framing square to slide down into. Cut the bottom and fasten in place with screws or finish nails. Then cut the back piece and fasten it in place. Cut the upper front piece and fasten in place.
The top divider piece has holding strips for several tools. This includes a strip fastened to the back edge, then a second strip set slightly over the thickness of the 2-foot level it’s intended to hold.
An Irwin Dovetail/Jamb saw is held in place in the front with a holding strip. This little saw is great for trimming jambs and other tight places. Install a pair of 1-1/2-by-1-1/2-inch blocks between the last holding strip for the level, and the inside edge of the jamb saw support strip. These have slots cut in their top edges to hold a pair of hand saws upright. The handle is a piece of 1-by-1, ripped from a 2-by-4, with its edges rounded with a router. Install with glue and screws through each end into the handle ends.
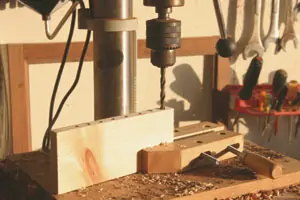
Holes for the paddles bit holder are bored on a drill press. A wood clamp holds the stock upright.
Bore holes in the back top edge to hold screwdrivers, nail sets, punches and other tools. Additional tool holders are built into the ends of the box. One end has a 3/4-inch piece with holes bored in it to hold paddle bits and pencils.
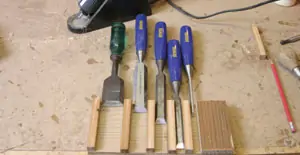
Wood chisels are held in a holder of 1/2″ stock. Glue the spacers between the chisels to the front of the holder with hot-melt glue.
The opposite end has a chisel holder for wood chisels. This is constructed of 1/2-inch thick materials. Cut the front piece and lay it on a work table and then cut 1/2-by-1/2-inch spacers to go between the chisels. Position the chisels in place and glue the spacers to the back side of the front board and between the chisels with hot-melt glue. Add a 1/2-inch bottom to the holder, then fasten the holder to the toolbox end with screws or finish nails. Spaces between the saws and level holding strip can hold a number of other tools, including measuring tools, a stud finder and so forth.
Assemble the drawer. The bottom is held in dadoes in the front and sides, and fastened down to the bottom edge of the back with flat-head nails. Make sure the drawer is assembled square.
The drawer front overlaps the end tool holders and the tool box bottom. Cut the 3/4-inch drawer front to size, but it has a dado to hold the bottom, so 3/4-by-3/4-inch end blocks are fastened to the ends to conceal the dado. Cut the 1/2-inch drawer side pieces to size. The drawer bottom is cut from 1/4-inch hardboard and held in place in the front and sides with dadoes. These are cut using a table saw with the blade set 1/4-inch high. Make a cut, move the fence slightly, make another cut and continue moving and cutting until you have a dado slightly over 1/4-inch wide.
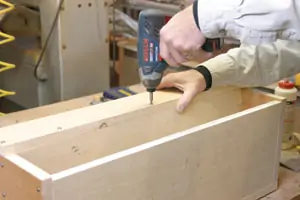
Assemble the box with glue, screws and countersunk finish nails.
Fasten the sides to the front with glue and finish nails. Cut the back and fasten between the sides with glue and finish nails. Install the bottom in the dadoes. Use a carpenter’s square to make sure the drawer is square, and then fasten the bottom down on the bottom edges of the back with small flat-head nails. The drawer is held in place with a pair of wooden turn buttons. Set the finish nails below the wood surface; fill with wood putty and sand smooth. Finish the tool box as desired. I left mine unfinished to age naturally. Now comes the fun of filling your new carpenter’s box.
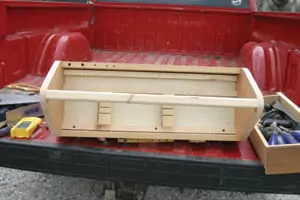
A drawer in the bottom of the box holds a small plastic divided box for nails, wood putty and additional tools. The top divider has holding strips for a level and saws, as well as a slot in the back to hold a carpenter’s square.
Tools to Tote
The following hand tools create a complete tool box for everything from framing to finish work. They include: a carpenter’s or framing square; try square; sliding T-bevel square; two hammers, one 12- and one 16-ounce; nail set; two handsaws and a pull saw; coping saw; 2-foot level; tape measure; folding rule; two planes, a block and bench plane; chisels; utility knife; pliers; screwdrivers; stud finder and drill bits. Because much of today’s work is done with a cordless drill/driver it is included, as are the bits and driver assortment.


