

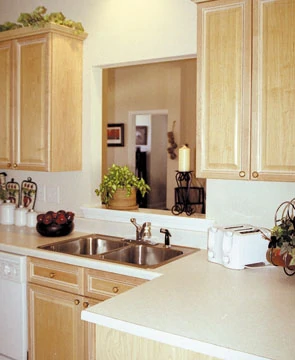
Passing the Bar: Creating a bar pass-through between a kitchen and dining or family room can lighten both rooms and provide a gathering place between the two areas.
Creating an opening between a kitchen and dining room can not only lighten your life, but may even spice it up as well. Not only does a bar pass-through make it easy to serve food from the kitchen to the dining room, but it also provides a small eating area the kids can use while you go about kitchen chores.
With a pass-through, the cooks are no longer isolated in the kitchen when guests come to dinner. Guests can visit and enjoy hors d’oeuvres at the bar while the dinner meal is completed in the kitchen. Of course, the opening also allows more light in both rooms. If you have a home with a separate kitchen, but with a wall between it and the dining room, a pass-through may be a way to enhance both areas.
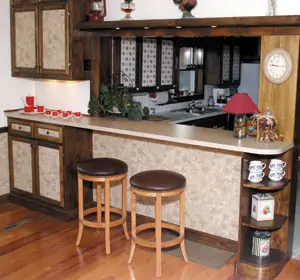
Although the pass-through design shown may not suit your particular house design, the basic idea can be adapted and the décor changed to suit. The pass-through consists of a countertop at typical “bar” height on the dining room side, adjacent to a countertop on the kitchen side at kitchen-cabinet height, which provides about a 6-inch difference. The bar height allows for the use of bar-height stools. You may prefer to run the countertop through the wall at the same height and use lower stools on the bar side. The design shown allowed the use of two different countertop colors; one to match wallpaper in the dining room side, and one matching the kitchen. The design shown also is in an older home with 9-foot ceilings. This allows for a fairly high shelf above the bar that also has space for wiring under-cabinet lighting.
Cutting the Opening
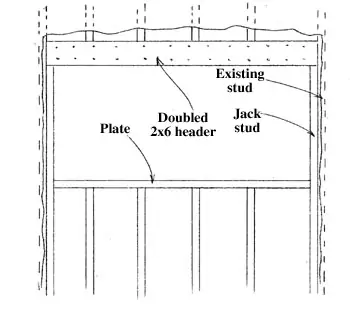
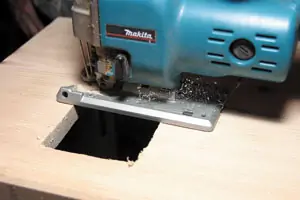
The first step is to determine if any plumbing pipes or electrical lines are running through the wall. Examine the attic and basement or crawlspace for evidence of these. Also, determine if the wall is load-bearing. This can also be determined from the attic, basement or crawlspace. If there are no utility problems, the next step is to cut the opening. If the wall is a load-bearing wall, you should brace the ceiling joists with temporary braces before cutting out the opening. Cut the opening large enough to provide space for a header above the bar. Cut the sides back far enough to provide space to install jack studs to support the header on each end. With the opening cleared, replace the plaster or wallboard back to the edges of the opening and refinish the walls on each side to suit the room décor.
Building the Cabinets
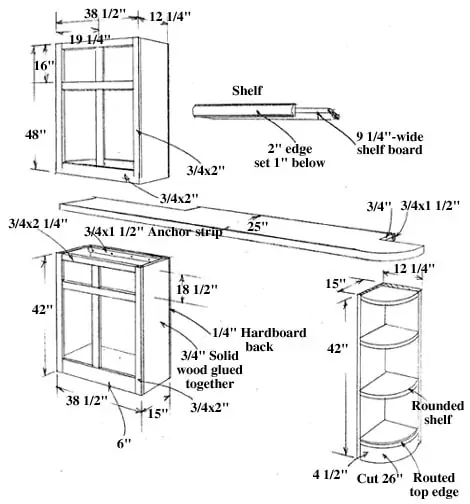
The bar countertop is supported on each end in the dining room with cabinetry. The right-hand corner is next to a door opening in the design shown. An open shelf with rounded corners was constructed and installed next to the door opening.
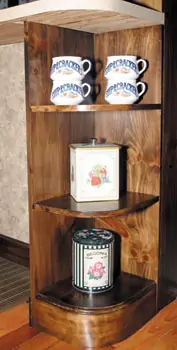
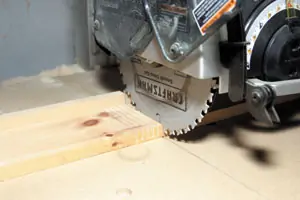
Although this corner cabinet seems somewhat complicated, it’s fairly easy to build. The cabinet was constructed of solid pine, standard 1-by-12’s in No. 2 grade. The bottom features a rounded facer cut to the height needed to match the existing baseboards of the house. The facer was created by kerf-cutting the back side on a table or radial arm saw. The kerfs are 3/8-inch apart and cut to leave a wood “hinge” of 1/8-inch. It is important the stock have no knots. You may wish to experiment with a piece of scrap stock to determine the exact depth and spacing as different woods bend differently. Also cut the piece extra long. Once it has been glued in position, you can cut the ends to length.
Cut the bottom shelf to its rounded shape, and then route the top edge. Apply glue in the kerfs, and to the bottom edge of the shelf. Then bend the kerf piece to match the curvature of the shelf and use large clamps to secure it to the shelf piece. Once the glue sets, cut the waste ends flush with the edges of the shelf. Cut the two sides to length and fasten them to the bottom shelf and to the ends of the rounded baseboard piece. Cut the remaining shelves to shape and fasten them between the two side pieces. Install a top shelf and use it to anchor the countertop in place over the cabinet.
The bottom wall cabinet is fairly standard construction. One exception is the inside bottom height is high enough to clear the wide baseboards and to match the curved shelf height. The back is 1/4-inch hardboard, the sides pine 1-by-12’s and the facers 2-inch-wide pine. You could also use plywood for the sides of all cabinets, and this would be the best choice if hardwoods are used.
Once the bottom cabinets are constructed and anchored in place, construct the countertop. The countertop has a 3/4–by-1 1/2-inch lip on the kitchen side, a lip on the dining room side and a strengthener of 3/4-inch plywood between the two cabinets on the dining room side. Once the countertop is constructed, lift it over the opening, position and anchor it to both dining room cabinets. Counter-sink pilot holes in each end over the wall supports, and drive 2-inch screws to anchor it to the top. Install wooden trim boards on the top and both ends, the latter covering the screws. Finally, install dining room and kitchen trim boards to match the existing trim.
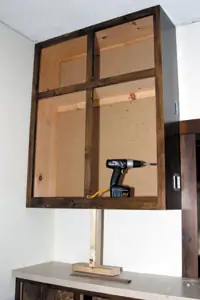
The upper cabinet was constructed in the same manner as the lower cabinet. It was measured to fit between the trim and the wall. Because very few walls are exactly plumb, a one-quarter inch difference was allowed for. The finished cabinet was raised up in place and held with homemade cabinet jacks and wooden shingle wedges until it could be plumbed and anchored.
Top Shelf
The next step was to create the shelf. The shelf is a piece of 1-by-12 ripped to 9 1/4-inches in width. Rip a 2-inch facer strip, route the top and bottom edges and fasten the strip in place with glue and No. 6 finish nails. Countersink the nails and cover with wood putty. Use glue blocks if you don’t wish to use nails. The shelf runs the entire length from the cabinet to the opposite wall. Install support strips on the cabinet and on the end wall, position the shelf in place and anchor it with screws to the support strips. The back of the shelf is held in place with screws down into the top edge of the top trim, which also extends the full wall length and over a doorway next to the pass-through opening.
Doors and Drawers
Making the doors and drawers is actually the most time-consuming portion of the project. The doors and drawers feature removable 1/4-inch hardwood panels. These panels are covered with wallpaper to match the wallpaper of the dining room. If at any time you wish to change décor, simply remove the panels and change the wallpaper. The door frames are rail-and-stile, actually designed for raised panels. And solid wood raised panels could be used instead of the flat panels. Clear or frosted glass could also be used in the doors.
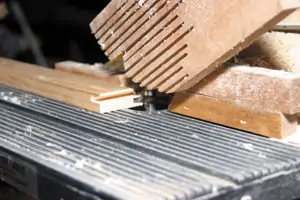
You’ll need a door-cutting router set to create the doors. The router bits can be used in a router table or with a router alone. A router table makes the chore much easier, and more precise. The first step is to rout the decorative edge that will be on the inside edge of all frame pieces. The next step is to rout the inside dado that would hold the raised panels in regular raised-panel construction. With all pieces run, determine the length of the pieces and cut to length. The horizontal rails fit between the vertical stiles but must have 1/2-inch added to each end for their shaped tongues to fit into the decorative edging. (Make sure you follow instructions for your particular door-cutting router set as they can vary somewhat.) Once the pieces are cut, use the mating router bit to cut the ends of the rails to fit into the stiles. Then finally, some router-bit sets allow one-pass cutting, but with other sets you must cut a dado on the back side of the rails to finish the joint. It’s a good idea to make some extra pieces and pre-assemble a door before you glue-up for a real door or drawer, especially if this is the first time you’ve attempted this type of construction.
Once all pieces have been properly shaped, glue-up the door and drawer frames. Make sure they are square and are not warped or twisted. Allow them to set overnight and then cut the 3/8-inch rabbets on the outside back edges of the frames. These allow for a 3/8-inch lip hinge. The final step in door construction is to rout the inside of the frames to allow for installation and removal of the center panels. You’ll need a router bit with a pilot guide. You will also need to finish cutting the corners with a chisel. Then cut the 1/4-inch panels, allowing at least 1/4-inch for folding over the wallpaper. Add the wallpaper and insert the panels into position. The panels are held in place with 1/4-inch wood strips ripped, sanded and stained. Fasten them over the panels with tiny wood screws in predrilled holes.
The drawers are constructed with 1/4-inch bottoms, and 1/2- inch drawer sides. The drawers are then installed in the openings.
The cabinet shown has two under-cabinet lights on the end cabinet and four under the shelf. These are wired to a switch located on the side of the cabinet.
With a little work you can create a bar pass-through and open up both your kitchen and dining or family room to more pleasure.
