


When I think of brick, I think of an old Ramones song, “Strength to Endure.” Because, let’s face it, when it comes to making a solid choice for exterior walls, it’s hard to argue with a decision to go with brick. And beyond its decades-lasting durability, brick is a highly energy-efficient material to cover your home. It also offers a wide range of colors and textures that let you build with a decorative flair. Brick provides a classic look selected by people everywhere, for stately colonials and simple ranch houses, and for outdoor or indoor applications. Brick can offer a rough and rustic texture as if from decades past, or feature a smooth, more contemporary appearance. And with the many available styles and colors for mortar, today’s brick walls and structures are being built with more character than ever.
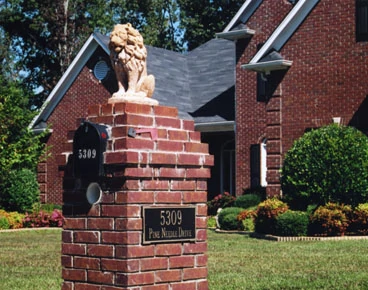
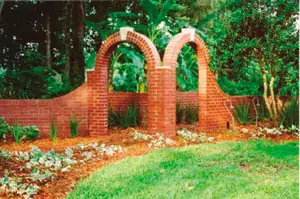
As a building material, brick offers great flexibility of construction. You can create a gothic, arched entryway, use paving brick to install a foot-friendly path through your yard, or even build an elaborate set of steps. Brick can curve, step in, or protrude – it’s all up to the builder. From garden walls to graceful columns, building with brick is as strong a tradition today as it ever was.
That said, like any quality building material, brick can require repairs. And as popular and pervasive as brick is around many homes, you’ll likely be faced with a patch-up project at some point. Brick is relatively maintenance-free, but occasional cleaning and spot checks for water damage are necessary to ensure long-lasting structural integrity. However, accidental impacts can damage brick, and the perils of wind and rain can wear away mortar. While these are definitely reparable situations, they can present some sticky situations.
A Tough Match
Often, an owner of an existing home will want to repair a damaged brick wall or patio area, but trouble can arise when the homeowner can’t locate new brick to match the existing brick on his home. The same problem can arise when a homeowner wants to build a new addition. It can happen even with fairly new homes. In some cases, finding the right match can be difficult for people looking for a solitary brick to make a single replacement.
A brick style or type can become unavailable for a number of reasons. Because brick is made of clay, its source, the clay deposit in the ground, can become depleted after extended mining. This can result in mismatched clay. Subtle changes in color may be gradual when mining the same pit for a period of weeks, but over a period of years the difference can be dramatic.
An unavailable brick type may be because of something as simple as a brick company that goes out of business, or the brick itself going out of style. Brick styles can change over the years, just like cars and clothes.
Expanding your search across state lines is a good approach to finding a match. With the vast channels of communication available through the Internet, searching through online catalogs of brick is as simple as a click of the mouse. It is possible that the brick is still available but is now called another name. It may help to take sharp color photos of the brick and mail them to distributors to search for a match.
If the brick is not made anymore, then you may have to strive for a color match. Try to find a match that is very close, if not identical to the color of the original brick. Try to match the color first, and then try to match the texture. A difference in texture won’t be as noticeable as a mismatched color.
Brick staining may be your last resort. A number of high-quality stains are available that allow you to achieve a near-perfect match if you start with the right texture. You can probably buy a few bricks from a dealer to test the staining system. Stand back about 20 feet to see how well the stained brick blends with the original color on your home.
Mortar Matters
A common problem with old or weathered brick walls is damage to the mortar. Much like matching brick, a little detective work may be required to match the correct mortar color and texture. Be patient and diligent, because this may take some experimentation.
The key to matching the color and texture of mortar actually lies in the sand used during the mixing phase. The sand in mortar accounts for well over 70 percent of the mortar matrix. New brick joints often have a film of lime or cement produced by tooling the joint. This film is eroded with weather and time, exposing more and more of the sand in the mortar mix. The color of the grains of sand makes a huge difference in mortar color, once the actual cement paste wears away.
To determine the particle size and color of the sand used in your mortar, you must do some mild demolition. Try to break out a cubic inch of mortar from several of the brick joints that require repair. Use a piece of wood to gently grind the mortar into a coarse dust. You don’t want to pulverize any of the sand particles. Mix 1 ounce of muriatic acid with 10 ounces of water (Use pure white vinegar instead of an acid/water solution if the mortar contains seashells). Stir in the mortar dust, and after two days, all the lime in the cement will have dissolved, and the sand will be at the bottom of the container.
Pour off most of the acid solution into a tub or toilet, being careful not to lose any sand. Add water to dilute the remaining acid, and pour the mixture slowly into several folded paper towels to catch the sand. Allow the sand to dry, and store it in a clear, glass jar.
Next stop: several gravel and sand pits until you find a sand or blend that matches yours in color and particle size. The sand may very well have come from around your area, especially if you’re dealing with an older home. Be sure to look at dry samples, because moisture can change the sand’s appearance.
Once you’ve found a sand or blend that makes a close match, you’re ready to experiment with the mortar mix. You need to locate a building supply store that sells lime, white cement and grey cement. Older mortars had a much higher lime content than today’s premixed varieties. Mortar that is 70 years older or more may require as many as six measures of lime to one measure of cement. Lighter mortars will require white cement rather than grey cement. You may find you have to blend both to get a perfect match. While you are mixing the new mortar, get the existing mortar wet. If the new mixture you are blending looks identical to the wet old mortar between the brick, you may have a perfect match when it dries. Mix a test batch and allow it to dry for two weeks. If you’re recipe isn’t right, keep trying.
Keep in mind, if your brick and mortar are dirty, you should clean the surface before beginning the repair. If this can’t be done effectively, you may have to stain the repair job after it dries to make it match the old brick.
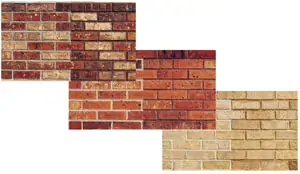
Colored mortar is available to decorate new brick installations. Notice how dramatically different mortars can change the look of brick walls. (Photo courtesy of Southern Brick Institute.)
Goodbye Bad Brick
Badly broken or deteriorated bricks should be cut out and replaced, and these simple replacement projects can often be handled by the do-it-yourselfer. After selecting new bricks that match the old bricks as closely as possible, cut the old brick completely out of the wall. Use a hammer and chisel to loosen the surrounding mortar, remove the brick and clean out the recess carefully.
Dampen the cavity and the replacement brick with a brush or fine spray of water. When the cavity is damp, but not wet, apply a thick layer of mortar to the bottom and sides of the cavity. Butter the top of the replacement unit and slide it into the cavity. Mortar should squeeze out from the joints. If it doesn’t then rebutter the joint, adding more mortar. Finish the joints by following the same repointing procedures as repairing damaged mortar.
Repairing Damaged Mortar
First, cut out the damaged mortar joints to an approximate depth of 3/4 to 1 inch. When patching the mortar, the depth of the new mortar should be twice the width of the mortar joint. Mortar applied directly to the damaged surface will not hold up. When removing the mortar, using a special joint chisel may help to prevent binding in the joint and chipping of the brick edges. Rake out excess mortar or grit, and brush out the joints to remove loose mortar or sand. Flush out any remaining particles by spraying into the joint with a garden hose.
There are special tools you should buy to handle the mortar. A masonry hawk, a pointing trowel and a jointer will speed your work and make it easier to do a good-looking job. You can even use your fingers in tight spots.
To apply the fresh mortar, termed “repointing,” use the trowel to apply the mortar in layers, pressing it into the joints. Pack the new head joints first and the bed joints second. This allows you to make unbroken horizontal strokes with the jointer, forming straight, even bed joints.
Match the mortar finish to that of the existing brick. In many cases, joints are filled flush to the brick face, and then slightly depressed with the jointer and brushed clean. In other cases, concave or V-joints can be made with special tools that strike the joint into a specific shape. Be sure to finish the joints before the mortar gets too hard.
A popular trend is to leave the mortar flush with the brick, or even slightly covering the brick for a more earthy, rustic look. Of course, this is just one of the many personal touches that can be accomplished with brick. From garden fences to chimneys, from new wing additions to simple wall repairs, there’s a lot to consider when building with brick. But the end result is well worth the effort.
