

Planning the Layout of a Tile Pattern Floor
By Matt Weber
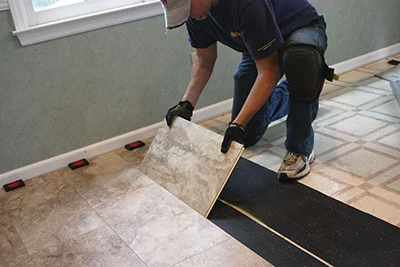
To lay out flooring with a repeating tile pattern takes careful planning, and these days, it’s not just ceramic or stone tile that has the repeating pattern. The look of a tile floor comes in the form of resilient sheet flooring, stick-down resilient tiles, and tongue-and-groove laminate planks, all of which boast the look—if not the material characteristics—of genuine tile.
The uniform joint spacing that achieves the popular bricklike pattern in tile means you don’t have much flexibility to adjust placement where a row meets a wall or obstacle. The objective with layout is to install a tile field that highlights full, unbroken tiles on the most conspicuous areas of the floor, while any partial “sliver” tiles along the edges of the floor are strategically located in hidden or less noticeable areas of the room.
This doesn’t sound so complicated if you’re laying square tiles in a grid pattern inside a square room. But once you change the shape of the room, change the shape of the tiles, or stagger the joint spacing from row to row, things start to get complicated.
Tile Layout Basics
For those new to laying a tile pattern floor, the temptation is to pick the straightest wall and start laying the floor along it. While that may work with other flooring materials, tiles should begin from the center of the room. This gives you plenty of space to work outward to the walls and ensure a symmetrical pattern.
Begin by checking the room for square. Use the 3-4-5 rule to check that the corners form right angles. Measure and mark a point that is 4 feet from the corner along one wall. Measure and mark a second point that is 3 feet from the corner on the intersecting wall. A diagonal line between the two points should measure 5 feet if the walls are at 90 degrees. In large rooms, you can double the ratio (i.e., 6-8-10). If one wall is significantly out of square, then lay out the floor so the tapered tiles will run along the least noticeable wall.

The first and foremost rule of tile layout: Make sure your pattern is square even if the room isn’t.
A standard procedure for floor tile layout is called “the quarter method,” in which the room is divided into quarters to help sequence the layout (see sidebar pg. 46). First step is to measure and mark the midpoint of all four walls. Snap intersecting chalk lines at the center point of the site, forming a square cross to guide the layout. Check that the crossing lines form right angles.
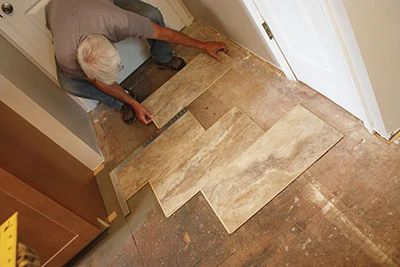
You can plot your layout to scale on graph paper, but for a better visual representation, lay two intersecting dry rows of tile in a cross-pattern along the chalk lines. Run a full course of tiles in both directions all the way to the perimeter walls (use tile spacers if including grouted joints).
Look at the tiles at the ends of each course. Is there space for large, attractive tiles around the perimeter, or only room for a partial sliver? Very small tiles in a field of much larger tiles are generally considered unsightly and give the impression of poor craftmanship. In some cases, they simply cannot be avoided, but the goal should be to reduce their number and mitigate their prevalence in the floor design.
To eliminate the small “sliver tiles” along the room perimeter, shift the cross pattern on the floor from left to right and front to back until the rows end with whole or larger tiles that don’t break the pattern quite as obviously.

The quarter method is a standard procedure for laying out all tile sizes, shapes and materials. To lay the tiles in a staggered fashion, such as a running bond pattern, lay the first row of tiles only along one axis of the intersecting chalk lines. Then, working from the center, fill in the quadrants and offset the grout joints from row to row.
As shown in the diagrams on page 46, once the joint pattern is altered with different sized tiles and/or different spacing intervals from row to row, you’re more likely to end up with partial tiles on the ends of the rows. Planning a layout that minimizes those slivers becomes more difficult—even when laying tiles in our hypothetical square, uncluttered room.
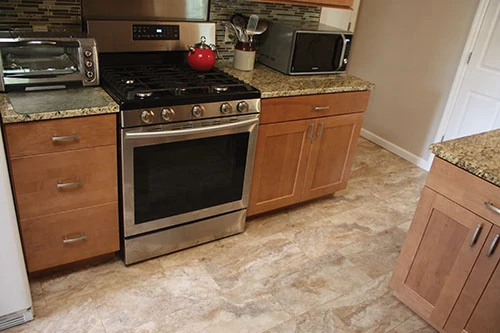
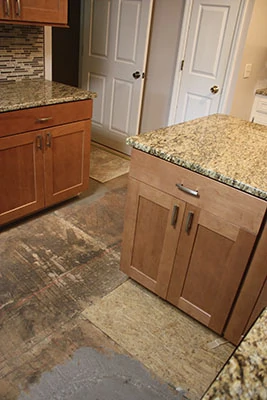
But we know rooms aren’t all square and empty. In a real-world situation, you’ll need to consider where other fixtures and wall projections will intersect the tile, and you’ll find you have many more problem areas to contend with. Rooms such as kitchens, with all their cabinets, islands and appliances, pose a particular challenge by throwing all those extra obstacles in your way, with all those extra places to get a dreaded “sliver tile.”
And, since you’re restricted to maintaining that repeating pattern, you can’t simply adjust a single row to accommodate your layout plan. Nope—unlike wood flooring, you’ve got to shift the entire floor, and it works like the proverbial bedsheet: Pull it in one direction, and it gets shorter on the other side. You might have eliminated partial tiles on one wall only to create them on the opposite side of the room.
If the job is particularly complicated (meaning the pattern is complex or the room is cluttered with obstructions), you’ll probably discover that eliminating all the small tiles is an impossible feat. A perfectionist might start pulling out their hair. But you shouldn’t do that…
The key to successful tile layout is to prioritize.
Priorities
Priority #1: Most homeowners prefer a full tile in the middle of the entrance to a room. The entrance gives the first impression of a room, so you want to present the flooring’s “best face,” so try to avoid using a partial tile in the primary doorway. By establishing a full tile at the entrance, you now have a working control point, meaning you can shift the floor layout to the right or left to make necessary accommodations.
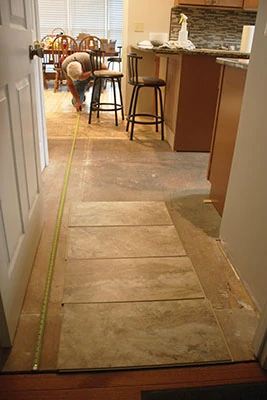
Priority #2: Hide conspicuous sliver tiles—and how to do so is entirely situational. For example, on a recent kitchen remodel, we laid 24-in. luxury vinyl tiles. The entrance to the room began with a short hallway from the door leading into the kitchen. This narrow hall combined with the wide floor tiles meant we had unavoidable partial tiles visible as soon as someone entered the room. So, what do we do?
We figured that the larger the tiles, the better the look. The size of our big tiles in our narrow space meant that we had to arrange narrow partial tiles on one side and wider partial tiles on the other. In this particular case, the door hung on the left-hand side of the doorway, and when opened it would cover part of the floor on the left-hand side of the hallway. Since our partial tiles were only a few inches wide, the open door would hide most of those tiles on the left-hand side, so that’s where we placed them, leaving the wider partial tiles visible on the right-hand side.
And that’s an example of the kind of give-and-take evaluation you need to apply to all edges of the room. If, for example, laying those sliver tiles on the left-hand-side of the hallway created partials elsewhere in the room which would be even more noticeable and egregious, then maybe you should prioritize full tiles in that more prevalent area of the room than in the hallway.
How do you know where to prioritize? Look down when using the room. This doesn’t mean just stand in the room and look down. If you’re the homeowner, pay attention to the floor during daily activity to get a feel for how people move through the living space, which areas get more traffic, and which areas get less attention. Aim your full tiles for those high-profile areas and hide your partials under barstools, countertop overhangs and toe-kicks. If you can’t eliminate the slivers completely, then hide them along the most unnoticed wall you have.
And don’t forget to factor in your wall trim. A very thin partial might be completely concealed by a combination of base and shoe molding, which can cover a gap about 1-1/4 inch wide.
Carefully planning the placement of your tile-pattern floor will go a long way toward achieving an attractive, professional-looking installation you can be proud to show your friends and neighbors.
Side Note One
Stone-Pattern Placement
When it comes to vinyl tiles that mimic the look of natural stone, there’s another aspect of layout to consider: Stone-pattern placement. Unlike natural materials that have unique grains and colors, most manufactured tiles will have repeating patterns in the product line. If you put two of these identical tiles next to each other, the floor will look less like natural stone because two identical tiles would never come from a quarry. Therefore, you should take time to position these recurring styles strategically in your layout, slotting dissimilar tiles between them or turning them as needed so the eye doesn’t pick up on the repeating patterns. This is most easily done by laying the whole floor out dry.
Side Note Two
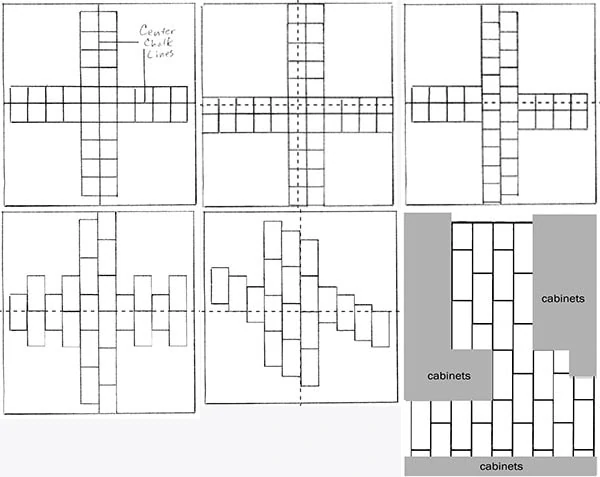
The Quarter Method
When using the “quarter method” for tile layout, the room is divided into four quarters by chalk lines that intersect like crosshairs at the center point of the room, forming a square cross to guide the layout. Lay two full courses of tiles (dry) along the chalk lines all the way to the perimeter walls (use tile spacers if including grouted joints). If this results in small sliver tiles along the edges, you can shift the layout accordingly to reduce unsightly partial tiles in along the most noticeable walls or other obstacles in the room.
Side Note Three
Laser Layout Assistance
Misplaced chalk lines can get confusing, so it’s nice to have a laser tool that generates a temporary line, so you can adjust its final position before snapping the chalk. When establishing the layout for our tile floor, we used the new Ryobi ELL1750 Multi Surface Laser Level to project a line on the floor. Another advantage of the laser: If the beam disappears at some point along the floor, that means it has encountered a high spot in a floor that isn’t level.
