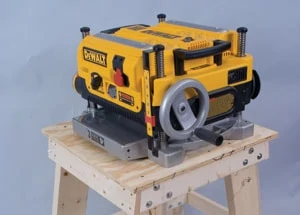
Build a benchtop tool stand from common tools and materials.
Benchtop tools came into their own with Ryobi’s AP10 planer years ago. Today, most woodworking tool manufacturers make one or more benchtop planer models, tools that make any kind of woodworking a lot easier for most people. As the planers gained popularity, small jointers came along. Short jointers in 6-inch widths are very handy, take up only a little space, and come without any sort of stand, as do the planers. Benchtop drill presses are similar in intent and utility, again, without any kind of stand designed for it. Some small bandsaws come without good stands, too.
Swinging any of these tools onto a real benchtop is easy enough once, though some of the newer planers now weigh about 100 pounds, making repetition both awkward and difficult. Using them at that height may not be. Planers and jointers are easier to work with when their work surface is inches lower than the resulting height on your average benchtop.
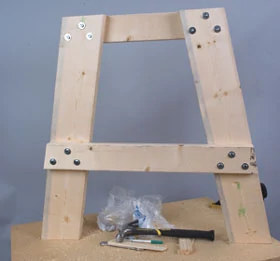
The stand built here is sized for a benchtop planer, specifically the DeWalt mounted on it, as shown above. It also works well for a benchtop drill press or jointer. It can easily be raised or lowered during building, simply by cutting legs to different lengths. Adding a shelf, if one is desired, is easy.
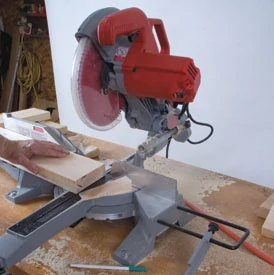
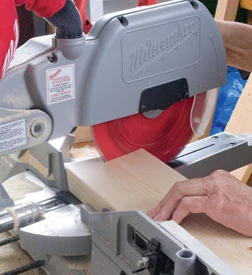
Steel stands are also available. They’re expensive and hard to assemble, though. Building your own stand with 2-by-6s, 2-by-4s and plywood, plus an occasional bit of 1-by-4, is simple and isn’t half the cost of steel stands. This not-so-pretty stand is designed to be exceptionally sturdy, but also easy to make with tools that most people have on hand, or can readily borrow. The Milwaukee slide compound miter saw shown in this article isn’t essential, but is a real time saver and accuracy provider.
If you already have a shop full of tools, the job is even easier.
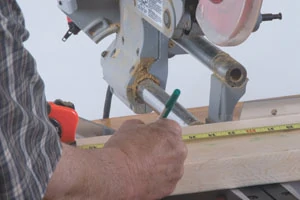
Tools and Materials
I started building my workstation by having Lowe’s cut the 2-by-6s to 4-foot lengths, allowing me to carry all parts home in my car. The 2-by-2-foot top is sanded 3/4-inch plywood, right off the shelf. If a bottom shelf is desired, pick up a 2-by-2-foot piece of 1/4-inch sanded plywood. Cut that to fit inside the legs.
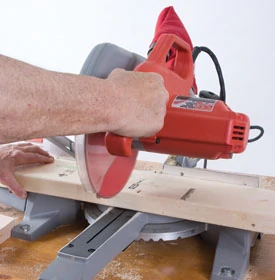
The 1-by-4 braces are whitewood. Buy 6- or 8-foot pieces. Use the 6-foot if carrying the wood in a car, 8-foot with a pickup. The top brace is 22 inches long. The bottom is 19 inches long. The 2-by-4 leg braces on the bottom are fastened inside the legs to support a shelf if desired, while the top braces are outside the legs to add support for the top.
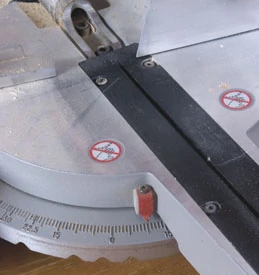
Tool requirements include a miter saw, a square, a drill, two drill bits, a couple of driver bits for screws, and a wrench to tighten hex bolts used for assembly. Toss in an impact driver to ease running screws in at the later stages. The stand is designed to be constructed from nominal lumber sizes, so the only cutting needed is to final lengths and angles. Standard 3-1/2-by-5/16-inch hex-head bolts are used, with nuts and washers right out of the bins.
Carefully select the lumber. Construction lumber is rough when good, awful when poor.
Framing Up
Step one, after buying wood and fasteners, is to square one end on each 2-by-6 to have a starting point. If you prefer, ends can first be cut to 10 degrees, the angle that stabilizes the legs front to rear when the stand is in use. The slight leg splay does a great job of preventing tip-over, even when fairly long boards are planed. Make sure to cut both angles without flipping the board. The ends look like / /.
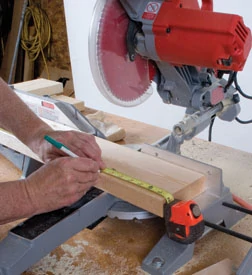
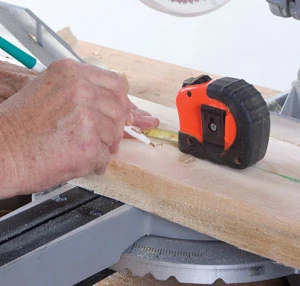
With four legs cut to correct length, the next cuts are the 2-by-4 side braces. (The length of the legs is 31-1/4 inches: If you’re shorter than about 5 feet, 10 inches, cut 1 inch off; if you’re taller than 6 feet, 1 inch, then add 1 inch.) The top brace is 20-7/8 inches long, cut to a 10-degree angle at each end, this time with the angles resulting in a shorter piece, not a slanted piece. For this, you flip the 2-by-4, so the ends are / \. Cut two top braces. Cut the bottom brace to 28 inches long at its bottom, again with the 10-degree slants at both ends, resulting in a shorter top—26-3/4 inches here. Again, the ends are / \.
Clear a decent sized work area, and lay out the first three pieces for lumber. Align the top piece with the legs so the 10-degree splay is going to be at the bottom. Align carefully together and mark for bolt holes in the first 2-by-4, making sure it is securely clamped to the 2-by-6 under it. Mark for three bolt holes, in a triangle pattern, keeping hole centers at least 3/4 inch inside lumber edges. Drill all three holes in the first clamped-together piece, as the photos show. Drilling depth is near maximum bit length here, so back the bit out and tap it lightly to free it of debris, and to let heat dissipate a little for each hole. Use a 5/16” drill bit. A light hammer tap or two gets the bolts into their holes this way. Alignment is better with tighter holes. Rigidity is improved, too.

Bolt the first pieces together, using a washer under both the head and nut. Snug up the nuts, but not to final tightness. Now, move on to the second leg. Use shim stock to make up for the bolt ends lifting the first leg a bit, align, clamp and drill. Bolt together as before, making sure to use washers on both sides.

Turn the leg set over. Square it with the top of your workbench.

Measure up 10 inches from the bottom of each leg and align the lower brace to the inside of the leg. Clamp securely in place, and mark for the bolt holes, again in a triangle pattern; three at each end. Drill. Place the bolts with washers, then add nuts with washers, and finger-tighten firmly.
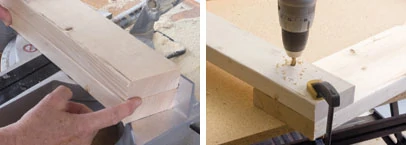
Assemble the second set of legs in exactly the same manner.
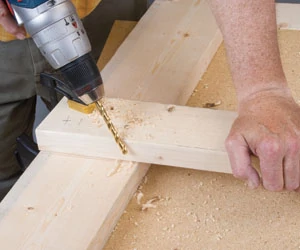
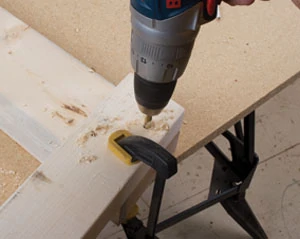
The 1-by-4 braces come next. Mark 3/4 inch inward from the edge, and then 2-1/4 inches inward and drill pilot holes. Now, align with the top brace and leg, and screw into place. Note the use of square-drive screws, with pan heads. The reason is simple: The screws were in the shop, and I’d forgotten to buy wood screws of the correct length. It is also a 24-mile round trip to a hardware store.
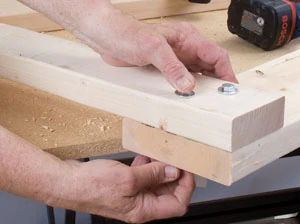
The first set of legs gets all four side braces installed. It’s then reasonably easy to snug the second set of legs inside the braces, while the stand is upright on the floor. Run the screws in. The Ryobi impact driver is a good wrist and forearm saver with this many screws to drive—32 on the braces, plus 10 to hold the top in place.
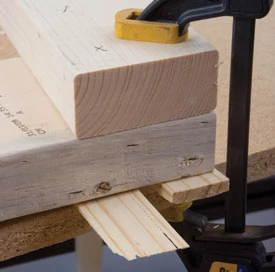
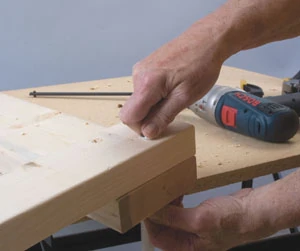
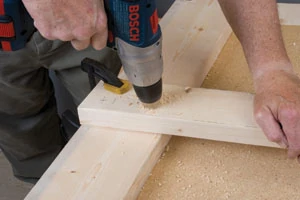
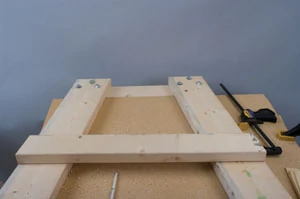
Settle the stand on the floor and snug up the nuts and bolts all around. There’s no need to wrench them down tight. A moderately tight fit does just fine without crushing too many wood fibers.
There should be no need for lock washers, either. If it’s necessary, one of the mid-range grades of Loctite works just fine instead, and doesn’t force a step into 4-inch bolt lengths. The 3-1/2-inch long hex-head bolts offer just enough length to get through 3 inches of wood, with room for a flat washer and the nut.
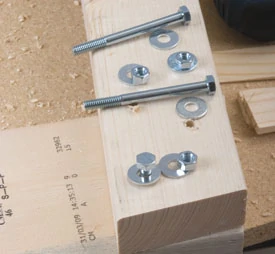
For nuts and bolts and washers, go for a good grade that is zinc-plated. More weatherproofing, such as double galvanizing, is not needed for indoor tools. Stainless steel is a waste of money, too.
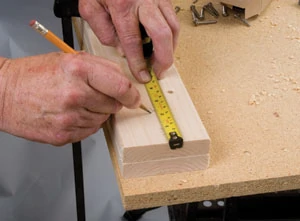
Table Top
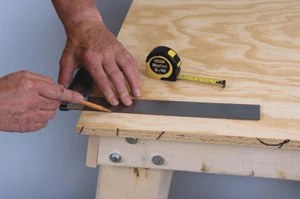
Finally, add the top. The 2-by-2-foot sheet of 3/4-inch plywood provides a lip on each side of 1 inch. From the edge of the plywood, measure in 1-3/4 inch and mark a line for pilot holes. Space them equally along the sheet, start at about 3 inches from each end. Use five screws per side.
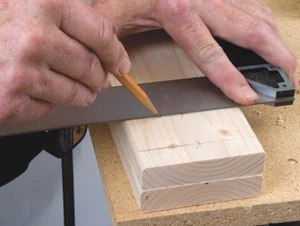
Run the screws in. Stand back and take a look at the site of your benchtop planer (or jointer, or bandsaw or drill press). If you decide to use this stand for a small bandsaw, I suggest building a box on top of the top, about 5 to 8 inches tall, open at the ends. This elevates the bandsaw to a useful height, while also providing some blade storage.
To add a shelf, use 1/4-inch sanded plywood, cut to width. Measure the inside of the stand just above the bottom braces. Cut the plywood to length. Fasten in place with four 1-inch flathead power-drive screws on each side.
The stand isn’t pretty—after all, this is construction lumber, made to be used inside walls. But it will outlast a couple of portable planers.


