

The Heros Behind the Walls. DIY Basement Renovation
By Mark Clement
I’m getting a man cave! I’m getting a man cave! I’m taking my beat-down, dirty basement and giving it a hyperdrive trick-out. I’m saying no to water on the floor, heck no to smelly drinking water, and goodbye to mold in the air.
I’m saying yes to a bathroom built for the boys (me, my son and my buddies). It’ll have a wood-walled shower (I can’t wait), a urinal (a sleek, all black, to-the-floor Kohler urinal of awesomeness). The basement remodel will also include a wall-hung toilet, so I never again have to clean behind a toilet, and stained concrete floors with nary a grout joint to clean—ever.
But, as visions of flat screens and beer taps dance in our heads, making this dream room a reality is the stuff of sober work and good craftsmanship. Even though I’m pretty good at watching TV, I’m more fired up for rooms that work. And, as an Extreme How-To-er, I’ll have as big a love affair with my sewage-ejection pump as I will with the pixels on the TV. This is where the underdogs of design really shine (until they have to go live behind the wall).
My man cave—and any smart basement renovation—starts with what I call the heroes behind the walls: The process and the products that make the basement bathroom lurch to life, and also improve life throughout house—for everybody—at the same time. That’s the real takeaway for me.
To put a little more technically: On the road to getting what you want, you can also avoid future plumbing problems, make your coffee taste better and your wife’s hair silkier, vastly improve sound quality in the rest of the house, and contain the fire you’re not planning to have.
Perfect the Process
Permit. As much as I love tools and action, I’m only hurting myself if I don’t get a building permit. Even contractors who “know what they’re doing” do it. Tom Silva pulls permits. So does Mike Holmes and all the other top-drawer people we watch on TV, because if you do things right, there are more payoffs than passing inspection. You’ll be able to sell your house more easily because you’ll be able to list it as having the upgraded number of rooms. You also delete the risk of a shutdown. And, you’ll have another set of eyes on your work—the best insurance policy ever. YouTube is good, but you can’t learn everything from it.
Codes. So, Step 1 is securing a permit, and in so doing you’ll learn that ceiling clearances need to meet your jurisdiction’s code in order to qualify as a room.
If you want to list it as a bedroom, there are also codes for having egress (windows) and multiple escape routes.
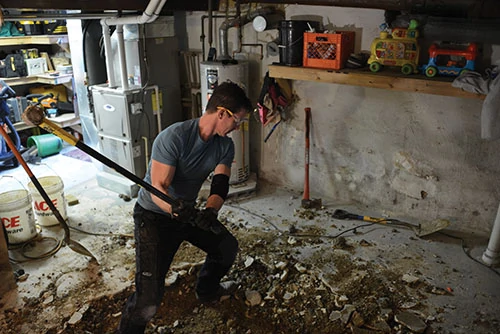
In this project, the room had to be 78 inches or higher from finished floor to finished ceiling. Because I was breaking up the floor for a perimeter drain and plumbing, removing the rest and lowering it makes the entire place awesome. But it was a lot of work. Sledgehammer smashing and farmer’s carries with 5-gallon buckets full of dirt are no picnic.
It was a big piece to bite off, but I’m glad I did.
Many old houses have thin slabs, and breaking it up can be done with a sledgehammer and shovels. Newer houses will typically have deeper, drier basements and limited need for this scope of work. If you need to demolish a thick slab, however, consider renting a heavy jackhammer, and plan it into your budget.
Perimeter Drain. Long story short, if your basement is wet, you probably need one. A drain is a budget line item for sure, but if your slab is thin (and even if it isn’t) then most of this is sweat equity.
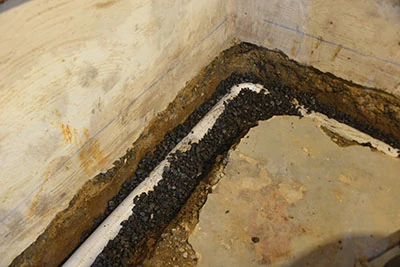
Break up the perimeter of your basement 12-16 inches back from the wall, dig a trench and haul out the dirt. Pitch the trench to a sump pump pit, fill halfway with gravel, then with Schedule 20 3-in. PVC (with the holes in the sides) wrapped in landscape fabric. Bury the PVC in more gravel. Then cover with concrete. Phewwwww…
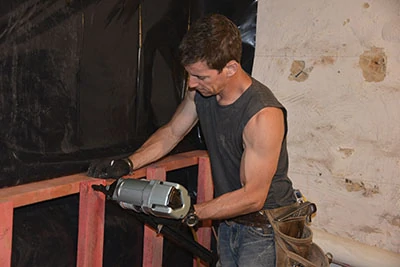
Fire Stop. Some people call this fire blocking or draft stop. Whatever you call it, it doesn’t actually stop fire; it slows down its transfer between floors. In the unlikely event there is a fire in your basement, fire blocking is a simple and easy-to-install barrier between floors of the house. I used 3-inch strips of plywood pneumatically stapled to the ceiling joists then filled gaps with fire-rated spray foam or fire-rated caulk, depending on the gap. Large holes can be filled with mineral wool like Roxul, which I love.
Vapor Barrier. A vapor barrier is (A) crucial to stopping a mold farm behind your walls, (B) ridiculously easy and cheap, and (C) easy to screw up because how it’s done depends on your climate. Your local building official should be able to advise you of code requirements when pulling your permit. For me (in Pennsylvania), a drape of 6-mil plastic between my foundation wall and framing does the trick. I screw the plastic to plywood battens with washer-head zippies to make it easier to handle, then staple the battens to the fire blocking.
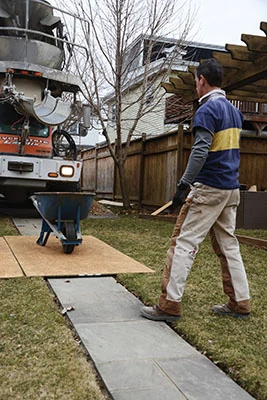
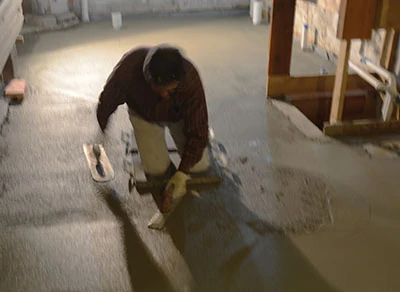
Framing. I hired a concrete guy to re-pour the floor that I removed. He left the finish flat and smooth, bull-floated and hand-troweled. His job was likely much better than I could have done and worth the money. However, after the slab was poured I formed and poured my concrete shower curb for the wood-walled shower.
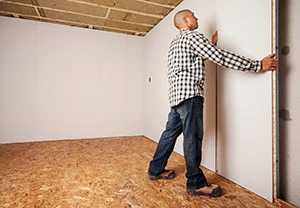
Once the concrete set up, I framed my walls. I’m a big fan of wood studs anywhere I can use them. I lay out walls one inch away from the foundation wall. It gives me room to make adjustments, space for plastic to drape and breathe, and it usually allows plenty of room to accommodate foundation irregularities.
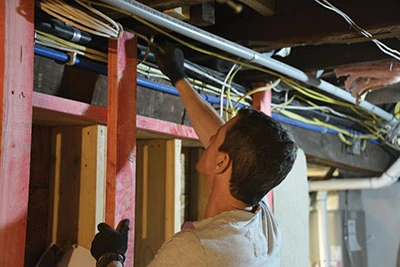
I also framed a portion of the exterior wall “on the flat” to make a channel for the wall-run drain line (remember, old house), which left a nice shelf detail in the hang-out portion of the man cave that I’ll trim out with finger-joint pine boards later.
Heroes Behind the Walls
If you spend too much time on what a bathroom looks like and not enough on what it does, you can expect disappointment and to spend more money in the long run. As electricians say, “wire is cheap while the walls are open.” We took that notion and ran with it, adding some things that’ll benefit the rest of the house for a fraction of what they’d otherwise cost.

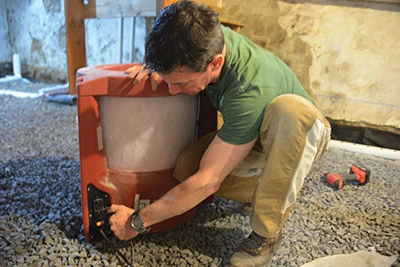
Sewage Ejection Pump. Skimp on this vital element of a basement remodel at your peril, my friends. My love affair with my poop pump, the Saniflo Sanicubic1, is not to be understated. It’s small, powerful, and sealed. I dug a pit for it under the stairs where it fits swimmingly as compared with other pumps that are often gigantic, tentacled plumbing Krakens with pipes and vents, and prone to clog.
The Sanicubic1 is a simplex grinder that liquefies the non-liquids entering the system and can eject them up to 36-feet and over 300-feet. What’s more, a clog inside a substandard toilet pump can result in—according to my plumber—the worst job in plumbing! Although, the Sanicubic1 costs a little more initially, it comes with a special feature supplied by its power-grinding commercial rating: My peace of mind.
I can sleep at night knowing that if a guest dumps anything down there that they shouldn’t have, it’ll probably be okay and not measure a 12 on the Richter Scale of Disgusting. Furthermore,
I can cover the pump pit and use the area above for storage, which is not so easy with other pumps I’ve seen.
Water Filtration. Our municipal water literally stinks. It’s potable, but between its taste, odor and the rock quarry (very small rocks, but still) that pours from our taps, it’s brutal on everything. Our dishes come out of the dishwasher as dirty as they went in, only the dirt is baked on. The shower doors are un-cleanable. Coffee machines are disposable here. And it doesn’t make my wife’s hair feel good.
So, when we reconfigured the utility room for bathroom walls, we added a Pentair water filtration system.

We actually installed three units that work independently together. When it comes to filtering water, there’s no “black box”, one-size-fits-all solution. You’ve got to filter what you’ve got, and knowing what you’ve got requires refined knowledge. While I can turn the screws to install a system, what I want is the knowledge that the screws I’m turning are the right ones. Like the concrete slab, I don’t see this as a DIY job. I don’t care how much YouTube I can watch, it does not make me a water-quality expert.
For example, a water quality analysis on well water can change by the hour, so designing a system for that requires local knowledge of the area’s overall trends and current weather. (Water in a drought will be different than water after massive rains).
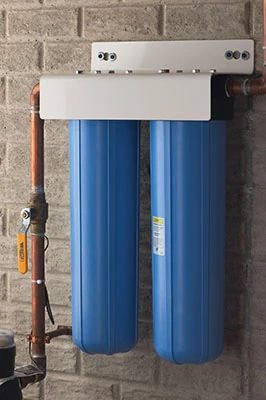
Our system uses Pentair’s 9100TS for removal of solids, and it’ll go after minerals like calcium, manganese and iron. We also installed the Pentair Pentek BBFS. This goes after suspended solids that smell like chlorine and chloramines (a chlorine substitute) in municipal water and hydrogen sulfide (a rotten egg smell in some well water).
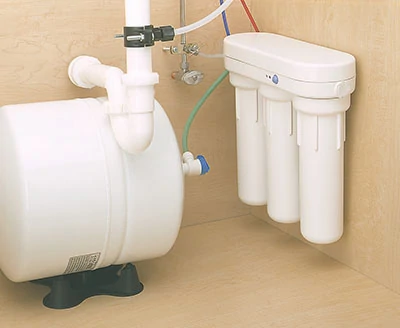
Plus, because we like coffee and because the joist bay right under our calcified refrigerator is running right through the bathroom framing, we install a point-of-use filter, Pentair RO 3500 reverse osmosis unit. This is installed in the utility room and plumbed up to the fridge. Good-bye pitcher of filtered water in the fridge forever.
Framing. I’m a wood guy, especially when it comes to complicated framing like a basement build-out in an old house. I know there are alternatives, but for me, wood studs deliver what I need. The straighter the material, the better. If you’re picking up lumber from a home center, at least try to peel them off an unopened bunk. If you’re getting them delivered from a lumberyard, keep them banded as long as possible. Keep the boards dry and store them flat. You’ll be glad you did when you go to install finishes later.
Another reason I like wood is the 80 million blocking and pad-out assemblies that old houses require. These can’t be done quickly or very accurately with any other material.
Every square inch matters in this project. It’s like the Space Station, so being able to manage material accurately is important.
I took a chance on the fire-and mold-rated Eco Red Shield studs I found by accident at a home center. It is suitable for slab contact (you should use this material or treated lumber for your bottom wall plate), and it stays unbelievably straight.
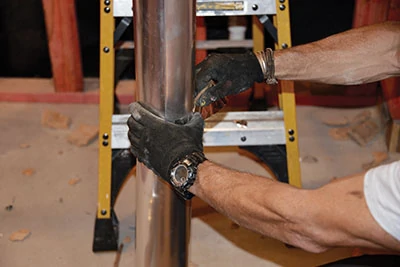
Screws. The more I work in old houses, the more I realize why Mike Holmes is nuts about screwing things together. The more complicated an assembly becomes—building an angled soffit around plumbing, HVAC and electrical, and packing out around stairs—the more I screw things together so I can see what works and what can work better. If something doesn’t work, screws go in both directions. Nails only go one way.
The screws that have recently changed my life are Spax Multi-Material Screws. Their sharpened threads minimize splits, make toe-screwing vastly easier, and the same screw works in wood and concrete. The T-30 driver tip barely wears or cams out, and I’ve never gotten one stuck.
Insulation. Using Roxul mineral wool was a near religious experience for me. It’s hard to describe how much Roxul takes an unpleasant process and makes it better in many ways. Roxul is insulation made from stone that cuts easily with a bread knife and friction-fits between framing members.
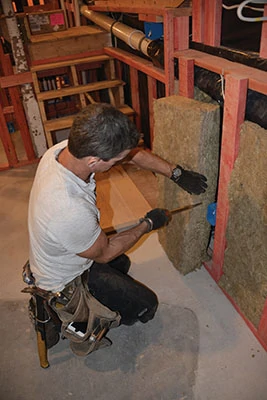
No staples are required, and there are no paper ears that tear. There’s no front and back, just a tight fit, it’s code approved and fire-rated.
Roxul costs a bit more than fiberglass batts, but delivers vastly more than its up-charge for the long term. Insulating irregular framing is a huge advantage. Let’s say ceiling joists are irregularly spaced, say 18, 19 or 22 inches. Simply cut a Roxul batt to the dimension, turn it sideways across the bay, and stuff it in there. Repeat until the bay is full. That’s not easy to do with other stuff in my experience.
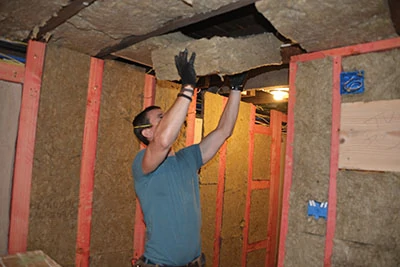
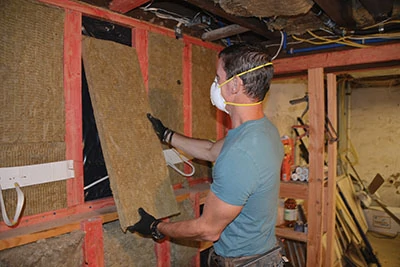
The other advantage of mineral wool is its sound-deadening properties. Coming into my man cave, which is only partially insulated as I type this, is like walking into a sound booth or a bunker. And what’s the payoff for the rest of the house? Less sound travels so that action movies and applause can be turned to the man-sized volume they deserve.
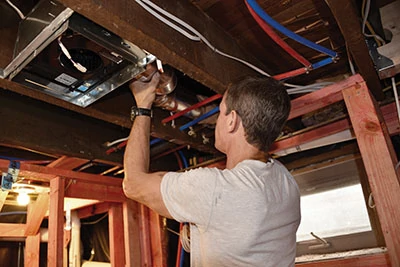
Bath Fan. If there is an overlooked, undervalued but crucially important part of adding a bathroom—anywhere in the house—it might just be the lowly but so very important bathroom vent fan.
Notoriously undersized and improperly hooked up by hacks who don’t know its importance to keeping a bathroom clean, I use an Air King. They’re designed and built near my home, and the company is passionate. It’s hard to make something so ethereal sexy, but they do it.
Don’t want to clean and gouge mold out of your bathroom caulk? Turn on the fan and let it run after your shower. A primary source of mold and mildew is steam condensing after it cools and lands on surfaces. Air King’s website is an awesome tool for figuring out which size fan you need to get. Also, take the time to hard-pipe it, which is ten times better than those flexible, cloggable wire tubes.
Tools, Trash & Other Things to Think About
A basement renovation is a big job. Maybe you want to do all of it; maybe only some parts (we subcontract plumbing, electrical etc.). It’s important to think through the process in advance, everything from re-routing junction boxes (don’t bury them under drywall) to how you’ll condition the space.
Tools. One hurdle is how to use your tools in the space. While you can cut a pile of studs with a circular saw, my back enjoyed that I set up my miter saw workstation and cut standing up. While its size meant I had to cut in the adjacent room, it was still well worth the time spent setting it up.
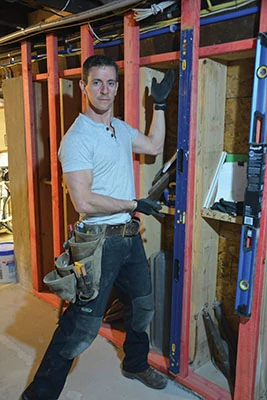
And, to keep things off the floor, please see my patented “tool wall” (strategically placed nails in studs).
One of my favorite new tools is for one of my least favorite, most pervasive problems: Dust. The BuildClean unit I used here is an expensive-but-worth-it investment, geared for the pros. Never have I used such an effective dust-eater.
HVAC. Chances are your air handler is a fixed item you’re working around, so tapping in might be easy. However, any air you take out of the system for the basement won’t be going upstairs where it was originally headed, so at the minimum think it through. If you’re concerned about airflow imbalance, check with your HVAC specialist to see what the best play is.
Insurance. Notify your insurance agent of the upgrades. If there’s damage or loss, you’ll rue the day you didn’t take 15 minutes to make the phone call, even if it’s not to a Welsh lizard.
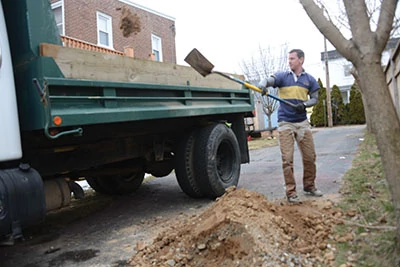
Trash & Transport. There’s a reason lots of contractors have 40-yard dumpsters on their job sites. Trash piles up fast, and it’s not fair to your neighbors if you pile it up bit by bit until you have a dumpster load.
Check with your local trash collector. Sometimes moving at the pace of DIY means you’re only generating a few bags at a time, which are easily dragged to the curb. For the big loads of demolished concrete, you’ll at least need a dumpster or better yet, a buddy with a dump truck or trailer.
After all, you can pay him back with deluxe accommodations in your man cave come game time. Trust me, he’ll love the urinal. Free beer can’t hurt either.
Editor’s Note: Mark Clement is co-host of MyFixitUpLife. Find him at MyFixitUpLife.com.
Side Note 1
Dricore Smartwall
 DRIcore SmartWall is an all-in-one engineered wall panel designed specifically for the basement environment. Much like Gore-Tex, a finished concrete basement wall needs to breathe. SmartWall gets smart with a high-tech moisture barrier that safely allows the flow of excess moisture, by keeping it in vapor form, while keeping the basement dry. With the SmartWall Air Gap system, the panels sit safely 1-1/2 in. from the foundation wall. It stimulates convection currents, and the continuous non-cellulose EPS insulation forms a protective and responsive surface. Thermal bridging, which occurs with traditional framing methods that utilize wood studs and batt insulation, is virtually eliminated by the SmartWall system, whereby the framing members are fully encapsulated by the Neopor-infused EPS insulation. The effective R-Value of SmartWall is rated at R16.9. And, because the SmartWall system is panelized, various time-consuming steps are eliminated so homeowners can begin enjoying their new basement sooner than ever.
Side Note 2
DIY Mold Inspection for Basement Remodels
My Mold Detective was invented by Certified Remediation Expert Fred Rodriguez, to provide homeowners with a Do-it-Yourself Mold & Allergen Test Kit that is affordable and accurate. Utilizing the same technology that Indoor Air Quality (IAQ) professionals use (but at a fraction of the cost) My Mold Detective’s patented, reusable pump and spore trap cassettes are simple to use. Air samples are then sent in a pre-paid envelope to an AIHA-accredited, independent laboratory where samples are analyzed. An easy-to-understand, confidential lab report is then emailed to My Mold Detective customers that indicates whether mold levels are normal or elevated.
Mold is often hidden in basements behind the back side of drywall, wallpaper, paneling or ceiling tiles, under carpet pads, inside ductwork and around pipes. Rodriguez recommends remodelers test for hidden mold before any reframing or new drywall is installed to prevent covering up any possible mold-contaminated building materials. Maintaining a healthy indoor air environment will help prevent a remediation nightmare that can cost thousands of dollars.
Visit www.MyMoldDetective.com to watch a quick how-to video and to learn how you can now test for mold like a professional.
