

Sound Building and Carpentry Practices for a Dialed-in Finished Basement.
By Mark Clement
I love the transformation from cold, dusty, concrete bunker to a warm and inviting space. A finished basement provides a sweet place for subterranean hanging out.
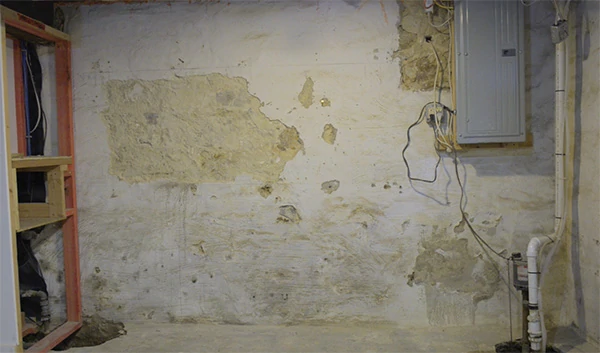
The cellar of my house had all the problems I’ve ever confronted in my below-grade renovations all wrapped up in one very challenging room. It was wet, so we put in a perimeter drain. Water made it moldy and musty. The ceiling was not just low, but it was road-mapped by every wire in the house stapled to the bottom side of every joist. The floor was uneven, and there were several noisemakers—the furnace being chief among them—surrounding the space. So, not only did we have to follow sound building practices, we needed to find a way to slow down the noise barreling into this room.
That’s a heavy lift. But how do you eat an elephant? One bite at a time.
The first noisemaker was a sump pump that ran constantly because of the water it had to manage.

The second noisemaker was a sewage-ejection pump. I love this pump. And I love that I can hear it because I know it’s working, but I don’t need to hear it at full blast so I detailed an insulation plan to quiet it to a hum.
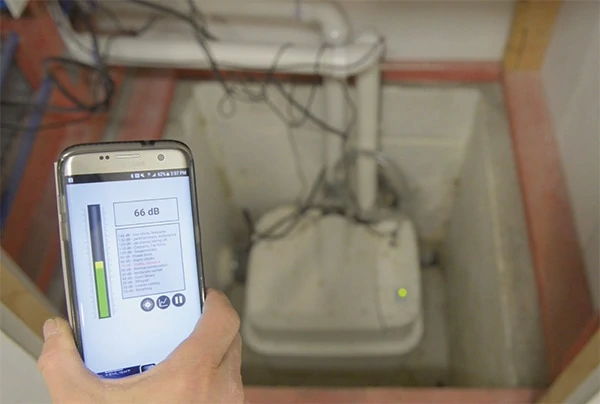
The furnace caused the rest of the noise. The furnace spinning up was like a helicopter taking off. The ducts by the unit flex (you know the sound—thump, thump!), and the ducts in the room also flex. The air seal around the metal seams isn’t perfect, so they leak too. The condensate line even gurgles. It’s like a zoo in here! But we’ve got plans for it all.
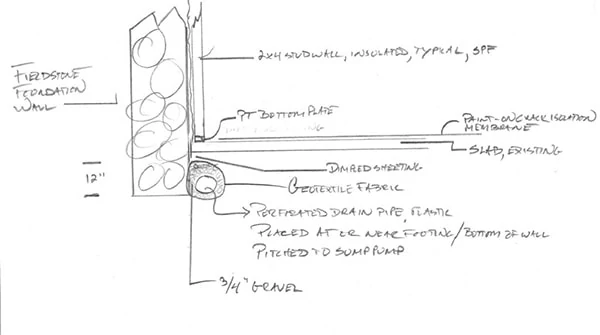
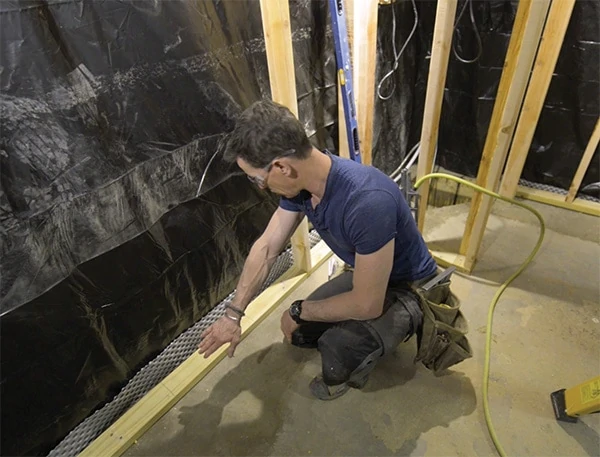
Here’s a terrible sketch of a very effective tool for water management. Hydrostatic pressure was forcing water through the floor, for heaven’s sake. There were puddles on the floor. A perimeter drain was the only choice. It’s an easy concept but a hellish amount of work. When you’ve got cubic yardage of dirt that hasn’t seen the light of day since 1903 in your living area, you know you’re at the beginning of a super long slog.
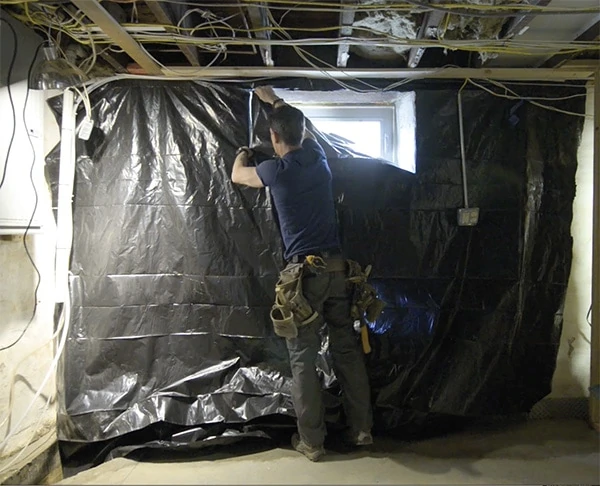
The perimeter drain acts a pressure release and gives the water just enough room (at least in my soil conditions) to move around in the dirt without forcing its way into the house. Water vapor, however, was still getting through the walls. To combat that, we hung a 6-mil plastic drape from the ceiling to the floor and integrate it with the perimeter drain.
The gray, dimpled membrane near the bottom plate lets any water coming through the wall pass between the concrete and wall and enter the perimeter drain system. It also isolates water vapor from the back side of the wall framing and insulation.
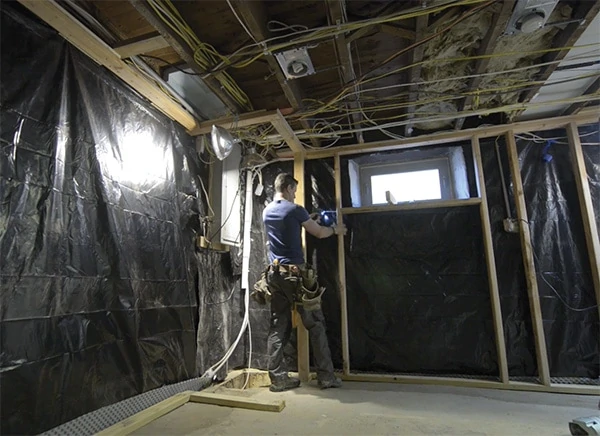
I’m a firm believer that “slow is fast” when it comes to remodeling old houses, so I frame the walls stick-by-stick.
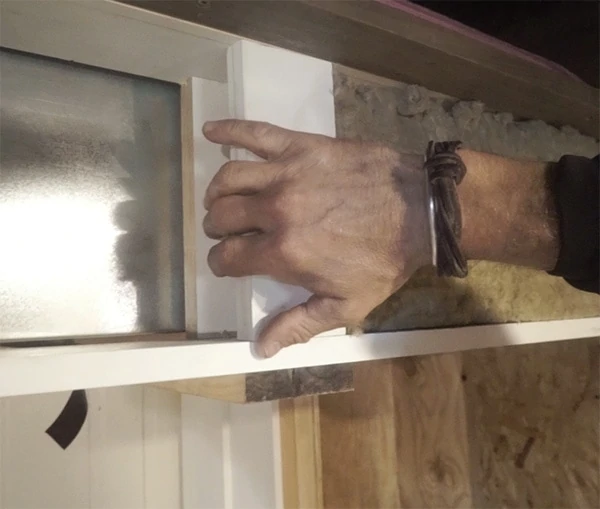
There are simply too many variables to tip up fully-framed walls or try to move quickly. I use lots of screws—Spax #10 x 3-inch multi-material screws are my favorite—because they enable me to “edit” connections. Mistakes are already inevitable due to lumpy floors, uneven framing, weird details like this flared window opening and the wiring maze overhead. I’m still mad that’s so sloppy, but it would’ve been at least a $5,000 fix, and that money wasn’t on the money tree this harvest, so…
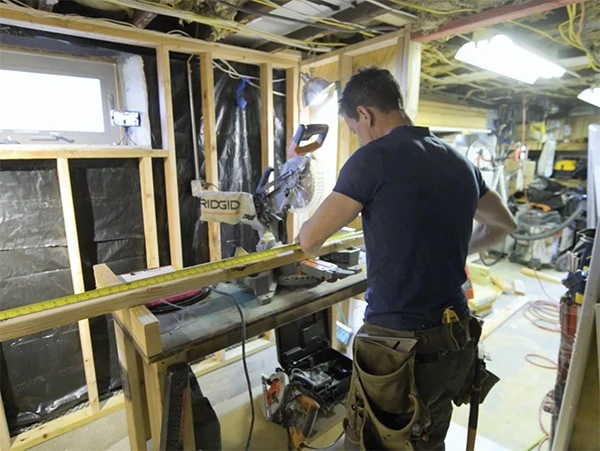
Standing up all day to work is better than working hunched over a stack of lumber with a circular saw. True story. For finished basement projects, I build a saw bench and put it on rolling casters. It becomes a place for stuff, rather than a pile and it enables me to make the lion’s share of the cuts I need to make with a miter saw. Basically, it’s a “make everything easier device.”
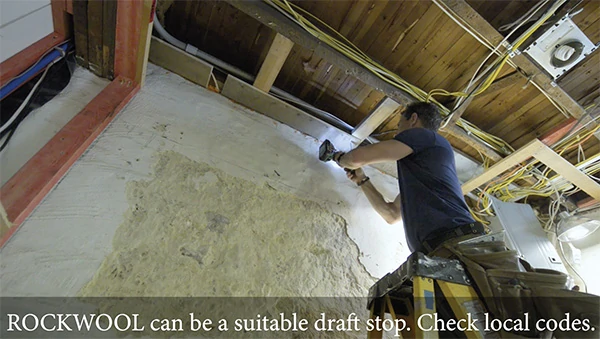
Fireblocking is kind of a pain to install, but it does an important job. Should a fire break out somehow, it’ll slow the flame’s progress between floors. It usually needs to be something like plywood or drywall. In some cases the mighty RockWool insulation is suitable—especially for filling small gaps and the vertical fireblocking that longer walls sometimes require. I call it mighty because it is. More on that later.
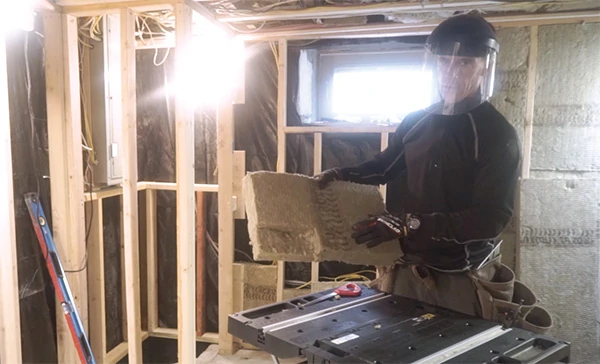
Sound travels best through solids. To hedge my bets against sound traveling through framing, I made what I call a split-stud frame for this vent. And, because RockWool has great sound deadening capability, I used it between the framing members. I haven’t heard metal crinkle or air plow through the ducts since I installed this. Does it work better than a typical ladder made from 2×4? It’s hard to say. But I know for sure the room is demonstrably quieter.
The friction fit of the RockWool also saves time and frustration. The mineral wool insulation has enough rigidity that I can slide it down a joist bay above the HVAC duct festooned with wires and other snags. I was able to slide it about three feet, fully covering the duct. I’m not sure how this would be possible with another type of insulation.
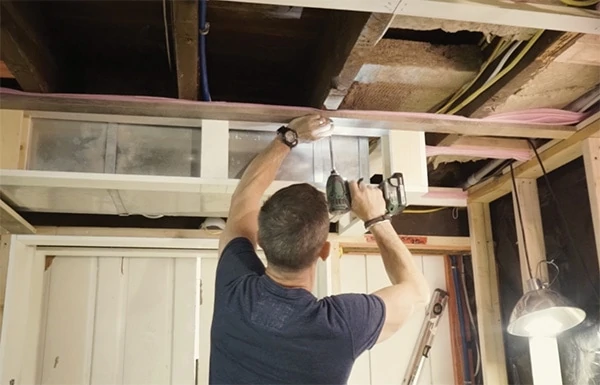
The insulation serves multiple purposes here: It insulates the duct so more air goes into rooms than leaks out through pin holes. It also helps insulate the room from noises above, and that makes me happy.
Also, I don’t need that 3M face shield to protect me from anything. The purpose this $7.99 piece of plastic-y greatness is serving is to keep airborne dust (just touching a joist releases a century of dustiness) off my face. I love this thing.
As I mentioned above, sound travels best through solids, like joists. Since there was neither room nor budget for a hat-channel or other sound-deadening techniques, I went a different route. To create a bond-break between the bottom of the joists and the top of my ceiling strapping, I put in four layers of sill sealer to team up with the RockWool in the joist bays. Because this is a jobsite not a scientific study, I can’t prove it helped, but I think it did. It certainly didn’t hurt.
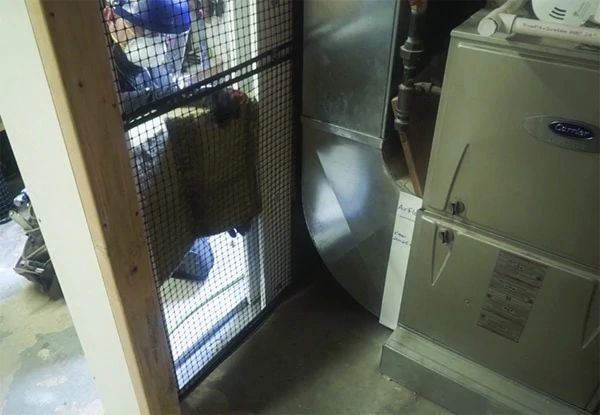
Because the furnace room is a room of sorts, I wanted to have a barrier between the insulation and the interior space. There was no room for drywall or anything, so a plastic garden fence screwed to the studs with fender washers does the trick. As for the RockWool, I chamfered each end and slotted it between the studs. The whole room was paneled on the outside with pine boards.
I even insulated the doors. And I can say with 100 percent certitude, this worked. The furnace now runs in a gentle hum with the sound flying and dying into the insulation. I feel a small triumph.
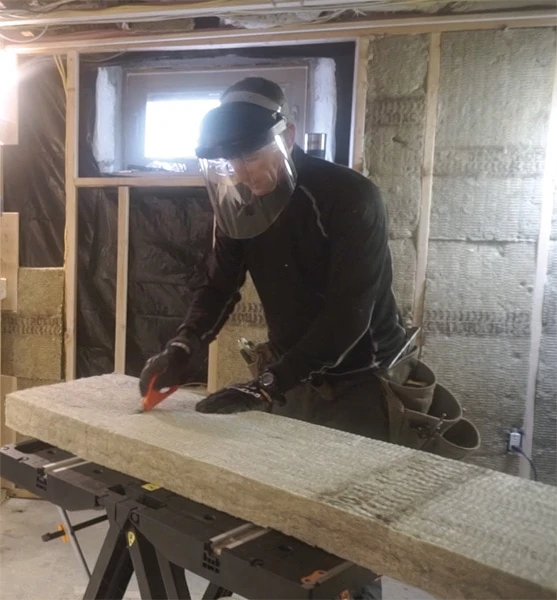
OK, so I’m nuts for RockWool. In this case, it’s notchable. I have a block I need to get behind, so instead of crushing or breaking the insulation or leaving a gap, I can simply cut out for the obstruction like notching a piece of wood, only much easier.
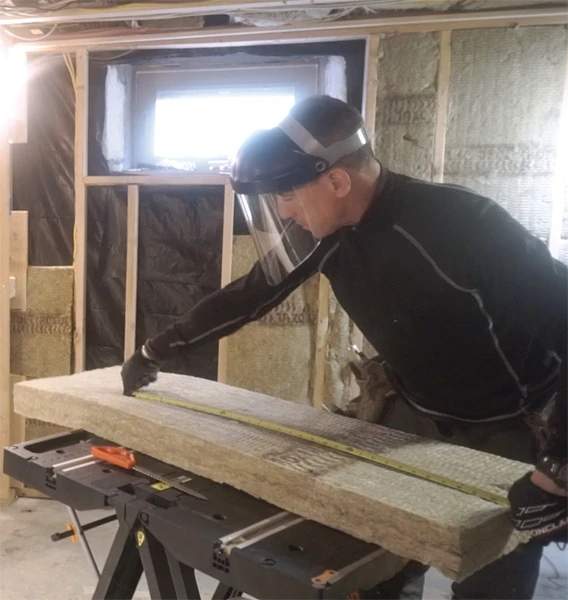
Not possible with other types of insulation, I can knick the mineral wool with my tape at whatever the measurement is. And because the pieces are short and rigid, I can work standing up. No kneeling on the floor dragging a utility knife through stuff that just doesn’t want to cut easily.
Mineral wool cuts supremely easily. No utility knife required. Rather, a long, serrated knife is the trick. RockWool makes one, or you can use the bread knife from your kitchen.
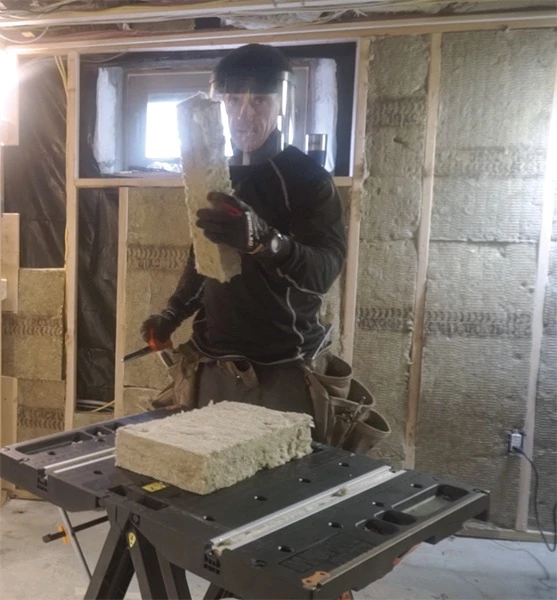
There’s almost no waste using mineral wool. Because its modular pieces and strips can be cut and used all over, and on cellars in old houses the nooks and crannies have nooks and crannies. I think this piece got slotted between the wall studs and the window wall. Maybe that’s over doing it, but it’s better than throwing it away.
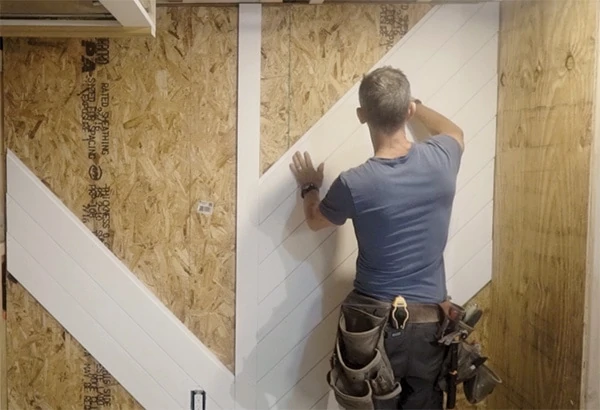
Is it even legal to have a basement reno without shiplap these days? While I went into this in more detail in the Jan-Feb 2018 issue of Extreme How-To, I bring it up here in this finished basement tips article to highlight that in this case, I chose to sheet the walls with 1/2-inch OSB prior to installing.
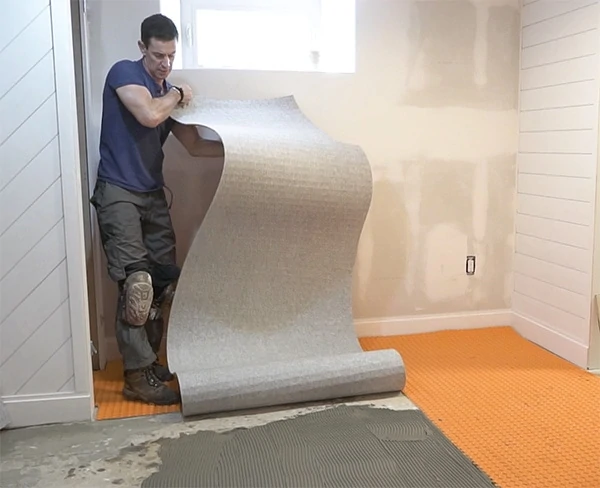
Before installing Schluter’s Ditra Heat Warm Floor System, I had my doubts. After installing it, those doubts were erased and replaced with pure joy. Because a basement floor is always cool—about 54-degrees year-round. That’s a relief in July when your feet are melting outside, but in January with the snow howling, I want my tootsies to be warm. It also helps the entire room feel more comfortable because some of the heat comes up silently from the tile and not as forced hot air or a noisy baseboard heater.
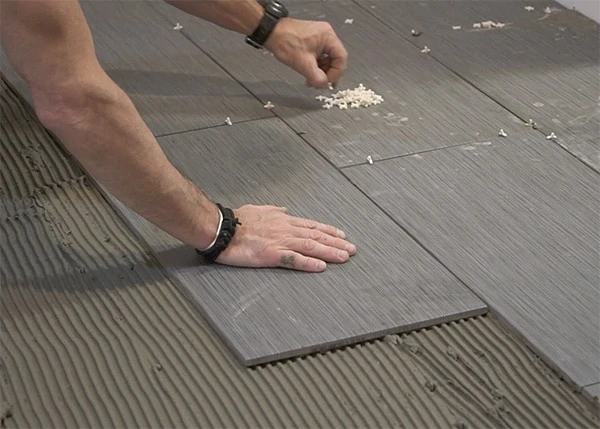
A few ground rules for tile: Comb all your thinset in the same direction. Don’t swirl it like some installers do. This enables the tile to push all the air out as you set it. And when you set it, squeeze and wiggle it into the thinset, getting it as even with the adjoining tiles as possible. The goal you’re trying to achieve is full coverage of the thinset against the back of the tile. For larger tiles like these, I also back-buttered. Unless the floor is really flat, it’s a good idea.
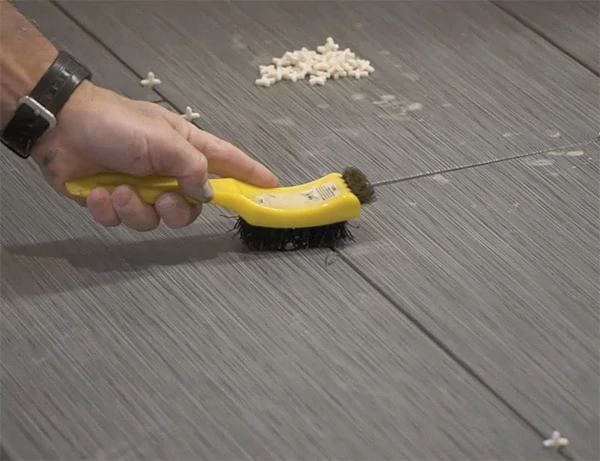
So, I wish I knew this trick many a finished basements ago. Squeeze-out of the thinset is inevitable. Keep a water bucket and brush handy. My Hyde Tools combination brush has bristles, a wire brush, and a wedge on the handle; very handy. Brush the thinset out as you go. It’s much faster than coming back the next day and gouging it out of the grout lines with a utility knife.
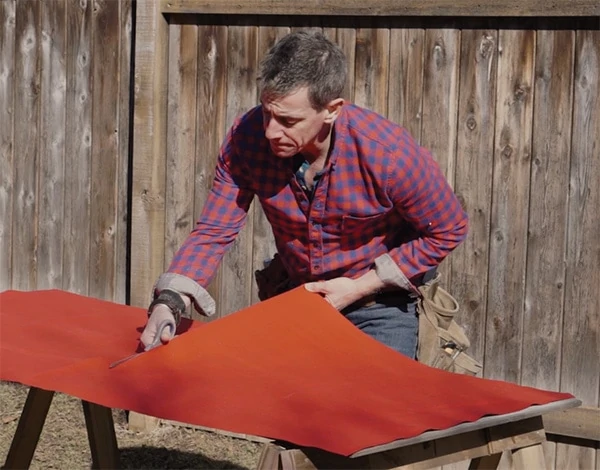
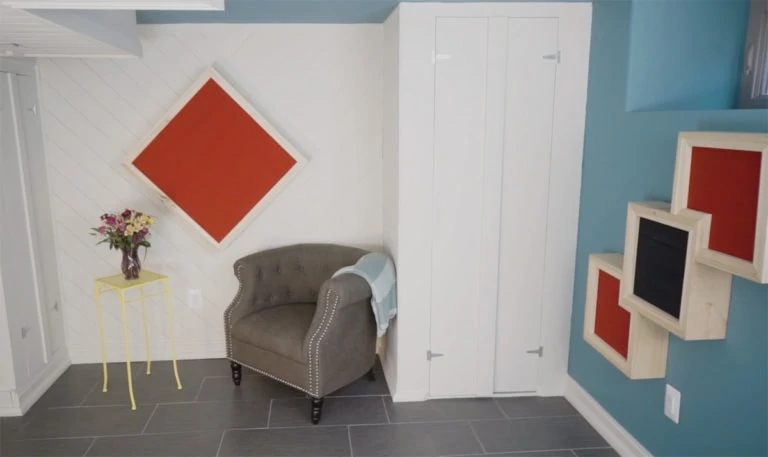
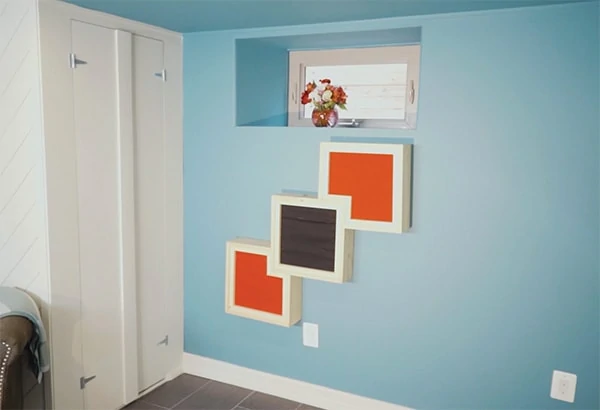
I had an idea for wall art that would also serve to slow down the sound bouncing around a room with hard walls and a tile floor. Don’t worry, I’m not quitting my day job.
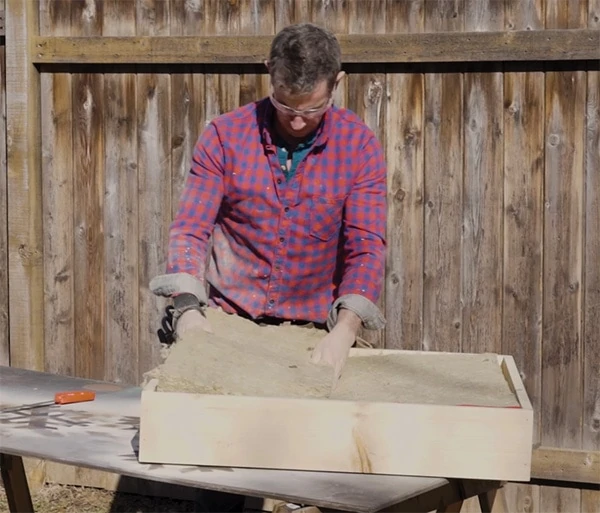
This room will be used as an office, so typing, talking, Skyping, etc. To lower reverberation, I made some wall art that’ll send out color and cool while taking in sound at the same time.
I wish I steamed the fabric. It’s cotton duck I got at one of those stores that sells such things, but I love the way these turned out. For more details on the wall art, check out the video I made at MyFixItUpLife.com.
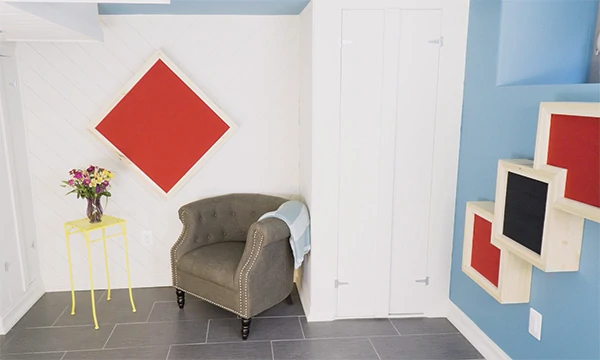
It’s easy to overburden a small room with design elements. However, between the shiplap, flat panel doors, tile and ceiling paint, I think it all hangs together. I know for certain it is calmer and quieter and, obviously, a million percent cleaner.
I love it when rough gets refined. I think that’s the essence of what we do.
