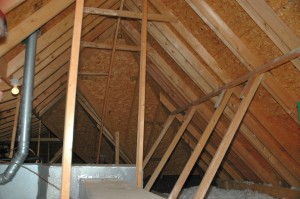
Yesterday, we installed an Enerflex reflective barrier in the attic of a local house. Our goal was to reflect the heat build occurring from the sun heating up the surface of the roof and reflecting the heat up and out of the attic, lowering air conditioning bills in the summer. While installing the product we could certainly feel the heat moving from low to high by placing our hand between the roof line and the Enerflex sheets and panels. The installation was very simple and this is an easy DIY project if your attic has easy access and there are walkways already in place. In a tight attic, your biggest obstacle will be working around the HVAC, drain vents and trying not to step through the ceiling.
The Enerflex panels were easily installed in part due to the springy metal rods that hold the panels in place when they are released. The panels come in 16 and 24″ widths to fit into standard spacings found between rafters. You will also need to pick up a roll of the product if you have spacing different from the standard or if you have a funky roof design with combinations of hip/gable and so forth.
A homeowner could save up to 10 percent on cooling costs which in the South is a substantial savings. Plan on doing the project in cool weather as attics heat up in the sunlight. Also, while you are in the attic check the depth and condition of the insulation there. For more information on Enerflex radiant barriers check out its web site, http://www.ufpi.com/product/enerflex/index.htm.
I spoke with Lowe’s this week and the recommended r-value for attics is at least R-30. Johns-Manville has formaldehyde free insulation and can be added on top of existing insulation to bring your attic up to the proper R value. Be sure and leave space around light fixtures and other areas that require ventilation. Consult your local building codes for further guidance.


