

A DIY Summertime Welding Project
By Blair Weilnau
First-time welder? No problem. With some ambition, inspiration and a Forney Easy Weld machine you can create your next backyard project. Having a fire pit, chiminea, smoker and wood-fired pizza oven can take up a lot of space on your back patio. Why not combine all of them and create a chiminea pizza cooker? Not only will it cook up delicious pizza, but sitting next to the fire and roasting marshmallows will provide some warmth on those cool summer nights.
Tools and Materials:
- Forney Easy Weld 125 FC or 140 FC-i
- Large to medium compressor tank
- 4′ x 8′ expanded metal sheet
- 1/8″ x 2″ x 6′ flat stock
- 4 metal hinges
- 2′ of 2″ round tubing (for the feet)
- Angle grinder with cut off wheels and flap discs
- 3 toggle pull latches
- 2′ of 6″ or 8″ diameter pipe (for the chimney)
- 2′ of 1/2″ angle iron
- 1′ x 1′, 1/4″ steel plate (for the chimney cover)
- Magnets
- Chalk
PROJECT PREP
Wearing the proper personal protective equipment is essential when metalworking and welding. Always remember to wear a flame-resistant welding jacket or apron and sleeves, welding gloves, safety glasses and a welding helmet. Arc flash and sparks can be detrimental, so protecting yourself is crucial.
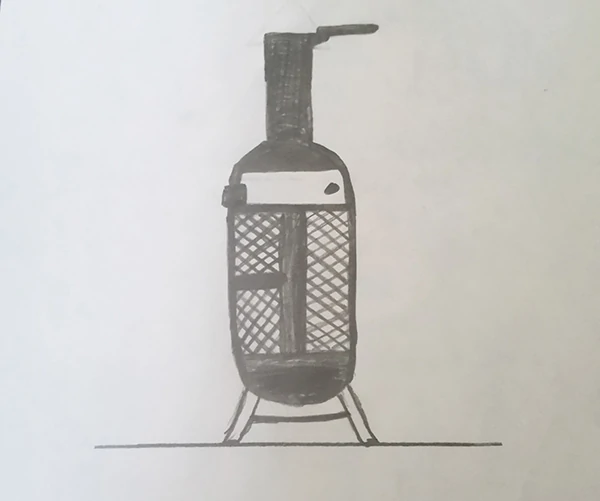
Sketch out your idea on paper so you have an idea of the design you’re looking for. You can make this as simple or complex as needed. We knew we wanted a taller tank to fit that chiminea look, but something slim that wouldn’t take up much space on a patio.
We found an old air compressor tank to fit this project, but you can also use a large propane tank that fits your desired size. Clean the tank with soap and water to ensure nothing is left inside. Mark up your design on the tank using chalk. We marked out a lower fire door, two back open sides, and a top door for the pizza.
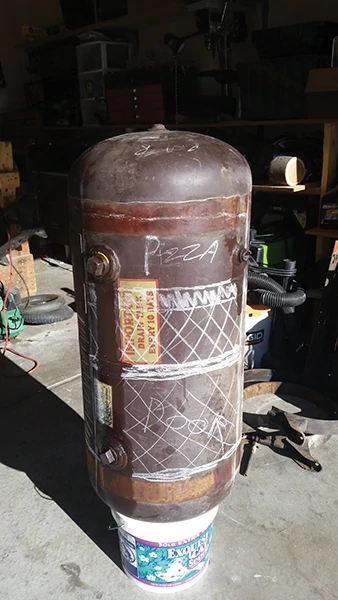
Pro Tip: If the base of your tank is round and cannot stand on its own, use a bucket to help prop it up.
STEP BY STEP ASSEMBLY
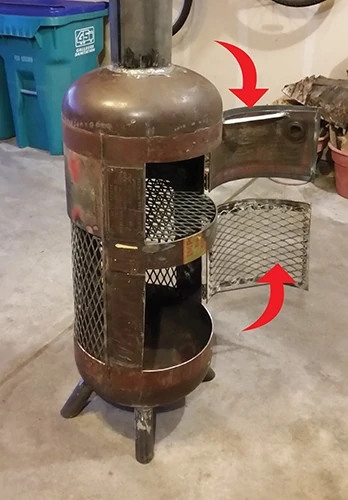
Use a cutting wheel to cut out the lower fire door first. Then cut out the two back panels. Make sure the two back open sides are below the pizza door to ensure proper heating of the pizza chamber. Next, cut the pizza door.
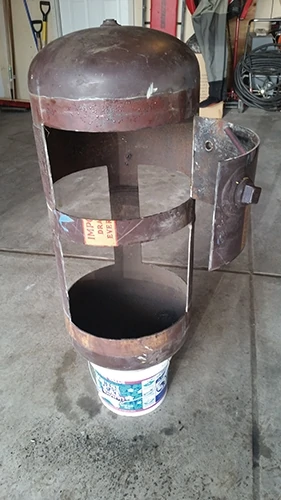
Once both pizza and lower fire doors are cut, weld hinges from the door to the compressor tank. Both doors get two hinges, one on the top of the door and one on the bottom. Next, cut expanded metal to cover the back open sides and weld this to the compressor tank. This ensures the fire is contained but heat can get out and oxygen can get in.
Cut 1/2-in. angle iron to weld to the back of the pizza door to prevent warping. On the lower fire door, cut out the middle section and replace it with expanded metal. Weld the expanded metal, as well as a 1/2-in. piece of angle iron to the back of the door.
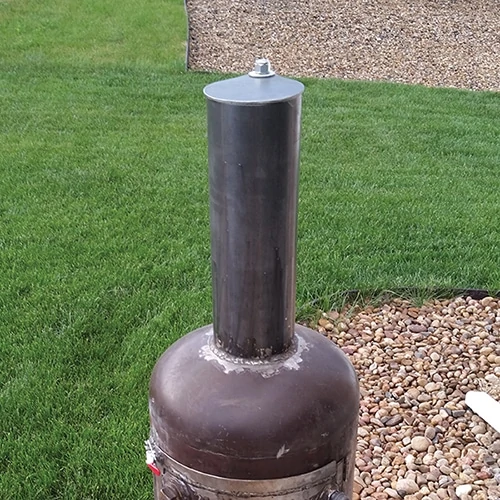
Next, create a chimney. Begin by cutting out the top center of the tank. Make sure the cut is directly in the center. Cut the chimney proportionate to your compressor tank size. Weld your 6- to 8-in. diameter pipe to the compressor tank, both on the inside and outside to create a stronger weld.
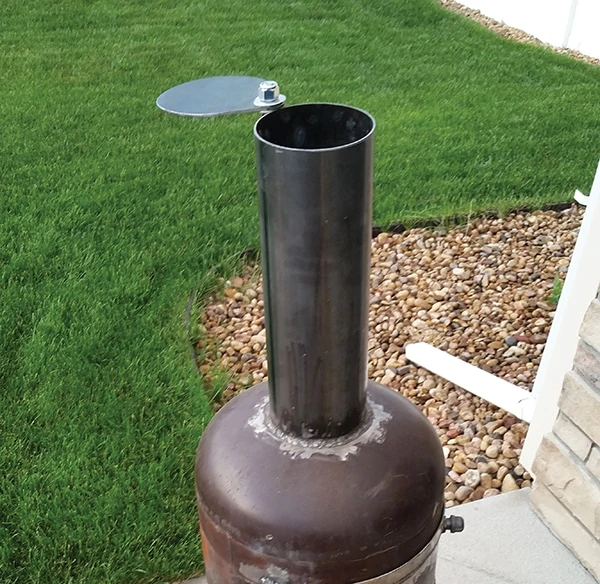
Make a cap for the top of the chimney that will be used to protect it when not in use (optional). The cap will be made from the 1- by-1-ft. steel plate. Cut the steel plate in a tear drop shape to the diameter of the chimney. The teardrop point will be used to attach the hardware to the chimney to create a swivel effect. Close the cap when not in use to protect it from the weather and swivel it open when in use.
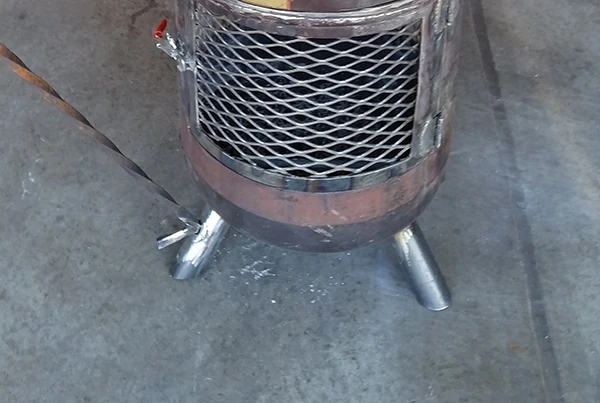
The next step is to build the legs. Cut round tubing to desired length. Make sure all four legs are equal and level, and then tack weld them into place. Once the stability is on point, complete the welds.
Add the finishing trim on the pizza door. Use the 1/8-in. plate, 2-in. wide metal strip and cut to appropriate size to fit the exterior pizza door. Weld these strips to every side of the pizza door except the hinge side. On the inside of the compressor tank, weld a 1/8-in. plate, 2-in. wide metal strip to the hinge side only.
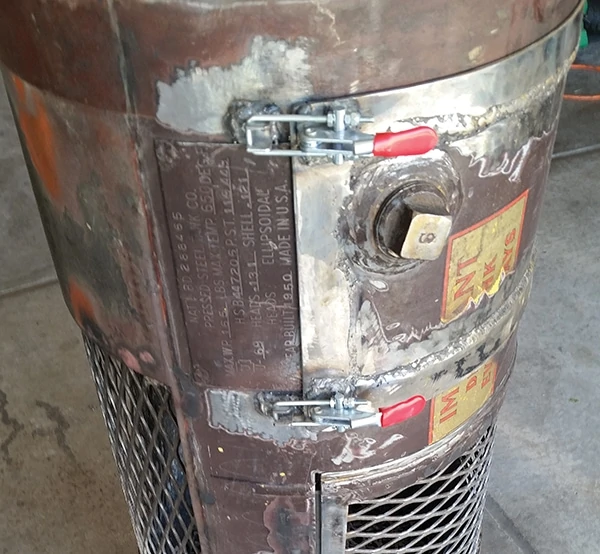
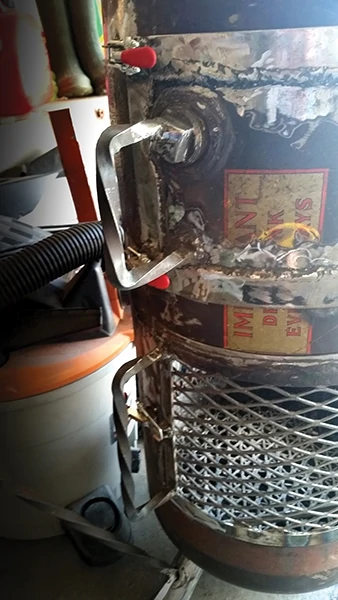
Attach the toggle pull latches to the door. Two will be used for the pizza chamber and one for the lower fire door.
Make handles for the pizza door and the fire door.
To create the pizza shelf, weld angle iron in small 1- to 2-in. pieces around the inside of the compressor tank. Cut expanded metal to the diameter of the inner compressor tank to rest on top of the angle-iron pieces. Tack weld expanded metal to the angle iron.
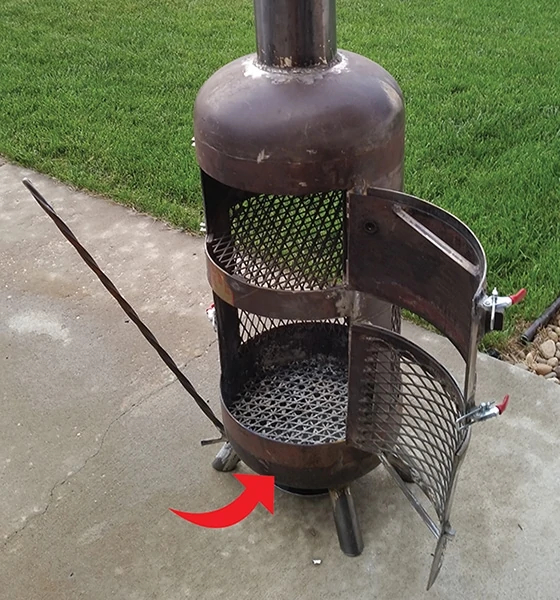
Create a fire grate similar to the pizza shelf on the bottom of the compressor tank for the wood to sit on.
If you realize your chiminea pizza oven needs more heat, create back plates using the original cut-outs from the air compressor (optional).
Lastly, drill holes in the bottom of the compressor tank below the fire grate so oxygen can get to the fire.
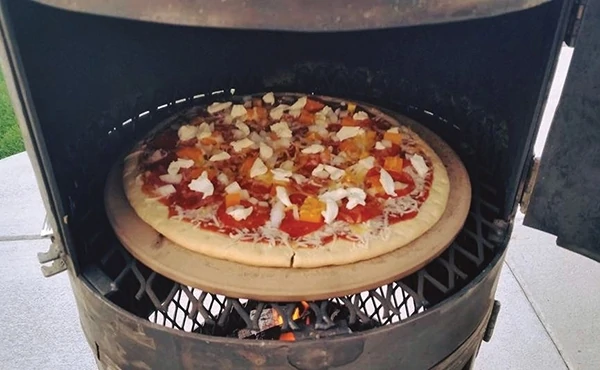
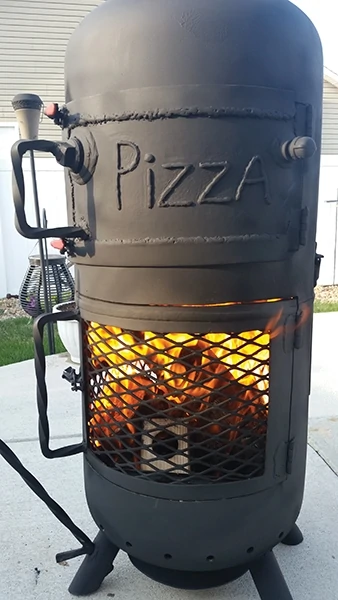
You can cook pizza, smoke burgers or roast marshmallows this summer with your very own chiminea pizza cooker! Make the chiminea cooker your own and customize it to fit your needs. We powder-coated it to protect it from the weather, but you can use high-temperature paint or if you like the rusty look, you can leave it as is.
Editor’s Note: Blair Weilnau is the Social Media Manager at Forney Industries, one of America’s most established family owned welding and metalworking product companies. For more information, visit www.forneyind.com.
