Rigid plastic footing forms are new alternatives to conventional forming methods for concrete pier footings. These types of piers are quicker and less expensive to install. The installation for the rigid plastic footing forms is similar to that for conventionally wooden formed footings, but with fewer steps and without the labor and resources necessary to construct wooden form. Typically, modifications to the form itself are made first, such as adjusting the top opening size to match the diameter of the construction tube for the connected pier and then attaching the construction tube to the footing form with screws.
Excavation to below the frost line and preparation of the area for the footing which must be placed on level, undisturbed soil or on 4″ to 6″ of compacted crushed stone or gravel which is then followed by placement and leveling of the footing form in the excavation. The usual procedure to backfill (without mechanical compaction / tamping) is completed before the concrete is poured. Another plastic footing form when inverted can function as a funnel for the pour. Once the pour is complete and the funnel is removed, all potential unfinished settling and air pockets are removed with tamping or vibration and additional concrete, as necessary. Place three to four #4 or #5 rebar in the construction tube extending approximately 6 in. below the bottom ring of the footing form. The top surface may be trowel finished. If an anchor bolt is required, it is inserted at this last stage of installation. Ridge forms used below grade stay in place.
Here are some useful tips to ensure your footings are installed properly and the integrity of your project is maintained.
- You should always make sure a qualified engineer has deigned your footing forms and that they have been tested by an accredited organization.
- Select a footing form that can carry the weight of your new construction and has met the proper building codes. Select a footing form made of environmentally friendly, study materials. Ensure you are placing the footing form on solid ground. The more solid the ground, the less likely movement will occur.
- Install your footings 4 to 6 inches below the frost line to avoid potential movement. If you are in an area without frost, then the form should be backfilled 2 feet to hold it in place when it is being filled with concrete.
- Should rebar be required, pour concrete into the system first. Insert three or four No. 4 or 5 rebar rods into the tube. To determine the length of rebar, measure the distance from the top of the tube to the air holes located on the footing form before you place the system in the excavation and backfill. Purchase the amount of concrete stated on the form label. You will use all of it.
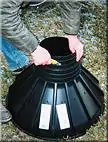
- Use an inverted footing form as a funnel to pour the concrete into the system.
- For a marine application, such as constructing a wharf, pour the concrete into the footing and tube on shore and have an excavator set them in place in the water. The other option will involve using a diver and a pumper truck.
- Footing forms should always be used when installing footings, as they provide added stability, strength and safety to your new construction.
- Don’t risk having to redo the job; do it right the first time.

Above-Ground Installation
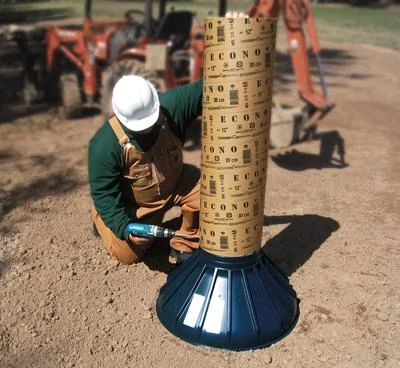
For above ground applications simply attach the required length of construction tube to the footing form with a minimum of four screws. Drill 3/8″ (10mm) holes on a 45 degree angle in the footing form as indicated by the markings on the flange area at each rib location to accept a minimum of 12″ (30cm) spikes. Place the footing forms on undisturbed soil and drive spikes at a 45 degree angle inward so as to prevent the footing form from rising when concrete is being poured. Use another footing form turned upside down as a funnel for pouring concrete into the tube.
- Excess rings should be cut off at the top of the ring being used and removed.
- Screw required length of construction tube to the footing form with four 1″ screws.
- Drill 3/8 (10 mm) holes on a 45 degree angle in the footing form as indicated by the markings on the flange area at each rib location to accept 12″ (300 mm) spikes. Drive 12″ (300 mm) spikes in at a 45 degree angle to prevent the footing form from rising.
- Pour concrete using footing form inverted on top of the construction tube as a funnel.


Step 1 Step 2 Step 3 Step 4
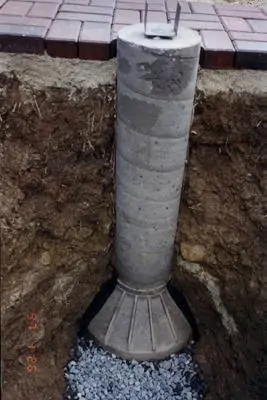
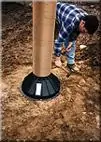
Below Grade Installation
For below grade applications simply attach the footing form to the construction tube with a minimum of four screws, place in the ground on top of undisturbed soil, or on 4″ to 6″ of compacted crushed stone or gravel, level, plumb and backfill. Use another footing form turned upside down as a funnel for pouring concrete into the tube.
- Dig hole.
- Base should be placed on undisturbed soil or 4″ – 6″ of compacted crushed stone or gravel.
- Excess rings should be cut off at the top of the ring being used and removed.
- Screw required length of construction tube to the footing form with four 1″ screws.
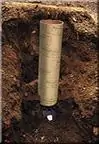
- Install in hole.
- Plumb and level. The tube must be braced if it extends 3 ft. or more above grade.
- If necessary, have inspected by building inspector before backfilling.
- Backfill. Avoid dropping or placing heavy rocks or heavy wet soil on the footing form.
- Pour concrete using footing form inverted on top of the construction tube as a funnel.
Step 5 Step 6 Step 7 Step 8


For more extensive installation instructions for concrete footing forms, visit www.bigfootsystems.com.