

My wife and I recently bought a home built with an unfinished basement and a concrete floor that we decided to turn into a welcoming space our kids could use as a playroom. They are still very young and spend a lot of time playing on the floor. We decided to install a lightweight rollout in-floor electric radiant heat system below a new floating floor as a way to supplement the natural warmth in the room and make it a cozy space for them to play. I did most of the work myself.
The first thing I did is cover the concrete floor with a roll-out vapor barrier. I then built a plywood subfloor.
Here’s how I installed the radiant system.
Step by Step
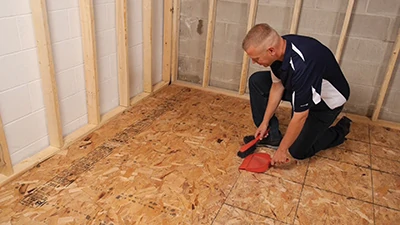
Step 1: Sweep the subfloor to remove all dust, dirt, stray nails and screws and other debris to have a clean working surface. Leave nothing behind to telegraph through the underlayment or finished flooring.
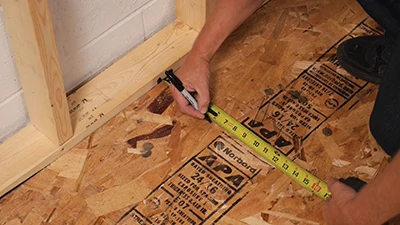
Step 2: Draw a sketch of the intended layout of the radiant heat system, including the intended locations of the floor sensor, the thermostat and the junction box, making sure the factory-attached wires at the ends of the radiant mats are on the same side of the room as the junction box.
Be careful to follow instructions. The system I used requires at least 6 inches left between the edges of the closest mats and the wall to have enough space to run the wires to the junction box.
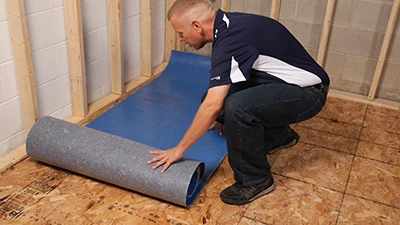
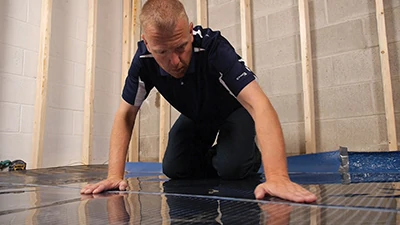
Step 3: Here I rolled out a radiant-heat-ready underlayment called QuietWalk from MP Global Products, which covered the entire floor area. The underlayment includes a vapor barrier to help manage moisture above the subfloor and below the finished floor. It also cushions the floor to absorb sound and minimize the clicking noises from walking on a floating floor, and has an R-value of 0.5, which will help keep the basement warmer in the winter.
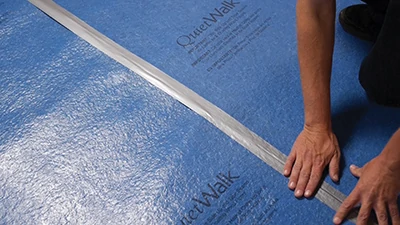
Step 4: The next step is to butt the seams of the underlayment, using duct tape to hold them in place. This underlayment has good compression resistance so it did not compress under my knees while I was taping.
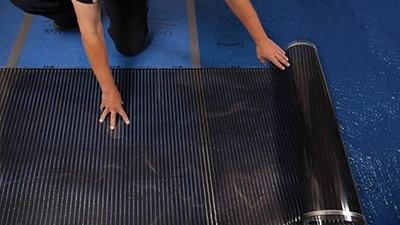
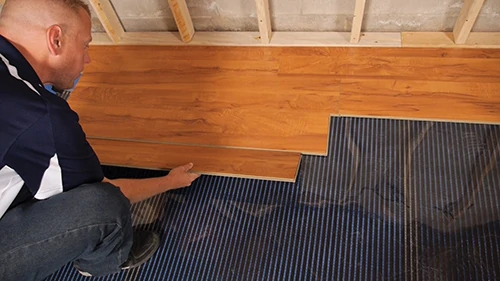
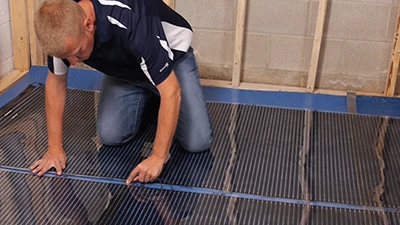
Step 5: I then rolled out the panels of QuietWarmth Radiant Floor Heating. I fit them to the layout of the room by cutting with scissors along the dashed lines between the radiant ink elements. I taped and insulated the cut edges with the included Kapton insulating disks. The panels come in several width/length configurations, so it was easy to fit the layout of the basement with minimal cutting.
I chose Perfectly Warm Radiant Heat Film because it was designed specifically for floating engineered wood and laminate floors (and some floating tile floors) and can be installed over underlayment. The ultra-thin wireless filament is just 0.016-in. thick.
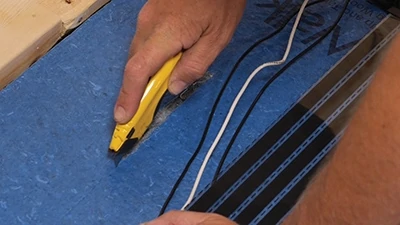
Step 6: The wires for the elements are factory-attached on one end, which is opposite the end that can be cut for sizing. Here I used my utility knife to cut a thin shallow slot in the underlayment to recess the electric wires, which will keep the floor free of high points.
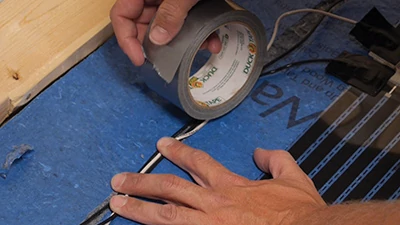
Step 7: Now it’s time to recess the wires and duct-tape them down into place so they don’t move.
Step 8: Roll out the second panel, abutting the first (leaving no gap).
Step 9: Next, I installed the in-floor sensor, which monitors the temperature of the floor (not the room) and aims for a setting just a few degrees above room temperature. Then, I ran the floor sensor wire in the same channel as the lead wires and duct-taped them down.
After some more adjustments, I ran all the lead wires and the floor sensor wire to a junction box on the wall, and from there I ran a set of wires to the thermostat on the wall.
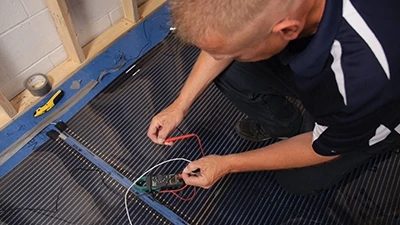
Step 10: The next step is to check all electrical connections with an ohm-meter to make sure the connections are proper to this point. One nifty feature of this system is that the heating film strips are laid out in parallel on the pad, so if one strip becomes compromised or damaged, the rest of the strips continue to heat.
At that point, after the check with the ohm-meter, my electrician wired the thermostat to the service panel for the house wiring, as per instruction in the installation manual that came with the radiant heat system.
Step 11: I was the ready to install a wood-look floating floor over the electric radiant heat panels. The radiant system, which features gradual supplemental warmth from low-wattage resistance heating of the ultra-thin, flexible radiant heat film, uses just 12 watts per square foot and conforms to the warranty requirements of my floating floor (and most other floating floors as well).
Kids and the family dog love playing on the floor, which, by the way, feels really good when I walk on it in bare feet.
Editor’s Note: MP Global Products L.L.C. an innovator and leader in the manufacture of made-in-America eco-friendly fiber acoustic underlayments and in-floor electric radiant heat systems for floating floors and for tile floors. Learn more about the products at www.quietwalk.com, www.quietwarmth.com or call 888-379-9695.
