


By Mark & Theresa Clement
If the value of a project is measured in how often you use it, our compost bin is well near the top of the list. If measured like the Olympics, it’d consistently be on the medal stand.
It’s a project that you can have up and running in a day, turning coffee grinds and toilet paper rolls into terrific topsoil.
Materials
We used twelve 2x6x8 Western Red Cedar boards. The material is naturally rot-resistant and chemical-free. Plus, it looks great and stays looking great for years. We fastened everything together with coated deck screws.
Cut the Pieces
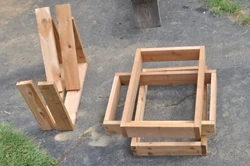
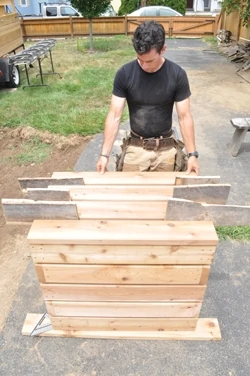
Our compost bin is five individual rectangular boxes stacked together with a 3/4-in. gap in between. Each box has an outside dimension of 36 by 24 inches. To make that work, cut the front and back pieces 36 inches and the side pieces 21 inches. We added a detail that makes our bin less “boxy” by alternating each box’s end-grain, lending a pleasing “box-joint” look to the corners.

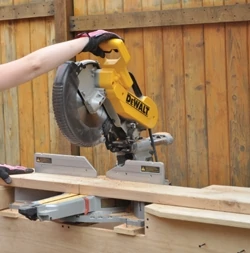
Next, cut the staves. The staves are the internal vertical supports that hold the individual boxes together. We ripped a 2X6 in half on the table saw, then cut them to length at 30-3/4 inches.
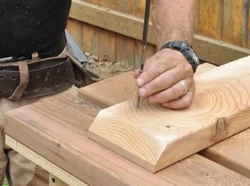
The top is four pieces of 2X6 at 36 inches. It’s held together by two 2X6 struts cut at 20-3/4 inches. We also beveled the ends of the struts so the lid sits inside the bin a little easier during use.
Assemble the Pieces
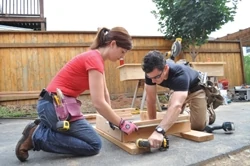
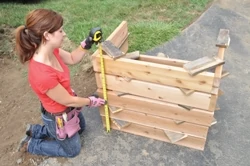
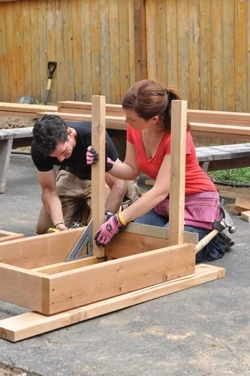
Assemble the boxes and, before driving all the screws tight, make sure the box is as square as possible then send the screws home. Next, fasten a stave in each corner as square as possible to the body of your bottom box.
Add the next box. Use 1-by spacers on each corner to gauge accurate spacing and fasten. Keep adding boxes and spacers.
Note: To access the compost, we fastened the bottom two boards from the face of the bin. That way we can take them off and dig out from below, where the best compost will typically be.
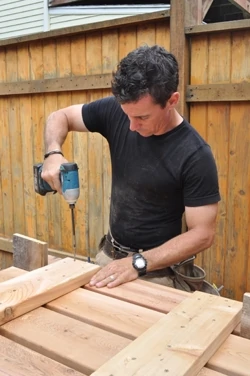
Assemble the lid. Again, use spacers. Hold it all together with the 2×6 struts fastened to the underside of the lid. Be careful not to overdrive the screws so they poke through the finished side. We used 2-1/2-in. screws here.
In hot weather, the bin can give off a noticeable aroma when you’re near it. So, find a spot in a remote corner of the yard, set the box level—and happy composting.
Editor’s Note: Mark & Theresa Clement host MyFixitUpLife.
Side Note 1
Delivering More than Dirt
Composting as a household routine—like laundry or lawn mowing—is often viewed as a fringe movement: something that seems cool from a distance or practical for farmers, but not suburbanites.
The reality, for us anyway, is that composting makes simple sense for regular people. It takes no more time that taking out the trash, which we all do anyway.
We’re trying to build into our kids’ source code that even though the world seems automatic, it isn’t. We call this policy “chicken wasn’t born at the grocery store.” Everything you touch, buy, or use has to be invented and made. It takes persistence, effort, and process— just like turning banana peels into black soil. We teach that the more garbage we divert from the waste stream—read: diesel-belching garbage truck—the gentler our impact is on the world. Our family diverts somewhere around 500 pounds of material annually. If just everyone on our street did it we would divert 10,000 pounds of uneaten salad and waffles from having to be hauled and processed.
Plus, as we try and overwrite the “no effort required” world, we’re sneaking basic science and civics lessons into their everyday lives: Bananas and waffles break down naturally. The world isn’t anybody’s garbage dump. And, doing something for the environment is important.
We actually use the compost sometimes, mostly for lawn repairs and soil amendments to flower beds. It works, plain and simple, and creates valuable nutrients for gardeners.
Side Note 2
What We Compost
Basically, if it used to be a plant (plus a few other things) it can be composted. The vast majority of what goes in our bin is stuff we consume every day:
- Eggshells
- Coffee Filters/Grounds
- Non-protein, un-eaten food (salad, peels, rinds, bread, etc.)
- Paper towels
- Paper board like paper towel rolls
- Plant cuttings
