

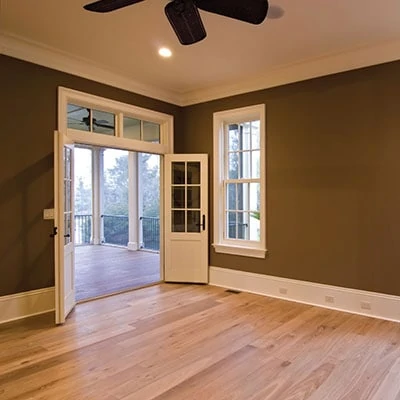
Get-started Advice for First-timers and Idiot-proofing for Pros.
By Mark Clement
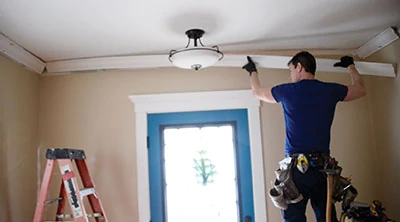
I adore crown molding. I like installing it, too. I’ve also been lucky enough to share demonstrations all over the country on installing crown and other trim and have noticed that people have almost the exact same questions everywhere I go.
The first assumption many people make is that it’s ‘easy.’ Yeah. No. If you bite on that hook, you’re gonna be another fish flappin’ on the DIY boat to Why-doesn’t-this-work-ville.
See, the thing about crown is that unlike flat stock, it needs to be addressed in several planes of space throughout the entire process, including upside down.
It’s enough to confuse anybody. And while I know how to do it, which is what this article is about, I don’t do it every day so I get confused, too. To keep things as simple as possible, I’ve made up a couple of idiot-proof practices that work for me and that I can share with you. (My personal idiocy, I’ll keep to myself.)
This show-and-share, as they say in my son’s classroom, will help you earn gold stars for cutting and joining crown’s inside corners—the most befuddling part of the process.

First Things First
There are a few skills you need to have before you try to whack out a primo, non-caulk-caked crown job. Namely, you need to be able to cut and measure accurately. Very accurately. And you have to be a king of copes.
The other thing I like is a smart tool setup. Crown molding requires precision and concentration to do well, and one place to take your game up a notch is with your saw and material support. As you dial in your rig you can also practice before installing anything.
Tool Tips
I’m not saying my setup is the best for crown, but it works for me. The main thing is this: Infeed and outfeed support for the molding on either side of your saw must be ‘in plane’ with your saw deck. The second thing is to attach a cleat to hold the crown in position while cutting. An accurate saw kinda helps, too. A lot. And a sharp blade is a thing of beauty.
You’ll also need a coping saw, clamps, a pneumatic nailer (I like a 15-ga. angled finish nailer for this), and the ability to sharpen a pencil. Plus, you’ll need a bunch of other stuff I won’t list because I’m guessing you have tools if you’re reading this.
My cut station, which I make myself, is my center-of-universe for crown because I can do everything I need to do to the molding in the same place.
First thing I do on any crown project is buy an extra piece or two. I use one as a safety in case I screw up. I cut pieces from the other to set up the saw and lay out the room.

Start by cutting a piece of crown about 30 inches long.
This is our ‘test piece’, one of two we’ll use. Make sure it’s nice and straight. Then, flip it upside down and use it to lay out the cleat location on your saw.

On the back of the molding are two flat surfaces. Get each one dead flat against the saw deck and saw fence. Once in place, draw a line to mark the front of the molding on the saw deck.
So far so good? Next, take a straight 1-by and place its rear edge along the line. I use a piece about 5-feet long, which gives me about 30-inches on either side of the blade to support the work. Next, secure it in position. I hold mine down with screws. The 1-by is ‘sacrificial’ so I cut through it as I cut the crown. The screws on either side hold it in place.
This may seem like a crap-load of work, but the time and aggravation it saves later is titanic.
Get Oriented
I don’t hang crown molding all the time so I get out of practice. And all the mental gymnastics are, well, gymnastics. So the next step is getting control of the floor routine.
I literally walk into the room, hold my test piece in the air right side up. (‘Right side up’ almost always has the detail on the bottom, with big swoops on top.) You can install crown upside down using the techniques here, but it is technically still upside down.
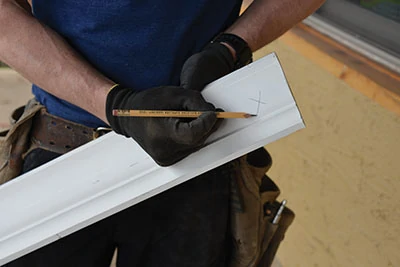
Next, I make an X on the bottom-right of my piece. When it’s upside down in the saw, the left is right and right is left. If you’ve read about “upside down and backwards,” this is the backwards they’re talking about; I could never understand that.
Since I barely understood what I just typed, the X helps keep me oriented. We cut that next.
Cope and Test
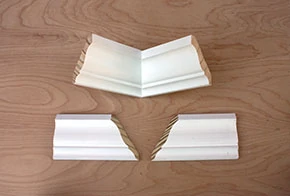
At the saw, the molding is cut upside down with the little swoops on the fence, the big swirls on the deck. This is called cutting in the ‘nested’ position; now you, too, are a tool dweeb like me. This also means the X on the right in real life is on the left as you cut. Turn your saw to 45-right and cut a miter off the end of the piece.
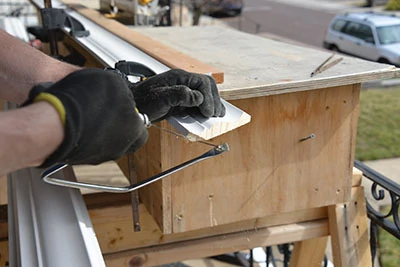
Next, with the coping saw, cut a cope. If you’re using pre-primed molding, a cope removes all the un-primed wood exposed by the cut. The way I cut the cope is by first aligning my coping saw with the miter so they form an X. To cut into all the nooks and crannies, you have to cut from various approaches, removing the saw from the work and starting again at a new angle as the saw bottoms out. When you’re done, all that remains is the leading edge of the primed wood. It only takes a minute or two once you get the hang of it.
Important note: There is only one piece you cut off squarely when coping crown: The little triangle tip at the bottom of the piece. The rest you cut out. This is an important distinction. You’ll know if you miss it.
Since it can be difficult to understand the technique by reading, the next step is to practice coping. Plan to do 10 of them until you feel yourself becoming a cope whisperer.
To make it easier, I clamp the piece onto my table (two clamps work better than one) and get to work. Then, I cut a second test piece and use it to see how good (or bad) my cope is. Sometimes you have to clean out a little more behind the cut. The saw can work for that. For getting into really tight areas I use a small triangular shaped file and a couple of chainsaw sharpening files.
One other thing: Know which way the teeth face on the coping saw can make life easier. For example, I point the teeth toward me, which causes the saw to cut on the pull-stroke, which I prefer.
Finally, on your real pieces, pre-cut all your copes. So for a rectangular room, cut four copes on four full-length pieces.
Test and measure
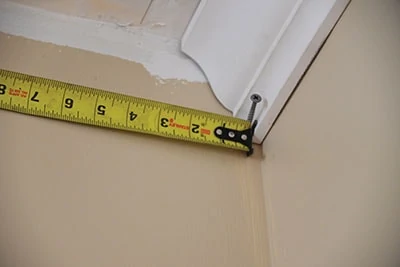
Grab your two test pieces and head into the room. Put them up in a corner and see how they fit together on the wall. Once they fit, mark lines top and bottom.
Do this in each corner. Your full-length pieces probably won’t hit these lines exactly, but they should be close. It’s a reference point.
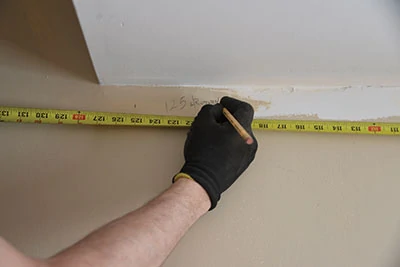
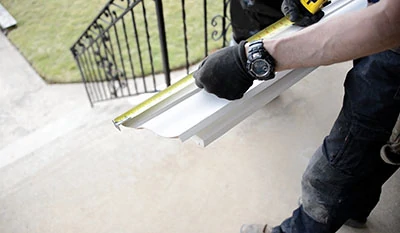
Pro trim guys measure this differently than I do. They usually measure the whole room and make their cuts all at once. I need to go slower because I don’t do it enough. So, to guard against my own ineptitude, I fasten a dead-end test piece to the wall on my layout lines made earlier. I then measure to it.
Did I also mention I do this alone? Instead of a helper, I simply use a few screws along the wall to support my tape. I pinch the tape to the test piece with one, then run one or two more along the wall to support the tape measure blade as I extend it out to the opposite corner.
You can measure from the test piece to the corner, as shown here. Or, measure from the corner to the test piece. It’s actually easier to measure to the test piece because you can roll the tape underneath it and see the measurement a little easier. (I brain-cramped that on the job.)
Cut and Nail
Now, to slam some pieces in place.
With measurement in hand, I go to the saw, hurl a piece on my cleat. Then I hook my tape on the bottom of the cope (where we cut the triangle off earlier) and simply measure to the dead-end. From here forward in our hypothetical rectangle room, I’m only cutting dead-end, square cuts. Isn’t that easier than agonizing over matching up TWO miters at every corner, then nailing them?
Note that even 1/16-inch off in crown molding is a lot. And, 1/8-inch is a mile. Even caulk and paint (which makes a carpenter what he ain’t), doesn’t do enough for me. Go easy, use a sharp pencil, and when in doubt, cut it long and see if the piece fits.
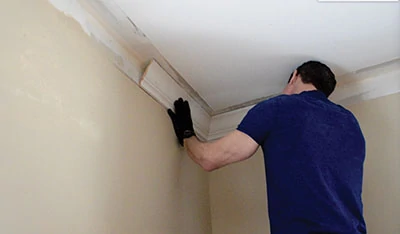
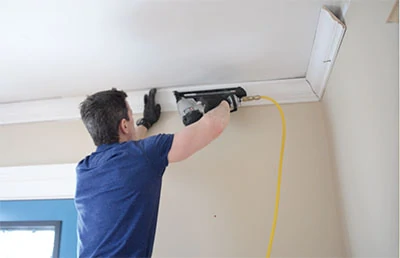
Nail. I leave the screws I used to measure in the wall (I usually install them 1/8-inch below the bottom of the crown location). These help hold the piece as I install it. For really wobbly pieces, popping one in the ceiling can help keep it from tipping.
I stand toward the center-right of the piece, gently place the dead-end left in position, and then see if the cope lays over my test piece.
In the best case scenario, I still have to flex the middle of the crown outward, slide the cope inward and gently press the center back to the wall. I call this a ‘snap fit’ and if it works, that’s great. Go back to the dead end, make sure it’s on your layout lines, then nail toward the cope. Stop about 30-inches away so the piece can still flex, otherwise the test piece will be stuck and you can’t fit your new piece in.
Now, remove the test piece, move it to the next corner, repeat the cut-and-install process, then, work the corner.
Work the Corner?
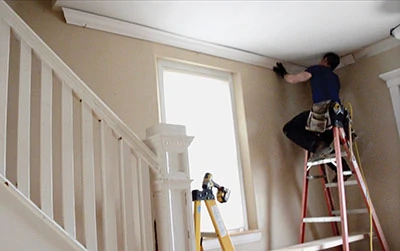
Yes, work the corner. Ceilings, especially in old houses, undulate, sometimes imperceptibly, and you have to convince the crown pieces to mate up: Press, pull, shim, tweak; twist by pressing up on the top and shimming out the bottom. We’re not talking much here—1/16 or 1/8 inch maybe—but it can close the joint beautifully. One of my favorite tools for this is my mighty Hyde 5-in-1 (or painter’s tool). Always handy in my tool pouch, it won’t break like a wood shim. And when I nail around it, I can still remove it easily. Once the corner is where you want it, nail it off, then repeat on the other three corners.
Outside corners and details
Outside corners are cut as miters but they can still be tricky. The molding lengths for outside corners are usually much shorter, like a chimney bump-out or something. When they’re just a few feet long, I still make test pieces and see how they fit. Outside corners are notorious for having a bulge in the walls past the corner that opens your miter if you don’t account for it. To check it, take two mitered test pieces (outside right and outside left miters) and see what the outside miter looks like when assembled. Chances are there’s a gap at the bottom point to which you would have otherwise measured.
Returns. For rooms that are missing a terminus, like this one where one wall continues up a stair, using returns show that you are a home-improvement hero. A return is simply an outside corner that terminates at the wall instead of traveling somewhere, like around that chimney bump-out. They are sensational little details.
However, they’re hard to fasten. Your 15-gauge finish nailer will probably blow one up. Pros, myself included, often use a micro-pinner. I also use caulk. Sometimes the piece can be wedged in place.
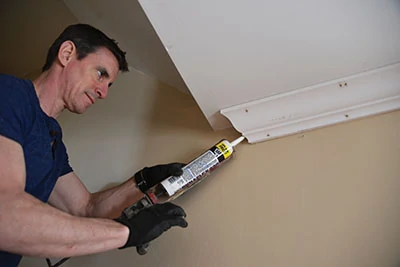
Caulk and Paint
For all this sturm and drang, once you ramp up, the actual carpentry doesn’t take as long as the painting. Since hiring a painter for a single room isn’t worth it (at least to me), I often do the painting myself, which means the next step is caulk.
Good caulk is worth its weight in oohs and ahhs when you’re done. It fills bigger gaps and lays down more smoothly. I used DAP Dynaflex 230 here as I have with success on many jobs from molding to windows.
As for paint, I prefer a top-notch paintbrush. If you’re using a throwaway brush you may end up with a throwaway job. Shur-Line’s HydroGlide brushes are top drawer and affordably priced, ideal for someone like me who doesn’t paint often but wants professional results. When I paint, I paint the molding first, then cut in the ceilings and the wall. Other people do it in a different sequence. The point is to have a sequence. And a clean brush. If you clean out the brush a few times a day, it’ll work better.
A question I get asked a lot: Will pre-painting the molding help me later? An answer I give a lot: No. It’ll just waste your time. Between caulk and nail holes, smudges and fingerprints, two coats of paint are required to clean it up and make it all nicey nice. And that can only be done once it’s nailed up.
I could go on, but that’s for another article.
Mark Clement is the carpenter and co-host of the MyFixitUpLife show. Subscribe to the podcast, watch live on Blab.im/MyFixitUpLife or subscribe to the MyFixitUpLife YouTube channel.
Side Note 1
Know your Corners
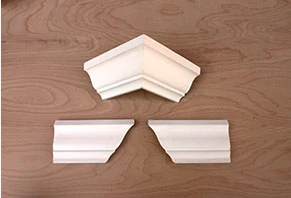
Cuts have names. If your room is a square or rectangle, all the cuts are ‘inside corners’. An ‘inside’ cut wraps the inner concave edge of an L. Conversely, an outside corner wraps around the outside or convex lines of an L. For a quick visual reference, you can make corner templates for crown molding, as shown here, to help keep your angles correct when cutting.
Side Note 2
Why Cope?
Few things say “I don’t really know what I’m talking about yet I will talk like I do” than someone who complains with an air of authority: “There are no square corners in this house!”
The reason is because NO houses have square corners. Framing is nowhere near that precise and even if it were, joint compound or plaster will “un-square” those corners.
As DIY Network’s Million Dollar Contractor, Stephen Fanuka puts it: “In a perfect world mitering is the perfect solution. Problem is, it’s not a perfect world. Ceilings are out of level, and walls are out of plumb.”
The advantage of coping is that it eliminates the square-corner fallacy because corners don’t have to be square for a cope to sing out its awesomeness.
While not all moldings can be coped (outside corners have to be mitered; it’s just geometry), coping is superior to mitering. If you’re still not on board, realize that changing the miter angle to 46 on one piece and 44 on the other doesn’t really work, because it changes the face-length of both miters, and you trade one problem for another.
So what about all those high-end jobs where big crowns are mitered and look great? Here’s Fanuka again: “The molding is mitered, but then the drywall or plaster guys come back and feather the walls and ceilings to close up the gaps.”
Who’s gonna do that who’s not a movie star or captain of industry? Most of us will caulk it closed and call it a day. There’s nothing magic here but there is a ton of work required to make perfect miters match an imperfect world.
Side Note 3
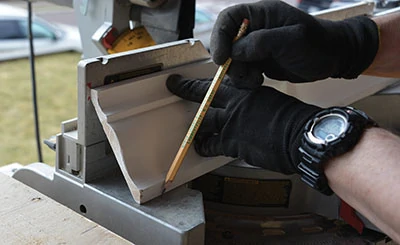
Sharp tools include pencils
I’ve seen guys with pencils so dull that my kid might as well be using his Crayons to mark a cut. Sharpening a pencil is a minor art. For trim like crown molding, just use a schoolboy pencil (#2 style; swipe one from your kids). If you can’t find one, make a carpenter’s pencil sharp by using a good knife like this OLFA with a sharp blade then polish the graphite to a point. As I say, there’s an art to it.

