

To hear our esteemed editor describe it, procrastination is not a virtue. But when it comes to deck building, putting some things off can come in quite handy. For example, you really don’t need to decide on the exact size of your deck until things get under way.
Sure, you should have a pretty good idea of the basic size of the deck, whether or not there will be multiple levels and how you will get from one level to the next. But to get started you don’t need to have precision right down to the inch.
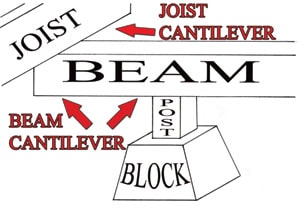
To get the full benefit of your mad procrastination skills in deck building, you need to use cantilevers, which are horizontal construction components that extend beyond their outmost vertical supports. In general, cantilevers should not extend more than 1/3 of the span rating. For example, if your beams can span 48 inches, you can cantilever out 16 inches beyond the last post.

The cantilever allows you to use imprecise layouts for the footings and blocks of the post and beam system. It also means the beam spacing and the ending points of your joists do not need to be dialed in either. Another big advantage of the cantilever is that you can hide footings, block and post back under the deck and they won’t interfere with trim or skirting.
When I lay out the blocks for a post-and-beam floor system, whether it’s for a shed or a deck, I purposefully put the rows of blocks about one foot inside the finished structure in both directions. I reach the outside of the deck with cantilevered beams in one direction and cantilevered joists in the other direction.
One of the big advantages to this system of cantilevering is that the blocks do not need to be laid out precisely, other than just being in line with the beams. So the post and beam layout can be relatively square, and then as the joists get put in position they can be aligned and squared more precisely.
In addition to the concept of cantilever, is the idea of running material wild until you make your final cut. “Let it run wild” is a construction expression that simply means to leave a little extra material hanging out there to be cut off later. You don’t have to make the final decision on the exact deck dimensions until you see how everything is coming together. You can trim beams when you are done with the joist layout. You can trim joists when the deck boards are nearly completed and you can trim deck boards after they are installed. Chalk lines and saw guides help make straight cuts on the ends of the beams, the joists and the deck boards.
Here’s how we used cantilevers to build the second level of our low deck:

Cantilevers Run Wild
My friend Dave usually scratches out his material lists on jobsite stationary (a scrap of wood) on his way to the lumber yard while driving, drinking coffee and talking on the cell phone. A horn may sound as he drifts into someone else’s lane, which Dave considers rude. “Hey, I’m designing a deck here!”
If this sounds a bit dangerous, most home-improvement stores and lumber yards can give you some help on what’s needed for a standard deck layout.
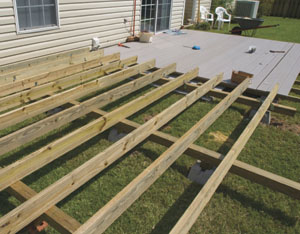
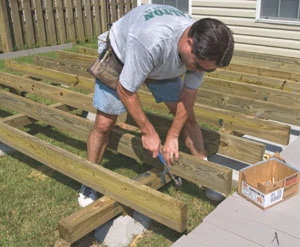
For this project I figured we needed about three 14-foot beams, eight pyramid blocks (one of the beams was over an old slab), about ten joists, a box of hurricane ties, an assortment of galvanized nails and a couple more boxes of deck screws. We already had the decking boards on hand. We started by spacing out the beams on the ground at the approximate spacing that we needed, keeping in mind that we wanted to keep the beams inside the deck structure about a foot from where we expected the final decking to be.
In the case of this particular section of deck, the elevation was determined by making a full step up from the lower section of deck we had built earlier. We decided that one full-width deck board would make a good riser and a good step height going up to the next level of deck. We wanted the second level of decking to be perpendicular to the first level, so we had to make sure that the beams were running perpendicular to the first level of decking. Building this way, the joists would run parallel to the first deck boards, and in turn the deck boards for the next level up would be perpendicular to the first level of decking. Got it?
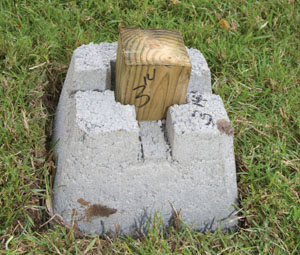
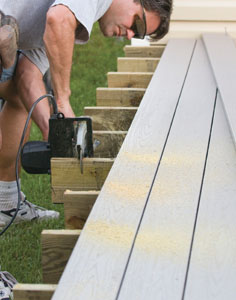
We spaced the pyramid blocks evenly along each of the beams, keeping in mind again that we wanted to stay back from the outside edge of the deck to allow the beam to cantilever out beyond the final position of the edge of the structure. With the pyramid blocks in place, we cut the sod around them and got the base of the blocks sitting on solid ground, nice and flat and level. [Note: Some areas require permits to build decks, the decks may need to meet specific codes, and its construction may require inspection. Research what the requirements are in your area.]
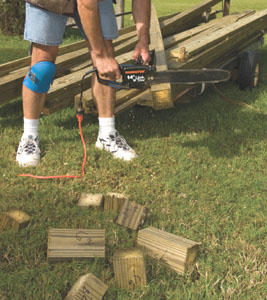
We propped the beams temporarily in place above the blocks and leveled them with scraps of lumber, old tires, bags of Quikrete and whatever else we had handy. We measured from the bottom of each beam to the top of each block to get the heights of the posts. We marked each block with this dimension then cut all the posts, marking each post as it was cut so we could match each post to its block.
We ignored the manufacturer’s recommendations for joist spacing. Our testing found it was too flexible for their recommended spacing. We used more joists and placed them closer together than the manufacturer’s recommendation.
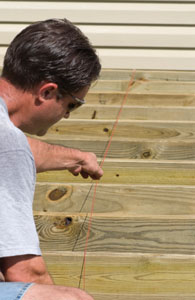
We used a string line to align the joist ends where they joined the lower deck level but let them run wild, beyond the edge of the deck, at the other end.
After crowning the joists, putting them on the layout marks and toenailing them into place, we then added hurricane ties to connect the joists to the beams.
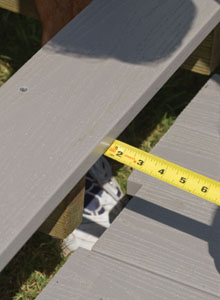
The layout of the first joist, the one closest to the house, was purposefully kept a couple of inches inside the proposed edge of the finished deck to allow us flexibility. In other words, we planned to have a little cantilever on the decking boards themselves.
To get started on the decking we put the first board in position, and then measured from the end of the joist to the outside edge of the board. We wanted the deck board to overhang 1 and 7/16 inches so we measured to the joist, set the deck board, put a screw in it at one end, then went to the other end and did the same thing.
We made a mark 32 inches on the joist at each edge of the deck and snapped a chalk line between those two marks. This gave us a reference point to make sure the deck boards were straight as we proceeded by simply matching the measurements to the chalk marks on a couple of the joists out in the middle of the layout. This is much easier than trying to hover a string line above the first deck board to get it straight. After the first deck board is on straight, you can hook your tape to the outside edge of the deck and check the boards periodically as the decking is installed.
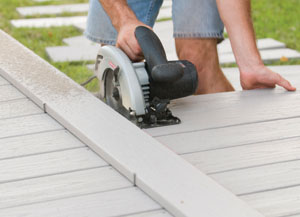
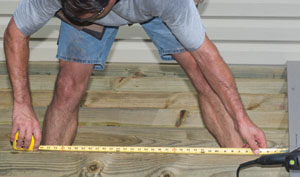
As we were getting to the edge of the deck near the ends of the cantilevered joists, it was time to determine exactly where the joists needed to be cut. We did this by putting the last deck board in place, marking the outside edge at each end, making another mark inside that, which is closer to the deck by the thickness of a deck board that we would later use as a rim joist/trim piece, plus a little reveal.
We then tackled trimming the deck boards, which we let run wild. We first had to finish the outside board on the lower deck, and then it was a matter of simply moving that layout to the upper deck and snapping a chalk line for the cut location.
Next time you plan a deck or shed floor, consider using cantilevers in your design. Not only can you hide blocks and posts under the deck, you can also put off layout decisions until later in the process. Works for me.
Screw It Later
Another thing I like to put off in deck construction is screwing down the deck boards, especially when you’re building a deck in the summer heat and humidity. Put in just enough screws to hold deck boards in position and add the rest of the screws in the cool of the evening. You can pick up speed driving deck screws by starting them with a hammer.

Trim It Later
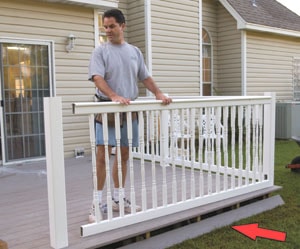
We waited to install the fascia board/rim joist (skirting on a higher deck) until the rail system was finished to allow access to the post areas under the deck.

Left Hand, Right Brain
You may have noticed that the circular saws you own either have the blade on the left or the right side of the saw. You probably have a preference for which setup you like best, but don’t forget about the saw that has the blade on the other side for those tight cuts when left doesn’t work right.
