

By Mark Clement
Why do I love building wood decks so much?
I think it’s because a well-crafted deck is more than a box and some boards on the back of a house. A lot more.
Because I’m a contractor and a carpenter, I find that decks are part layout, part site work, and fast framing where thoughtful design, dialed-in trim details, beautiful materials, and fun carpentry bring life to a pile of lumber.
No matter how big a deck is, it’s the trim details and fundamentals—yes, that includes tools, glorious tools—that transform projects from cringe-worthy to the creative carpentry I get so much satisfaction from.
So here are some tips I use from design to carpentry.
Here we go.
Posts
I’ve built lots of decks, playgrounds, docks and retaining walls. One of my very favorite things to work with is round posts. Where I’m from, we call them ‘pilings’. They’re called ‘poles’ or ‘round posts’ in other parts of the country.
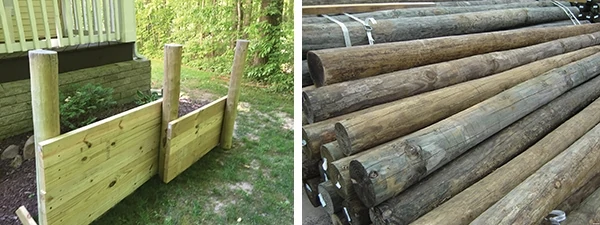
Mainly Southern Yellow Pine, they’re (1) gorgeous and (2) awesomely versatile. They have sensational structural integrity, which I love. And they have truly signature style: The round shape is pleasing and the grain just leaps out of the lumber. So if you’re building a deck and want a look as natural as the surroundings, look at round posts. They’re also awesome for fences.
Pergolas
I don’t mean full-sizers. I mean smaller pergolas integrated into the guardrails. They’re awesome for everything from a subtle division between yards (think: zero lot line homes) to creating a sense of a space (think: Niche for a grill or seating area). In other landscapes, they work as what I call static busters, say, for example where you don’t want a wall between you and your neighbor, just something to break up the line of sight.
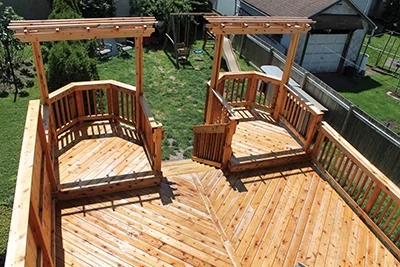
One thing I really like to do is make them from built-up or ‘laminated’ posts. I create an ‘I’ of sorts, 2×6-2×4-2×6.
Nails and Metal Hardware
There’s a mistake nearly everybody makes installing metal hardware, namely joist hangers.
That mistake is using the same nails for the angled holes as the face-nail. What you’re supposed to do is use a 16-penny nail for the angled hole through the joist into the ledger. The longer nails criss-cross in the ledger and make an awesome connection with major pull-out resistance.
While I often use screws for deck connections, when I do use a nail it’s often for connecting a joist to a beam. Since starting the nail when the beam is in place can be a headache and a finger-smacker, I sometimes start them before I roll the joists into place. Gun nails work, but hand nails really drive the joist into place.
Structural Screws
The world of what I call the ‘structural screw’ has come many-a furlong in recent years. Once the stuff of timber garden beds and cordless drills letting their smoke out, they’re now the go-to for most pros. They’re insanely awesome for ledger boards on decks and anchoring pergola girders to their posts. You can rip ‘em in with an impact driver, and it’s like welding the wood to itself.
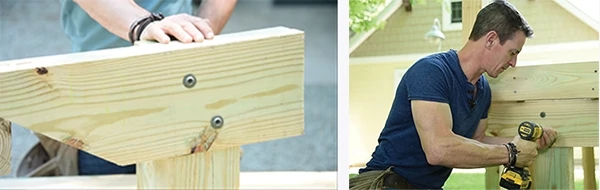
One place structural screws have not found a home until recently is in the post-to-beam connection and in guard posts. You have to check the code reports because not all screws are rated for this, but the brand I use, Spax PowerLags are.
You can use two through the face of a beam and into the shoulder cut of a 6×6, as shown in the photo detail. Because I’m a fan of the over-build, I’d use four, two in front, two in back.
Wood
In case you didn’t notice, I’m a big fan of building wood decks, from beauty to ease-of-use, to good-for-my-soul carpentry. And unlike denser materials they don’t retain nearly as much heat in the summer, like a stone patio for example.

Other materials try to mimic wood, because wood is worth mimicking. And, while you have to take care of anything that lives outside (a concrete slab gets mold on it too), caring for wood is reasonably easy.
From the carpentry standpoint, it’s versatile, I don’t have to alter my framing for diagonal decking (other decking types typically require framing 12-inches on center for diagonal decking). Obviously, wood’s structural integrity works for framing, and its natural beauty makes it the gold standard for trim and finished surfaces. I just like it.
Power washing
The first thing to know is that a power washer is not a magic wand. The best way to clean a deck is to approach it more like the un-glorious kitchen sink dish than like an industrial, power tool-based operation.
Soak the lumber with a type of detergent that cleans what’s on it. Some detergents are formulated for mold and mildew, others for dirt. For projects where you want to brighten the wood or strip an existing finish, check the detergent.
I make the ‘doing the dishes’ connection not to be drab but to keep it simple and inexpensive. You wash your car with a sponge, right? I soak a deck, then scrub it with a deck brush, then rinse it.
Here’s where the pressure washer comes in. You have been advised: A pressure washer is for rinsing. Detergent does the cleaning, just like a greasy dish in your sink. For rinsing, keep the pressure low and the nozzle at a low angle to the work.
Hyde’s pivoting pressure-washer wand gets that done for me effectively.
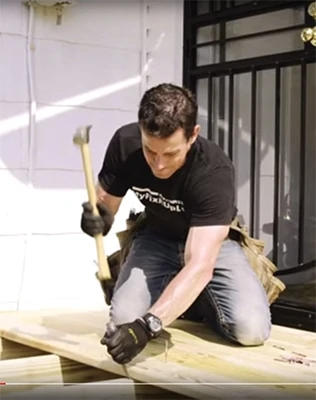
End cutting
It is a common DIY deck mistake to cut individual deck boards to length. What pros do is cut the first two or three to length—some carpenters leave 1/4-in. overhang—then run the remaining deck boards long. Once they’re all installed, snap a line from the first board to the last and then cut all the boards at once with a circular saw.
Nail trick
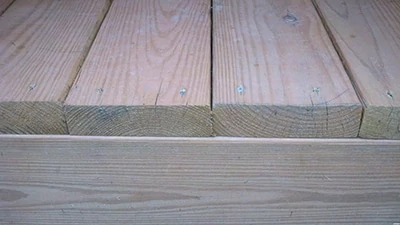
For pressure-treated lumber, I mainly use ground contact-rated Southern Yellow Pine. For decking I prefer 2×6. And when I install that decking, I butt the boards tight to each other and fasten.

For kiln-dried lumber like Western Red Cedar, I gap the boards so they can expand in high moisture situations. All it takes is sticking a 16-penny nail in a few joists to create the standoff.
Rings up or rings down?
There’s a deck-building debate that’s more lore than science. In fact, when I built my first decks (they were docks) I was taught to install deck boards with the annual ring cupping down. The idea was that the deck board—if it cupped at all—it would cup in the direction of the grain. Annual ring down, it sheds water. Up, it holds water.
Well, this is fiction. Install the best looking side facing up and move on. Use ring-shank nails or screws to fasten. The reason deck boards move is because they do so naturally and because they dry at different rates on the top (in the sun) and the bottom (in the shade).
One thing I recommend is to finish deck boards on the bottom before installation to help them shed water easily.
Delivery
I prefer to get deck packages delivered and dropped at the project site. It’s easier, faster, and I have to manage boards fewer times.
For the delivery, I always have a few 2-bys or (gulp) pallets for the load to land on. Better to break a pallet than a driveway.
For managing the boards to the back of the house, where they most often go, hand-carrying 2-bys is usually how I do it. But for 6×6—if I can fit into the back yard—I much prefer using a wheelbarrow with the timbers across it perpendicularly.
Kids
I love to get my children involved in my projects. Within reason. Lexi and I had a great time building this deck. She helped me with the hardware I used on it and we got to—safely—goof around and do cool stuff together. I treasure it too, because she turned 15, and the recycling bin is cooler than me now.

Stair
Laying out the guard post height on a stair, if you’ve never done it, can be a Herculean effort in understanding angles. But if you know the ‘stacked 2×4 and framing square trick’ you can do everything from scribing angles to back-mitering the rails to marking your post for a code-compliant height, all without knowing a single angle.
I’m abbreviating this a little, but…Run a 2×4 on edge along the stair nosings. Place another one on top of it. Run it past the posts a few inches top and bottom. Screw or clamp the second board to the post. Mark the back side of the 2×4 along the posts. Also, mark its location on the post. This is your stair angle and your overall length.
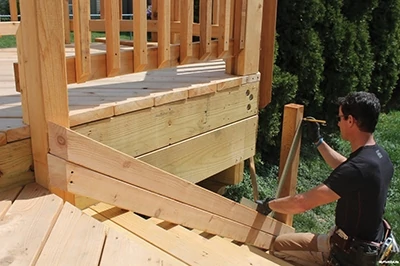
Next, position the framing square atop the 2×4 with its long edge over the post. At the top of the framing square blade, run your pencil. This is the top of the guard posts. Cut both posts in place.
To cut the rails, bevel your circ saw or miter saw 45-degrees and make this a back-mitered compound cut for a tight look. Install. Cut the posts in place. Install both rails, then install a 2×6 top cap.
Chisel trick that’ll make woodworkers cringe
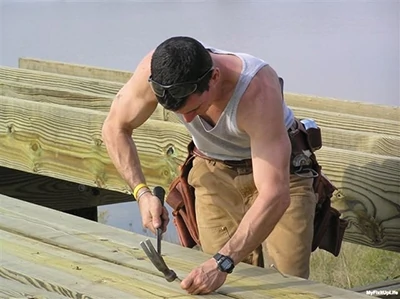
Need to persuade a deck board into position? Use your chisel.
First, start a nail or screw in the deck board. With the bevel of the chisel facing away from the deck board, drive the chisel into the joist. Pulling the chisel toward you will lever the deck board into position. You have to pull hard. Once there, sink the fastener and check your biceps. You’ll be pumped.
Tools, glorious tools!
Rotary Hammer. There are two main things I consider when I need to drill holes in masonry for a deck, which is usually for the ledger board along the house.
First, since I pulled a permit for the build, I know from my application that I’m not allowed to fasten a deck ledger to a brick veneer. A house made of brick—yes. A house covered with brick, no.

Second, if I can drill into the house—this was an old stone foundation—I know I need the power and efficiency of a rotary hammer (a hammer-drill’s bigger, tougher brother). If you have to drill in masonry or concrete for 1/2-inch diameter bungs—yes, they’re really called that; also called ‘shields’—a rotary hammer is the tool for the job. A 1/2-in. hammer-drill might be able to do it. And even if it can, every inch of the way will be excruciatingly loud and you’ll go through bits like gangbusters.
If you don’t own a rotary hammer, you can rent one. It’s worth it. And, it can serve double duty. I’ve used chipping irons and spades on my rotary hammer to break rocks out of post holes, loosen impossibly compacted soil and chip off the edges of sidewalks or patios that obstruct post placement. They’re a great deck-building tool.
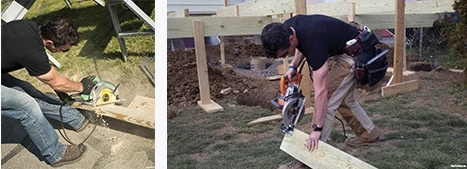
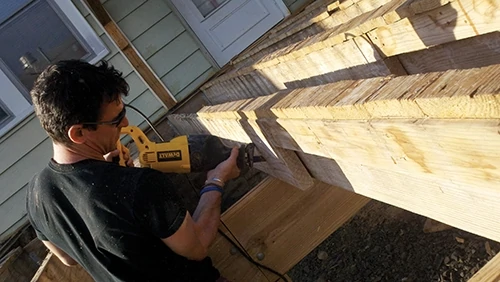
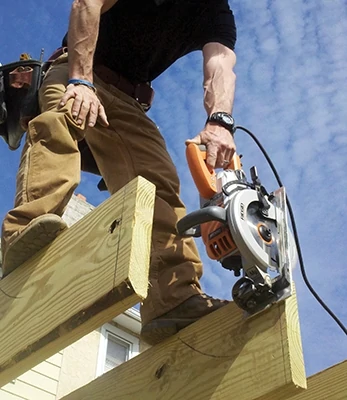
Sidewinder Saw or Worm-Drive? For pros building decks, worm-drive circular saws are great for several deck-specific cuts like cutting joists in place. You can do it with a sidewinder, but a worm drive is better. I also like it for cutting off the stack.
But wormies are heavy. While I like their length and out-front design, a sidewinder is easier to lift and move around.
Mark Clement is a carpenter and co-host of the MyFixitUpLife show, www.MyFixitUpLife.com.
