DIY Cabinet Making
Regardless of whether you are building a stereo cabinet or dresser, a kitchen cabinet or bathroom vanity, basic cabinet construction is the same. A cabinet or furniture piece consists of the carcass or case with two sides, bottom and top, a back and a front. The front may contain drawers, doors or shelves or combinations of the three. Cabinet building has several variations which may be used in construction.
The carcass construction can be separated into three types: leg-and-rail, frame-and-panel, and box or case. Leg-and-rail construction is found on chairs, tables, benches, stools and on some furniture such as chests.
Frame-and-panel construction is used to make up the component parts of many types of furniture including the sides, doors and interior web frames with dust panels that are used on many fine, hand-built pieces of furniture.
Box or case construction is the basic design of dressers, buffets, desks and chests, as well as kitchen cabinets and bathroom vanities.
The simplest case construction is a box made of plywood. These can be softwood or hardwood plywood, and they can be painted or stained and varnished. Particle board, finished on one or two sides, is a common material for construction of some cabinetry. A case can also be constructed of solid wood, but these days solid wood is used only on small pieces or for extremely fine furniture.

The simplest cabinetry is a box construction such as a kitchen cabinet. Shown is the typical construction dimensions of an applied-facer kitchen cabinet base.
How To Build Kitchen Cabinets
Kitchen Cabinet Case Construction
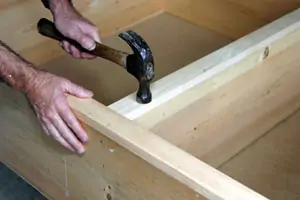
Both upper and lower cabinets have the same basic construction details. On the lower cabinet, the first step is to cut the two sides. Incidentally, you can construct a custom kitchen cabinet to fit any space, rather than the small individual sections joined as with purchased cabinetry. Or you can make up smaller units and join them in the same fashion. If a side is to be concealed against a wall, that side can be made of more economical plywood. The exposed side should be cut from a good hardwood- or smooth softwood-surfaced plywood.

The following is the simplest method of constructing, using glue and finish nails that are then set below the surface and the holes filled with wood putty. Cut a 1/4-by-1/4-inch rabbet in the inside back edge of each side piece for the cabinet back. The bottom shelf is raised above the floor on most cabinets to create a “toe-space” or kick board. Locate the position of the bottom on the side pieces and mark the kick board cut-out on each cabinet side. Cut using a saber saw.
In most instances the bottom front facer is 1-inch in width, allowing for a 1/4-inch lip to protrude down into the toe space. Mark this location and then use a carpenter’s square to mark a line for the bottom. Cut the bottom 1/4-inch narrower than the sides, and then fasten the bottom in place with glue and finish nails, making sure it is aligned with the squared marks. Install a nailing-strip at the top back. Cut this to fit between the two sides and fasten in place with glue and finish nails. Cut the back to the correct size from 1/4-inch plywood or hardboard and, with the case lying face down, lay the back in place. Use a carpenter’s square to make sure the case is square, and then fasten the back in place with 1/2-inch staples and an air nailer, or with 3/4-inch coated nails.


Turn the case upright and you’re ready to install the facings. Cut and install any dividers of shelves. The simplest method, especially for overlap doors, is to install veneer tape over the plywood edges. These edges must first, however, be sanded smooth. A more traditional method is to install individual facer strips over the front edges of the case. These normally fit flush with the outside edges of the case, but overlap the inside edges.
Cut the two side casings first, fitting them flush with the upper end of the sides and the lower edge of the toe space. Fasten these in place with glue and No. 6 finish nails. Then cut the lower facer to fit between the two side facers, ensuring the correct width to match the top edge of the bottom shelf and the bottom edges of the toe spaces on the sides. To cut to length, cut one end smooth and square, then hold it in place and use a sharp pencil to mark the length. Cut the pieces square using a fine-toothed blade in a radial arm saw. Glue in place and fasten with No. 6 finish nails into the case-bottom edge. Use No. 8 finish nails through the side facings into the sides to further secure in place. Cut the top facing in the same manner, ripping to width, and then cutting to length. All facers should have their edges jointed smooth.


In this case the top facing is fastened between the two side facings with glue and No. 8 finish nails through the edges of the side facings into the ends of the top facing. If the cabinet has drawers, cut facers and install in the same manner. Cut door and drawer dividers to fit between the drawer bottom facer or facers and the upper or lower facer as needed. These can be anchored in place with toenail-driven, self-starting wood screws in countersunk holes, with glue and finish nails, or with glue blocks from the backside. Wood strips 3/4-by-1 1/2-inches are fastened inside the front and back, and to the sides at the top for anchoring a countertop in place.


At this point the cabinet bottom is ready to be installed. If plumbing is to be installed for a sink, and electrical connections for a disposal are needed, measure and cut the openings at this time. Then place the cabinet in position. The cabinet must be level in all directions. Use a four-foot level to determine level and wood shingles as shims to ensure a level unit. Locate the studs in the wall and fasten the cabinet in place with screws through the rear top nailing strip. The cabinet back can also be fastened to the wall with screws into the studs. Build the countertop and install.
Upper cabinets are constructed in the same basic manner, using box or case construction for the sides, bottom and a 3/4-inch plywood top. In this case the sides, top and bottom all have 1/4-by-1/4-inch rabbets ripped in their inside edges for the plywood or hardboard back. The facings are cut and installed in the same manner. Upper cabinets are anchored to the wall with a nailer strip at the top and through the back into the studs, as well as with screws through the back into the studs. Homemade cabinet jacks of 2-by-4’s with shingle wedges can be used to temporarily hold the upper case up in position and help level and plumb it until you can get it fastened solidly in place.


A more intricate form of construction involves creating a facing frame of mortise and tenons joints. The front facing frame is then anchored to the case sides, top and bottom with glue blocks and countersunk wood screws from the inside or with glue and biscuit joints. This totally eliminates the nail holes that must be filled and is the best method for fine furniture cases.

Fine furniture often consists of a case with an assembled facer frame fastened over the front edge of the case. Mitered corners add to the fine construction.

Another form of construction consists of legs-and-rails with panels. The legs-and-rails are assembled with mortise-and-tenon or dowel joints. The panels are held in rabbets.
Frame-and-Panel Construction
With this type of construction, the corner posts of the assembly, which may also be the assembly legs, are fitted with panels. The frame consists of rails and stiles fastened together with mortise and tenons or dowels. The corner posts or stiles may be rabbeted or dadoed to accept the panels, or the panels may be held in place with dowels or biscuits. This is a very popular method of constructing small chests and tables, as well as larger pieces of fine furniture. The panel may be constructed of thinner, or thicker, stock that is shaped at the edges.
The inside framing on built-ins and simple furniture can consist of shelving standards with adjustable wooden shelves, or wooden shelf strips can be used to support permanently located shelves. Drawers can use metal slide systems. On fine cabinetry and furniture, however, the inside construction is as important as the outside because the inside framing not only provides for drawers and shelves, but also provides strength. Drawers are often supported by inside wooden partitions called web frames. Solid stock or plywood may be used, but they add a great deal of weight. Open frames are commonly used. If the frames are fitted with thin wood panels they are called dust panels. Dust-panels and web-frames are marks of quality furniture. They are always used on desks or bureaus with locked drawers; otherwise you could remove an upper drawer and get into the contents of the drawer below it.

These frames are normally assembled with mortise-and-tenon joints, and with dadoes for the thin wooden dust panels. The web frames may be held in place with glue and nails or screws. More often, the frames are fitted into rabbets or dadoes in the sides of the case and glue blocks used for support under the frame pieces at the back. Although the dadoes in the sides of the case could be the full thickness of the frame pieces, it is best to rabbet the frame edges and cut a narrower dado joint to provide more gluing surface and a stronger joint. A dovetail joint is the strongest for this type of unit; however, the frames must slide in from the front. When a frame-and-panel construction is used for the sides of the case as well, the web frame may be fitted with stub mortise-and-tenons.
If the front edge of the frame is also to act as a drawer-front facing, it is covered with hardwood to match the exterior of the project. Otherwise the frame is concealed behind the drawer fronts. If the frames are long, as on buffets, they should have a middle supporting rail or even two supporting rails if necessary.
Doors and Drawers
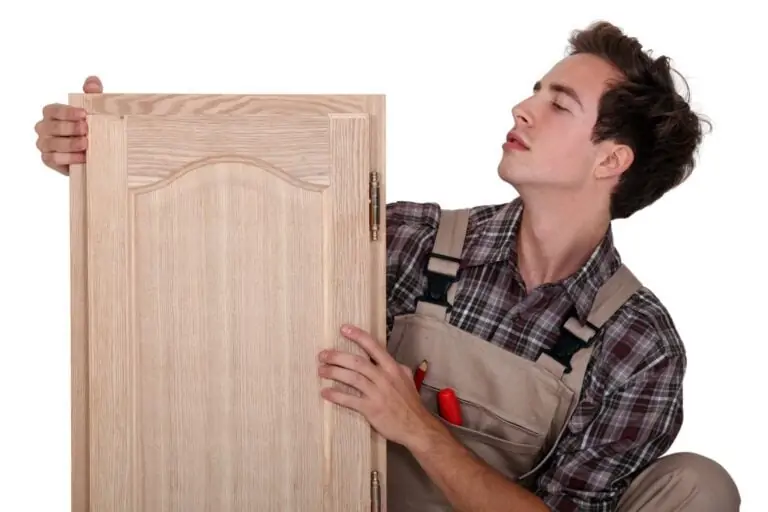
Doors and drawers can be overlap, lip or flush. Overlap doors and drawers have the entire front thickness exposed. These are often used on “Euro” style kitchen cabinets and bathroom vanities. Lip doors and drawers normally have a 3/8-by-3-inch lip or rabbet around all edges. This allows for using 3/8-inch lip hinges for installing the doors. Flush doors and drawers are fitted with their fronts flush with the case facings. These require great care in building and installing. Flush doors don’t seal off the cabinet as well as overlap or lip doors.

Door fronts may be made of solid wood or 3/4-inch plywood. The outer edges may be left square on overlap doors, but are commonly rounded on lip doors. Drawers are commonly made of solid wood, sometimes of plywood.
Finer furniture, however, often utilizes frame-and-panel construction for the doors and sometimes for the drawers. Or the drawers may be solid wood with shaped fronts. The frame-and-panel doors consist of two uprights, called stiles, and two horizontal pieces, called rails. Some doors also have a third horizontal piece, or cross rail, in the middle. The frame pieces have dadoes cut along their inside edges for panels. Or a rabbet may be cut along the inside edges of the frame, in which case the panel is held in place by molding. The inside edge of the frame is called “sticking.” It can be left flat or shaped, or provided with attached decorative molding. A molded sticking adds to the strength of the frame structure.
Frame-and-panel doors may be made in several ways. The simplest is to cut dadoes in the frame pieces then dowel and glue the frame pieces together, inserting the panel in place as you assemble the frames. Or the frame can be assembled with mortise-and-tenon joints. The best method, however, is to use a router or shaper to create shaped stickings. This creates a shaped joint and provides a larger glue surface, as well as a decorative frame edge.
The panels inserted into the frames can be thin plywood panels or solid wood with their edges shaped. The top of the frame and panel can be left straight, or an arched panel and top rail may be created on a shaper or with a router.
Creating cabinetry, whether building your own kitchen cabinets or a fine piece of furniture is a rewarding task. Start with simple box construction and work your way toward the more complicated construction as you gain experience and tools.

Doors and frame-and-panel construction often consist of shaped bead and ogee edges with flat or shaped panels. These can be cut with a router or shaper.