

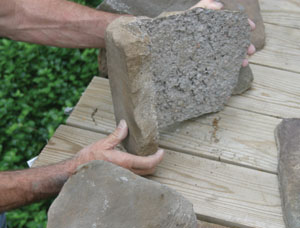
Lightweight and easy to install, artificial stone is a popular alternative building material.
When the first caveman rolled a stone in front of his cave to keep out the animals, stone became a building material. Stone has continued to be a popular construction material throughout the ages, and is just as popular today. These days, however, artificial stone has become increasingly popular. Weight is one reason. Less dense and lighter in weight than natural stone, manufactured stone is easier to handle, store and install. Less weight also means artificial stone can be applied in more areas, and with less support, than would be required for natural stone. Yet, the material has all the beauty of natural stone.
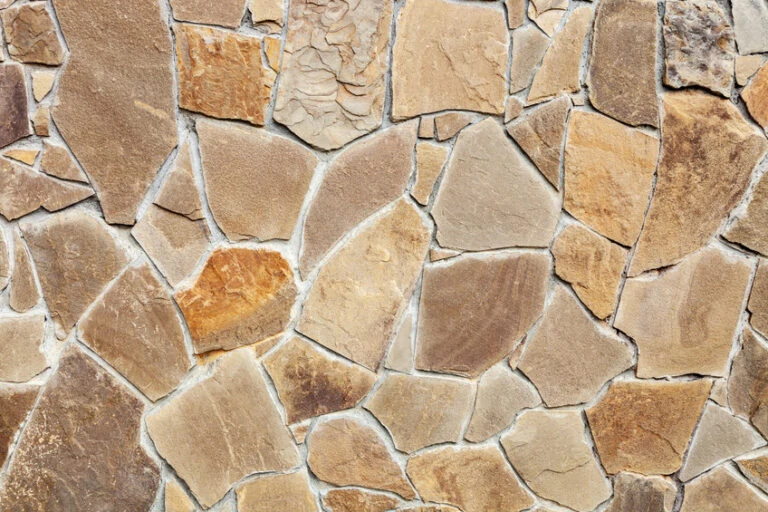
The selection of artificial stone styles is also greater than natural stone on a local basis. Artificial stone allows you to utilize styles not commonly found all across the country. These include polished river rock, fieldstone, ledgerock and even simulated quarried stone. The latter is much more economical than natural quarried stone. In fact, selection of the style and color can be confusing with all the possibilities available. The artificial stone being shown in this article is Dutch Quality Stone, in fieldstone style (www.dutchqualitystone.com).
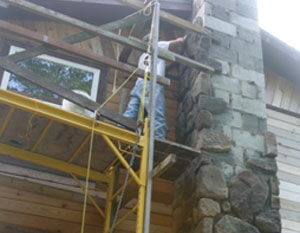
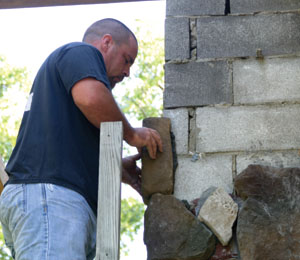
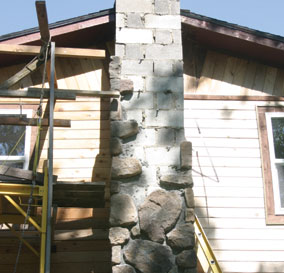
In the project detailed in this article, a fireplace with chimney was constructed of concrete block. The fireplace was faced with natural fieldstone, but not enough was available for the tall, two and half-story chimney. Artificial fieldstone was selected to match the fireplace stone. The homeowners added a few natural stones to help blend the chimney with the fireplace. Before you choose the product and decide to install the stone, check out the various products available, as well as the various manufacturer’s installation manuals available.
As with natural stone, installation is fairly easy, but hard work. One advantage is you can work a little at a time, which is actually the best tactic for most installations. Installing artificial stone is a lot of fun and allows you to be really creative, resulting in a beautiful project you’ll not only be proud to show off, but will add value to your home.
Tools & Materials
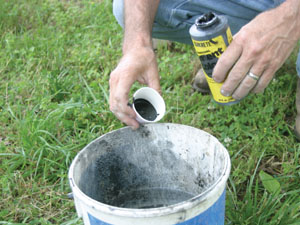
You will need a few masonry tools, including safety glasses, wheelbarrow, mixing hoe, hock and mason’s trowels. The hock is to hold the mortar, but a plastic bucket can be used to transport and hold the mortar if you’re working on a scaffold and ladder for a high project such as the chimney. You will also need a metal jointing tool, wooden stick, or better yet a large, round-headed bolt, a grout bag and whisk broom. Several plastic buckets and soft rags are also handy. And you’ll need a tape measure, level and other basic woodworking tools.
Artificial stone can be cut with masonry wide-mouth nippers, a hatchet, mason’s chisel and hammer, a masonry cut-off saw, or using a masonry blade in an angle grinder. Make sure you wear eye protection, and for the latter two you’ll also need a dust mask. All cutting chores should be done outside.
After determining the style and type of stone desired, the next step is to estimate the amount of materials needed. Artificial stone typically comes in boxes of flats and corners. The latter are L-shaped to wrap around outside corners and create the illusion of full stones. Measure the length and width of the project and multiply the measurement to determine the square footage. Then measure the linear feet of the outside corners. You will also need to know the square footage of the corner pieces, according to the specific manufacturer. For example, one linear foot of Owens Corning Cultured Stone corner piece covers 3/4 of a square foot of flat area (www.culturedstone.com), whereas one linear foot of Dutch Quality Stone covers 1/2 square foot. Subtract the flat area of the corners from the square footage of the flats required. Subtract the square footage of any doors, windows and other openings. It’s a good idea to add about 10 percent extra materials for cutting, trimming and fitting. It’s also important to know if the style chosen is sold based on the coverage with a standard 1/2-inch mortar joint, or tight-fitted such as ledgerock. In addition to the stone you’ll need Type N Mortar, mortar color (if desired), aggregates (sand) or premixed Type N mortar and potable water.
Artificial stone may be applied to any number of interior or exterior surfaces. A weather-resistant barrier must be used on all exterior and interior mortar applications, except for those over masonry and concrete. Make sure you follow local building code requirements for installation of the materials, including the waterproof barrier. If installing on surfaces other than masonry or concrete, a mesh or metal lath must be applied over the water barrier. All exterior surfaces must have flashing installed at water entrances, and the finished edge of applied stone must be a minimum of 4 inches above an earth grade or 2 inches above concrete. Before applying the stones, read and make sure you follow all of the manufacturer’s installation instructions.
Installation Basics
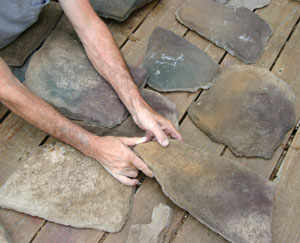
Yes, there is an art to laying stone, whether natural or artificial. Artificial stone commonly comes boxed, and the first step is to lay out the stones so you can readily see all the sizes, shapes and colors. In most instances you’ll want to lay the stones with a variety of sizes and colors in the overall design. Use small stones near large ones, varying the textures and sizes. Get everything ready, including tools, ladders and other supplies.
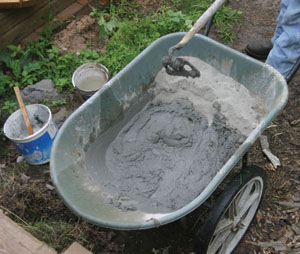
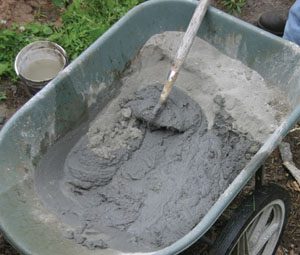
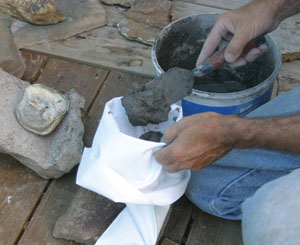
One of the most important keys to any type of masonry job is properly mixing the mortar. You can use premixed mortar, but on larger jobs individual components may be the best choice. The proportions of a standard mortar mix is either Portland Cement or Blended Cement and hydrated lime, mixed one part to 4-1/2 to 6 parts aggregate. An easier mix is one part Type N Masonry Cement to 2-1/2 to 3 parts aggregate. I normally simply count shovels of the latter, using a masonry shovel. Don’t mix more mortar than you can use in 30 to 45 minutes. I normally use one shovel of Type N Mortar Cement to three shovels of sand. If you have help, you might double this mix. The materials are placed in a wheelbarrow and thoroughly mixed while dry using a masonry hoe, which has holes in it to allow for quicker and easier mixing of the materials.

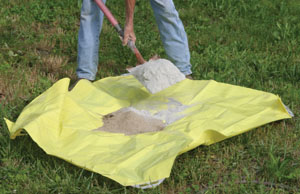
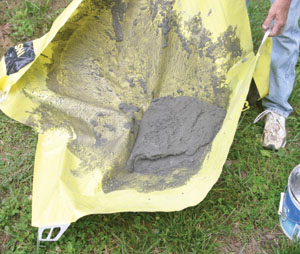
An easier mixing method is to use the Crete Sheet (www.cretesheet.com), a plastic sheet with handles. You can mix a batch in about 5 minutes and cleanup is easier. Once the dry material is evenly mixed, add the water a little at a time. If using mortar color, add the proper amount of mortar color to the first batch of water and thoroughly mix. Then add this to the dry mix. Using the hoe, incorporate the water into a bit of the dry mix until thoroughly blended. Then either add more water or pull in more of the dry mix with the hoe and continue mixing until the entire batch is evenly mixed. The proper amount of water is important. Too little water and the mortar will be crumbly and dry. Too much water and the mix will be soupy, messy and won’t hold the stones properly. A proper mix will be firm, yet moist. It will stay when pulled up with the hoe and will not slump down. Or, pick up the mortar with a trowel and turn the trowel sideways. The mortar should not slide or run off. Allow the mortar mix to set for about 10 minutes before use.
Now you’re ready to apply the mortar and set the stones. The mortar and stone pieces can be applied in two methods. In some instances the mortar and stones can be applied from the top down, and this does help in keeping the set stones clean. Most of us less experienced masons, however, will have better luck setting stones from the bottom up. This is particularly so with corner stones.
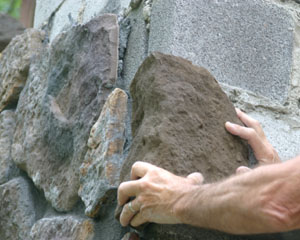
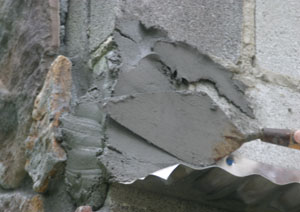
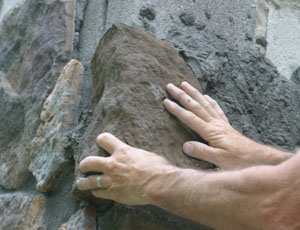
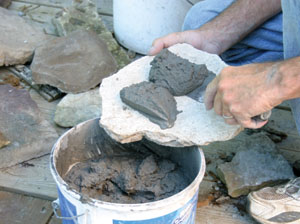
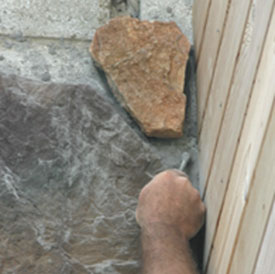
If installing over metal lath, use a mason’s trowel to apply the mortar in a 1/2- to 3/4-inch thick layer “scratch” coat. It’s important not to spread too much mortar or it may set up before you can apply the stones. On smooth masonry surfaces, such as concrete or concrete blocks, the mortar will have the frustrating tendency to slump down and fall off. One tactic is to fling small handfuls of mortar onto the surface, then trowel smooth to obtain the thickness needed. It’s messy, but it works. The easiest method is to use a mason’s trowel to “butter” the back of the stone with mortar and then press the stone in place. It’s important to have complete coverage between the mortar bed and the back surface of the stone. With the mortar and/or stone in place, gently press the selected stone against and into the mortar. Wiggle the stone slightly to force a bit of mortar out around the edges of the stone. Don’t press too hard or you’ll push the mortar out from behind the stone.
Regardless of the method used, it takes a bit of practice. Joint width in many cases should average about 1/2 inch. This will, of course, vary with the style of stone used. Fieldstone looks better with more variance, and it’s also harder to precisely fit these shapes. A “looser” look has a more natural appearance. On some styles, however, it’s important to keep mortar joints as consistent as possible. Fit larger pieces first, and then fit in smaller pieces.
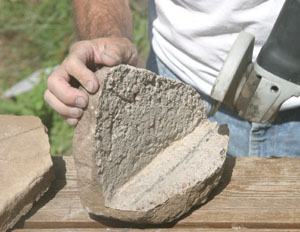
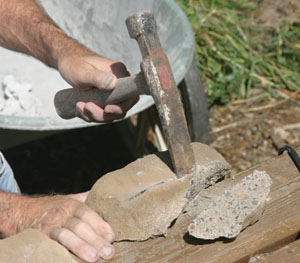
You may need to cut some stones to fit, especially with styles other than fieldstone. Stones can be cut using wide-mouthed nippers, or a hatchet. A masonry blade in an angle grinder can also be used. Or use a powered mason’s cut-off saw. Always wear safety glasses and a dust mask. Place mortar on the cut edges and, if possible, position the cut edges so they won’t be visible, for instance above or below eye-level. For materials such as ledgestone, the stones are fit tightly together. If laying such a tight-fitting style, the scratch coat must be completely covered with a bed of mortar, not only to conceal the scratch coat, but to prevent creating open spaces that can trap water. Try not to get mortar on the front surface of the stones. Unlike real stone, artificial stone is painted and abrasive methods normally used to remove mortar could remove the paint.

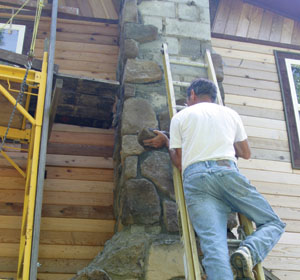
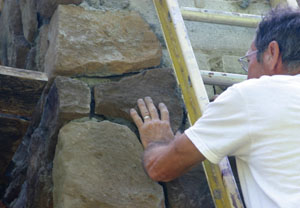
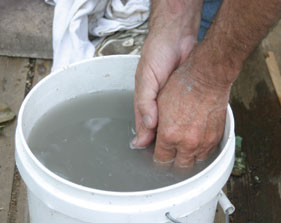
Allow the smears or clumps of mortar to dry, and then use a whisk broom to gently brush off the mortar. In hot or dry weather, moisten the back of each piece with a fine spray of water or a wet brush. If installing over concrete, masonry or a scratch coat, dampen the area before applying the mortar. If corner stones are used, such as on the chimney shown, apply them first. Be sure to alternate the faces of the corner stones with the long and short legs running opposite directions. After the corner stones are applied, work toward the center of the wall with the flat stones.
Finishing Touches
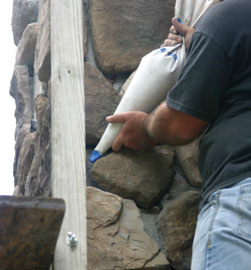
Allow the mortar to set until you can just create a thumb-print with some pressure. The time will vary according to weather and temperature conditions. Use a jointing tool, or the round head of a bolt, to scrape away sharp edges and round the inside of the joint. Do not remove too much mortar, nor undercut the stones. You may also need to add mortar to the joints, especially if you have applied the stones with mortar on their backs. A mortar bag, similar to a cake-decorating bag, is used to inject mortar into the joints. Once the mortar joints have set sufficiently, use a brush or whisk broom to remove excess mortar. In most cases water should not be used to remove mortar as it can cause staining of the surface. Do not use power washing or wire-brushes for cleaning.

Different styles of stones also require some additional installation techniques. Styles such as quarried stones require level, plumb and precisely-even joint lines. Long, rectangular pieces look best laid horizontally. River rock styles should not be cut if possible to maintain a natural look. Ledgestone styles should be laid as tightly as possible, and striking joints as deeply as possible, but not exposing the scratch coat or back edges of the stones. Mortar can also be tinted to match the stones to help conceal the joints. In addition to the corner and flat stones, a wide variety of finish stones are available including: window and door trim, keystones, and even receptacle, light and water hydrant blocks with openings for these utilities. With a little practice and your first project, you’ll probably be looking for other projects for this fun and beautiful building material.
