

Dress up your rafters with a decorative tail pattern
By Matt Weber
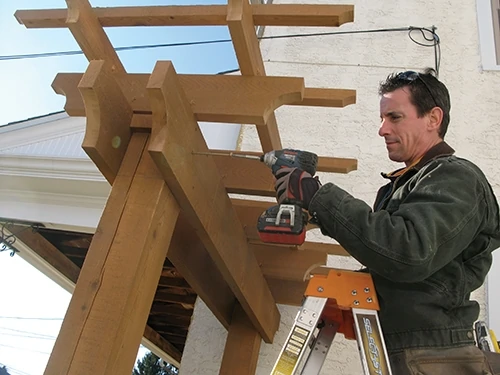
At the recent Remodeling Show/Deck Expo in Baltimore, Maryland, the EHT staff caught up with our friend Mark Clement, who was giving a demonstration on how to cut decorative rafter tails. With a limitless array of patterns, these stylistic enhancements to the ends of a beam or rafter can give a unique look to a pergola, a rose arbor, a trellis or covered patio. With a few basic carpentry tools and an eye for creativity, you can create a design that puts a personal stamp on your next outdoor building project.
Rafter tails generally dress up large outdoor structures. For both a sense of visual balance and structural strength, these framing members are generally made from large boards measuring 2×8 or wider. The broader the face of the board, the more material you have to incorporate the swoops and notches that comprise the rafter-tail pattern. Use treated lumber for outdoor projects or a wood species such as redwood that has natural preservatives.
Step by Step
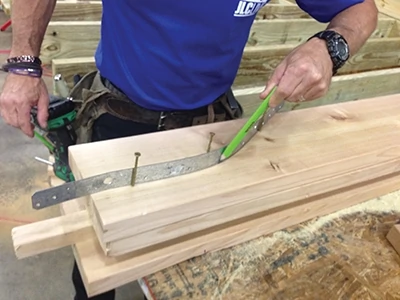
A neat trick for making a decorative swoop on a rafter tail is to use a straight strip of sheet metal as a cutting guide.
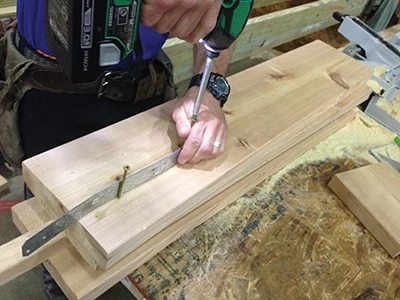
Use a series of 3-in. screws partially driven into the lumber on each side of the metal strip to hold its arched position as you mark the cutline.
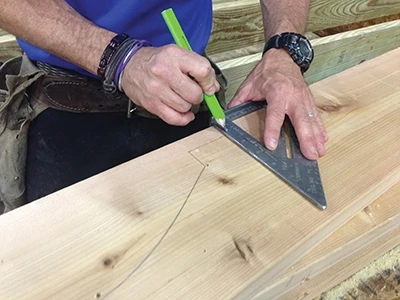
Accentuate the swoop design with notches and angles. A Speed Square makes a handy guide to keep cut marks square.
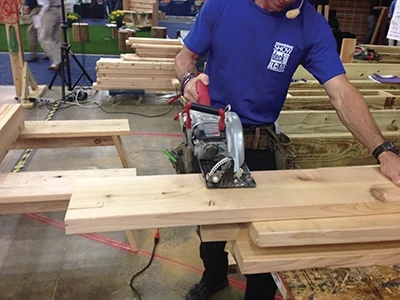
Clement suggests you save time cutting by using a handheld circ saw on all straight cuts.
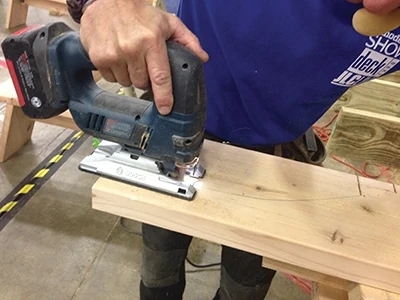
The thin blade of a jigsaw can follow the curved path of your swoop, and its straight-cutting action can finish the incomplete cuts that the round blade of a circ saw leaves behind. The only down side is a jigsaw cuts much more slowly.
After cleaning up the cut edges of the tails with a sander, use your completed rafter as a pattern template to trace a matching profile on all the other rafters of your project.
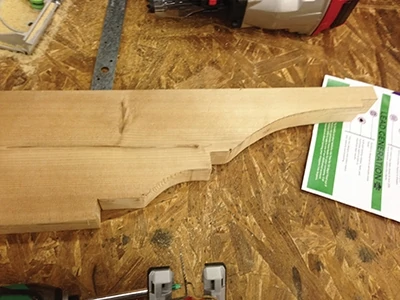
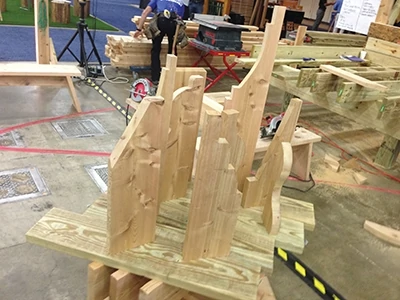
Lots of notches and detail can add a sense of ornate elegance to a rafter tail design, while simpler geometric patterns give them a more basic, streamlined appearance.
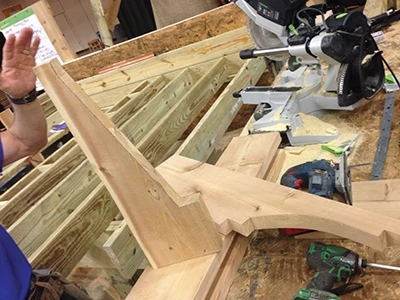
The choices in pattern design are limited only by the size of the wood and your imagination. Experiment with different patterns to see what looks best your particular project.
Editor’s Note: Mark Clement is a professional contractor and co-host of the MyFixItUpLife radio show.
