

By Rob Robillard
This story starts off simple enough: Last winter an elderly client of mine decided to go the store to get a newspaper and coffee. He said to his wife who was sitting in the living room, “Honey I’m off to the store, I’ll be back in a few minutes.”
The wife replied, “Okay, see you soon.”
The husband walked into the attached garage. The wife heard the car start followed by a loud crash. Running to the garage she saw her husband’s car against the rear wall of the garage and the wall pushed out toward the rear yard.
Believe it or not, this is a common accident. In this situation the husband inadvertently put the car into drive, thinking he was in reverse, looked backwards to leave the garage but drove forward into the wall.
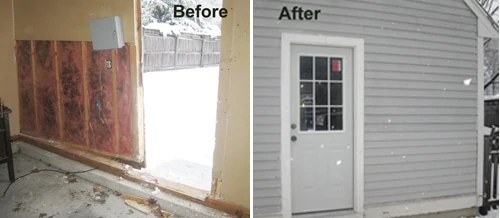
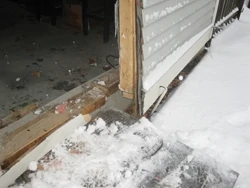
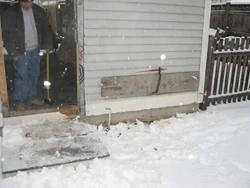
The car smashed into the rear garage wall, destroying the insulated steel door and completely pushing the wall off the foundation.
Call to the Carpenter
That morning my cell phone rang, and the wife told me what happened. While listening to the story I had no idea how I was going to approach this repair. I had visions of a catastrophic roof collapse on top of a car as well as other structural nightmares.
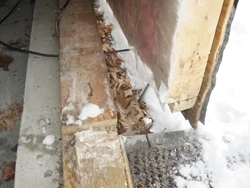
When I saw the damage I realized that the main problem was the rear personnel door and its frame. The 2×4 bottom plate had been pushed off the foundation by several inches but was otherwise intact. The force of the car had sheared the 16-penny framing nails connecting the 2×4 wall plate to the pressure-treated 2×6 foundation sill plate.
Now What Do We Do?
The door that was damaged was located approximately 6 feet from the garage corner. Fortunately the wall plate was still sitting on the foundation sill plate 30 inches from the corner. However, the wall plate at the door was hanging off the foundation sill plate by 6 to 8 inches.
Seeing that 90 percent of the rear garage wall was still intact and only a roof was supported by the wall, we decided that shoring was not needed and the best way to repair the damage was to “pull” it back onto the sill, saving the wall framing.
Our theory was that if we could push or pull the wall with enough force we could slide the wall back onto the foundation sill plate.
The Structural Wall Repair
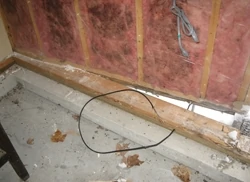
We first removed the damaged door, drywall and insulation from the damaged section of wall. Two of us pulling and pushing could not budge this wall; we needed more power. But how?
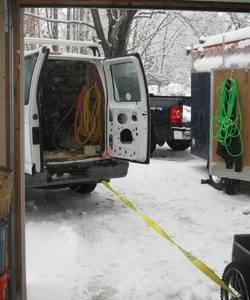
After a coffee break and some head scratching we decided we would use our van to pull the wall back in place.
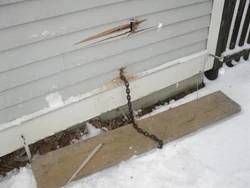
To prepare to pull the wall, we drilled two holes in the plywood sheathing on either side of a wall stud. We ran a chain through the holes and around a large staging plank on the exterior of the wall. The plank evenly distributed the force of the chain and did not stress one single point or stud on the wall framing.
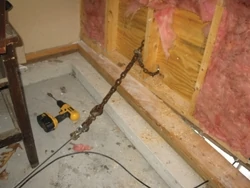
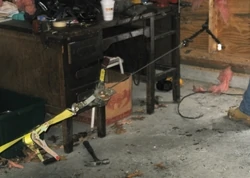
Using sections of tow cable we attached the chain and plank to our van and applied tension to the chain and cables.
Once the wall was tensioned we used a sledge hammer against the bottom plate to move the wall, starting at the wall corner and slowly working toward the doorway. We had to continue to apply additional tension with the van as we moved the wall.
This was a slow process, and moving the wall completely back in place took about 15 minutes of back-and-forth sledge work and tensioning. Once the wall was fully on the sill plate we used 6-ft. levels and the sledge to plumb it into position.
Securing the wall in place was easy. We used 16-penny galvanized nails in all of the 2×4 stud bays, securing the wall plate to the sill plate.
The Cosmetic Repair
We purchased and installed a new Stanley insulated steel door, reinsulated the wall cavity and applied new 5/8-in. fire-rated drywall to the interior of the garage wall.
The car (and our method of wall repair) damaged some of the exterior siding and trim on the exterior of the garage. We replaced the trim and siding as needed.
Editor’s Note: Robert Robillard is a remodeling contractor based in Concord, MA, and editor of a www.AConcordCarpenter.com.
