

By Tom Matthews
A new coat of paint is one of the most striking enhancements one can make to the curb appeal of a home. However, a home’s exterior might consist of any number of materials, as well as a combination of different materials. These various materials often require different techniques to ensure a new long-lasting topcoat. This article covers some of the more common house cladding materials, and offers professional advice on techniques to paint them.
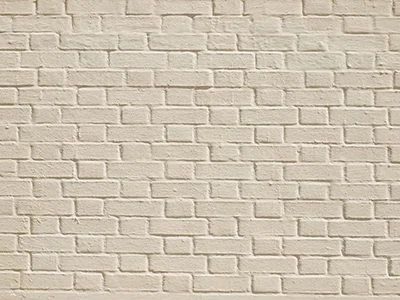
Brick
Surface prep—If efflorescence is present, remove it by scrubbing with a wire brush. To remove heavy staining, mix a heavily diluted solution of water and muriatic acid. While wearing goggles and rubber gloves, mop the solution onto the wall and scrub thoroughly with a stiff-bristled brush. Rinse with plenty of clean water. Eliminate any source of water from behind the brick that could have caused the efflorescence.
Treat any mildew with a 3:1 water-bleach mixture, leaving it on for 20 minutes and adding more as it dries. Clean off dirt, chalk, dust, any residual particles of paint or treated mildew by scrubbing with detergent and water. Rinse thoroughly.
Scrape out and widen any cracks, brush out the dust, then seal with 100-percent acrylic or siliconized acrylic caulk. Check mortar joints carefully and repair or re-point as needed. Always wear gloves and eye protection when prepping the surface for any paint job.
Priming—Priming brick is not essential with quality exterior latex house paints or masonry paints, but priming will maximize sheen uniformity and minimize efflorescence and mildew. Use a quality exterior latex primer that is recommended for masonry surfaces.
Painting—Use top-of-the-line exterior 100-percent acrylic latex house paint in flat, satin or semigloss finish, depending on the desired appearance; or use a quality latex masonry paint.
Another option for brick paint is an elastomeric wall coating. These are exterior acrylic latex masonry paints designed to be applied in very thick films (about 10 times as thick as regular paints). They are tough and flexible, and stretch as cracks underneath open and close, which bridges the cracks and keeps water out while maintaining a nice appearance. They can be tinted to a light color, but are considerably more expensive than conventional paints. Apply two coats for maximum crack bridging and durability, and follow the manufacturer’s recommended spread rate; for best performance, this will be 40 to 60 sq.ft./gallon to achieve a minimum dry film thickness of 7 mils per coat.
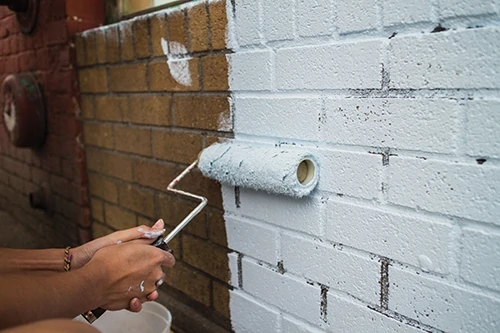
The easiest way to paint brick is with a paint sprayer. For small areas such as an accent wall or fireplace, brushes and rollers will suffice. Choose a roller cover with a thick nap (1-1/4 in.) to ensure best results on brick, which is covered with nicks and surface irregularities.
Fiber Cement
Surface prep—If the siding may be manufactured from cement asbestos, make no attempt to scrape, sand, wire brush, power-wash or otherwise disturb the surface. Instead, apply a solvent-based or latex sealer or primer recommended for exterior masonry surfaces, and once thoroughly dried, proceed with painting. If the siding has previously been painted and lead is suspected in the paint, contact a contractor qualified for lead assessment and abatement.
Otherwise, prep the surface of fiber-cement by removing any loose or peeling paint by gently scraping or abrading with a wire brush. If efflorescence is present, scrub it off and eliminate any water source that may have caused it. Treat mildew with a bleach mixture and rinse with plain water.
Priming—For fiber cement, priming is helpful but not necessary if the existing paint is in good condition (unless specified by the paint manufacturer). If you had to remove efflorescence, coat the siding with a quality exterior latex primer that is recommended for masonry surfaces.
Painting—Use top-of-the-line exterior 100-percent acrylic latex house paint in a flat, satin or semigloss finish; or use quality latex masonry paint.
Stucco
Surface prep—If the stucco has previously been painted and you suspect lead in the paint, leave it alone and call a contractor. Otherwise, remove all loose or poorly adhering paint by scraping or using a wire brush, or power-wash with plain water, taking care not to drive water into cracks or porous areas.
Remove any efflorescence and eliminate any water source that may have caused it. Remove mildew with a bleach solution and rinse thoroughly.
Priming—With stucco, priming is important to ensure maximum durability and resistance to efflorescence, alkalinity and mildew. Use quality exterior latex primer that is recommended for masonry or stucco.
Painting—If you’re repainting the stucco, use top-of-the-line exterior 100-percent acrylic latex house paint in flat, satin, or semi-gloss finish. Old, unpainted stucco can also be finished with a top-quality exterior 100-percent acrylic solid color stain that is recommended for masonry or stucco surfaces. Some solvent-based acrylic masonry or concrete stains may be applied to stucco without priming, but you should consult the manufacturer’s directions.
Wood
Surface prep—If the existing house paint has no lead content, remove all loose paint by scraping or by wire-brushing, working with the grain of the wood. For wood shakes, use a wire brush with vertical strokes. (Note: when using a steel brush on cedar, remove all bits of steel wire to avoid discoloration.) Feather-sand the rough edges of the remaining paint. Refresh the surface of exposed wood by sanding with medium grit (#120) paper. If gloss or semigloss paint will be used, follow by sanding with fine grit (#220). Dull any existing glossy paint by sanding with a fine abrasive.
Treat any mildew with a household bleach mixture then rinse thoroughly. Use detergent and water to remove any loose dirt or sand.
Priming—Prime all areas where the old paint has come off. For best results, prime the entire job using quality exterior stain-blocking latex or oil-based wood primer. Use quality oil-based primer and paint if the surface has a buildup of old oil-based paint.
Painting—Use top-of-the-line exterior 100-percent acrylic latex house paint in flat, satin, semigloss or gloss finish, depending on desired appearance. A flat finish will provide a more uniform appearance, but quality satin and semigloss finishes will resist mildew more than a flat. Do not apply oil-based paint over latex-based paint or stain.
Vinyl
Surface prep—Treat any mildew with a bleach solution. Clean off any dirt or chalk with detergent and water, or power-wash, then rinse thoroughly.
Priming—Priming generally is not necessary if mildew, dirt and chalk are all removed as part of surface preparation.
Painting—Use top-of-the-line exterior 100-percent acrylic latex house paint in flat or satin finish. A flat finish will be much less revealing of variations and irregularities in the siding than will a glossier finish. For vinyl siding, apply only very light color paint: white, off-white or a light pastel. A rule of thumb is to not paint the vinyl siding any darker than its original color. Applying a darker color may cause irreversible warping (called “oil canning”) of the vinyl siding, due to the heat absorbed from sunshine by darker colors. For best results, apply the paint with a sprayer.
Aluminum
Surface prep—Treat any mildew with bleach then remove dirt, chalk, treated mildew, etc. by scrubbing with detergent and water, and rinse thoroughly. Chalking on weathered aluminum siding tends to be deep in the factory finish, and a second treatment may be necessary if there is still noticeable chalk on the surface.
Priming—Priming is generally not necessary if chalk can be removed as part of surface preparation. For areas where chalk is stubborn and cannot all be removed, apply a solvent-based exterior primer recommended for aluminum siding.
Painting—Use a sprayer to apply top-of-the-line exterior 100-percent acrylic latex house paint in flat or satin finish. A flat finish will be much less revealing of dents and irregularities. Note that because excess chalk can hinder the adhesion of paint to aluminum siding, some manufacturers offer acrylic latex additives that help exterior latex paint stick to hard-to-coat surfaces. For excessively chalky surfaces, consider using a product such as EmulsaBond from Flood Paint Solutions.
Editor’s Note: Much of the information from this article came from the Paint Quality Institute. Learn more at www.paintquality.com.
Side Note 1
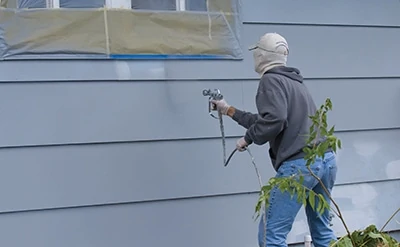
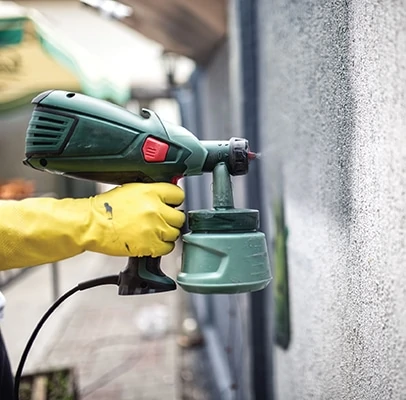
Painting with a Sprayer
When applying paint with a sprayer, either HVLP or airless, movement of the gun is extremely important. Keep your wrist straight and the spray nozzle parallel to the work surface for consistent application (rather than flexing your wrist and swinging the gun, which causes overspray and uneven coating). The gun should be held 7 to 12 inches away from the work surface. Start at the top and work downward. To avoid excessive paint accumulation, don’t pull the trigger unless the gun is in motion. Squeeze the trigger as you move into a spraying pass over the work surface. Follow the tool manufacturer’s guidelines for tip selection and paint-thinning recommendations.
Once the job is over, clean and flush the sprayer using the appropriate solvent. This is an absolutely critical step and ensures the equipment will be properly stored without contaminants that gunk up the system.
Side Note 2
New Paint Products
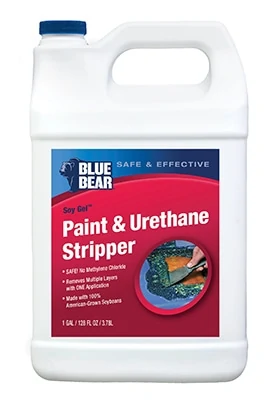
Blue Bear Strippers
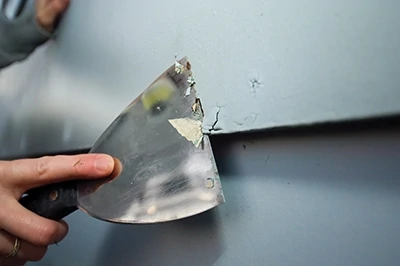
When it is time to paint your house, prepping the surface goes a long way to make the project easier and the finished surface look the best it can. If the old painted surface is showing signs of peeling, removal prior to repainting would be the best option. Blue Bear Paint & Urethane stripper makes removal of old coatings easy without having to spend a lot of energy with a scraper or sander. Simply apply the gelled stripper to the surface and let it loosen and release the old coatings for you. The Paint & Urethane stripper will remove multiple layers of coatings with just one application.
If the old surface is still in good shape and you are just covering it over, Blue Bear Cleaner & Degreaser may be all you need. Wash the surface with this cleaner to get to the best possible surface adhesion for your new coating.
Depending upon the age of the house and the paint, you may be faced with the challenge of lead paint, which requires special consideration when removing. Franmar’s Blue Bear Lead Based Paint Stripper works to neutralize the lead in the paint so that it is safe for you and for disposal. With this stripper you don’t have to worry about lead dust or safety concerns from lead. Visit www.franmar.com.
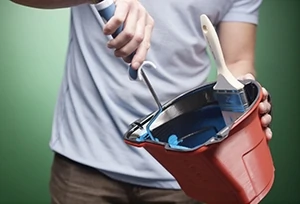
HANDy Pro Pail
The new HANDy Pro Pail is designed to accommodate up to a 6-1/2-in. mini-roller or 3-in. paintbrush and will hold more than a quart of paint or stain, making it a must-have product for painting contractors. To deter hand fatigue for painters tackling tough projects, the new Pro Pail includes an adjustable strap, as well as a handle rest for a mini-roller or paintbrush. The Pro Pail also has a custom-fit liner available for purchase. Manufactured in the USA from 100-percent recycled materials, HANDy Pro Pail Liners are solvent-resistant to allow painting contractors to work with any paint or stain.
The liners make color changes a breeze while eliminating unnecessary cleanup time. Visit www.bercomincorporated.com.
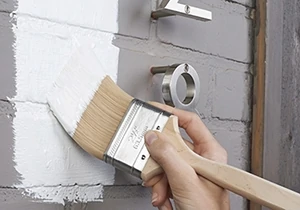
Shur-line Paint + Primer Applicators
Shur-line offers the first-ever applicators designed for Paint + Primer projects. Now accounting for approximately 60 percent of the paint sold today, Paint + Primer is designed to seal the surface and add tint or hue simultaneously—often in a single coating. As a result, the liquid is thicker than most individual paints. Shur-line’s new brushes are the first to be specifically engineered to support heavier Paint + Primer liquids. For do-it-yourselfers who want to transform a room in a single afternoon, instead of a matter of days, the Paint + Primer option saves time and money. Bonus features like proprietary Hydroglide Technology help weekend warriors complete paint projects up to 30 percent faster with exceptional paint release to the surface and super-fast clean-up times. Visit www.shurline.com.
