


Thinking Inside the Box for a Unique Patio Door and Window Combination
By Larry Walton
I’m not a big fan of sliding glass doors. I know they have their place. In fact, they have some distinct advantages such as being constructed like a window, which makes them particularly well-suited for handling direct, wet weather.
Another advantage of the slider is that it’s out of the way much like a pocket door, with a built-in place to park the door when it’s open. I get that, but I don’t like the look, the movement it takes to walk through, the extra effort needed for kids and the elderly to operate, and the extra measures needed to secure them.
So I keep taking them out and replacing them with double French doors or a combination of swinging doors and sidelights.
Thinking Inside the Box
When replacing these overgrown windows, there are two basic design principles to keep in mind. Number one is to think inside the box. In other words, configure your design to work within the space of the original opening of the sliding glass doors. This can be done by drawing a simple sketch of the opening and putting the combination of doors, windows, panels, pet access openings, glass blocks and art niches where you want them.
Sometimes there is a challenge getting the new door jambs to fit below the header, depending on the design of the sliding glass doors. Remember, if you remove material from the header, it will need to be re-engineered to support the house structure above it. I usually pay my door supplier a little extra to cut down the door and the jamb—an operation that is pretty common for them.
Other than the elevation, it’s really just a matter of choosing what you would like to fit in that opening. Often a simple solution is to install a pair of French doors that fill the entire opening, which can be a nice upgrade in looks. It also provides a very wide opening to bring in large fixtures like grand pianos, hot tubs and stuffed grizzly bears.
If a grand passage is not required, you can configure the opening in a variety of ways. Another slider in our house got a single door with an active half-lite for screened ventilation. The remaining space was walled in to accommodate an additional armoire in the bedroom.
Don’t forget that you have choices in how a door operates in terms of swing. You may want to put the swinging door on the left or the right, and the hinges can be on the outside or toward the middle of the original opening.
The design which we chose for this particular project is a good example. To get the desired traffic flow and accommodate the type of air movement that we needed, plus access for the family dog, we brought several elements together.
We got a good deal on a 2’6″ door, which is smaller than most exterior doors but takes up less room when open. This helps with furniture placement. In addition to the door size, rather than hinging it at the outside of the original opening like you would a pair of French doors, the hinges are located in the center of the opening to get the swing and the traffic flow that we desired.
Trim as a Unit
The second basic design principle is to trim the components in your layout as one unit. Tie the components together under one trim header casing that extends the length of the new doors and windows. The far left and far right vertical trim board should extend from the header all the way to the floor with the rest of the trim components filling in as needed.
In our case we wanted a single-light French door with a left-hand swing hinged in the middle of the original opening. The rest of the space was to be filled in with a single hung window above a wall panel, which would accommodate a dog door.
Of course, in the same space, you could install double doors or a larger swinging door with a glass sidelight, or a glass sidelight on one side with the door in the middle and an active window on the other side. Be creative by thinking inside the box.
Here’s how I got rid of the sliders, my wife Robin got her active window, and Sunny got a built-in dog door.
![[01] 2LW_2158](https://extremehowto.com/wp-content/uploads/2014/05/01-2LW_2158.webp)
We started the patio door project by pulling off the interior and exterior trim and removing the active side of the patio door.
![[02] 2LW_2167](https://extremehowto.com/wp-content/uploads/2014/05/02-2LW_2167.webp)
The depth on our circular saw was set to barely go through the siding. We used the outside of the saw base as a guide along the frame of the sliders.
![[03] 2LW_2178](https://extremehowto.com/wp-content/uploads/2014/05/03-2LW_2178.webp)
Prying the strip of siding away from the house revealed the flanges of the slider, which was built like a large window.
![[04] 2LW_2205](https://extremehowto.com/wp-content/uploads/2014/05/04-2LW_2205.webp)
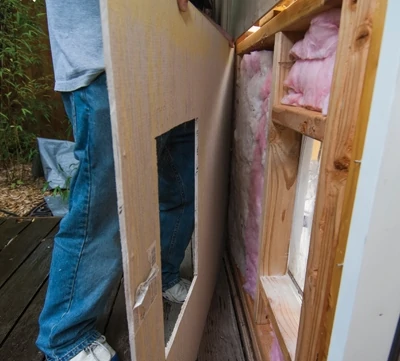
We removed an extra 2×4 that the framers installed below the header as a filler. Note: This is not the same thing as removing the header, which is an essential support bridging over the door opening.
![[05] 2LW_2215](https://extremehowto.com/wp-content/uploads/2014/05/05-2LW_2215.webp)
After removing the extra spacer, we cut the siding flush with the header using our Porter-Cable reciprocating saw.
![[06] 2LW_2201](https://extremehowto.com/wp-content/uploads/2014/05/06-2LW_2201.webp)
We laid out the framing in the opening so the hinge side of the new swinging door was supported with a king stud and a trimmer. In this case they were both the same length since we installed them right under the existing header.
![[07] 2LW_2231](https://extremehowto.com/wp-content/uploads/2014/05/07-2LW_2231.webp)
We cut 2×4 cripples to support the window sill, which are the horizontal framing pieces just under the window.
![[08] 2LW_2239](https://extremehowto.com/wp-content/uploads/2014/05/08-2LW_2239.webp)
The spacing of the cripple closest to the door was determined by the frame of the dog door, which needed to be close to the main door for furniture placement. I can’t have the dog running into my chair or spilling my game-time beer.
![[09] 2LW_2249](https://extremehowto.com/wp-content/uploads/2014/05/09-2LW_2249.webp)
We used an impact driver and 3-in. drywall screws to attach the horizontal framing pieces above and below the dog door, which was installed at the manufacturer’s recommended elevation.
![[10] 2LW_2308](https://extremehowto.com/wp-content/uploads/2014/05/10-2LW_2308.webp)
With the door, window and dog-door openings all framed, drywall was installed over the entire opening. We cut out the dog door opening with a small drywall saw.
![[11] 2LW_2350](https://extremehowto.com/wp-content/uploads/2014/05/11-2LW_2350.webp)
We began installation of the door by laying down a generous amount of caulking under the threshold.
![[12] 2LW_2358](https://extremehowto.com/wp-content/uploads/2014/05/12-2LW_2358.webp)
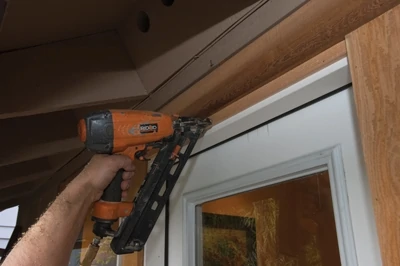
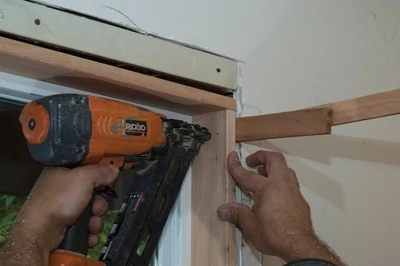
After lining up the door jamb with drywall on the interior, we nailed through the jamb into the trimmer near the hinges. We removed one of the top hinge-plate screws nearest the door stop and replaced it with a 3-in. drywall screw for extra support.
![[13] 2LW_2367](https://extremehowto.com/wp-content/uploads/2014/05/13-2LW_2367.webp)
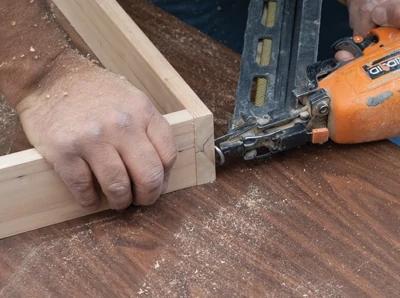
We always fill the voids between the doorjamb and trimmers with shims at each nailing location. This not only helps maintain the proper reveal gap, but it increases sheer strength to keep the jamb from moving in and out as the door hits the stop.
After filling the voids between framing members with insulation, we covered the area below the window with sheet siding.
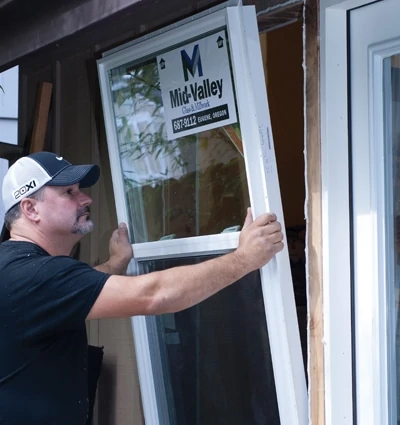
Caulk was applied to the exterior framing where the window flange would touch the framing. The window was installed by setting the frame on the sill and tipping it into place.
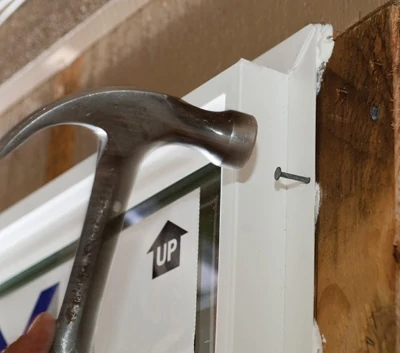
We used 7d galvanized nails to fasten the window flanges to the framing, being careful not to hit the vinyl frame with the hammer.

We installed Tyvek house wrap tape over the flanges and onto the framing, starting at the bottom horizontal piece first, then both sides, and finishing with the top horizontal. This provides the right overlaps for water runoff.
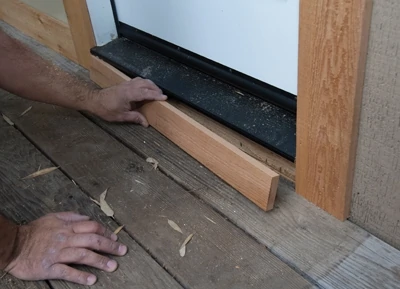
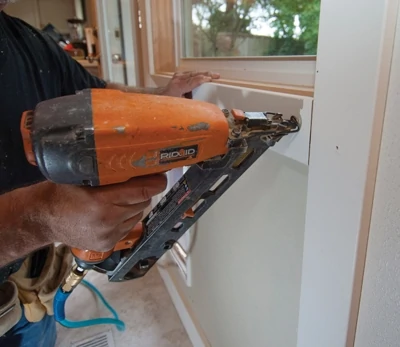
The trim piece under the door also serves as a support for the threshold drip cap, so make sure it is tight under the threshold and well secured to avoid movement and squeaks.
We added an extra trim piece where the window frame kept the header trim a little too high for the door frame. The window and door trim lined up in the interior.
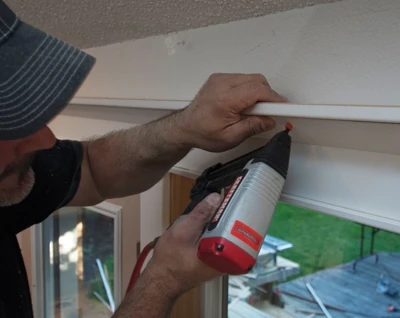
We built a hemlock box to serve as the interior window surround. The depth of the surround is the measurement from the window frame to the inside surface of the wall.
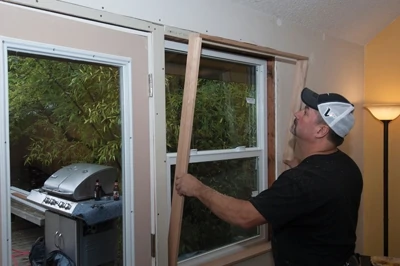
If you install a window surround, make sure to keep it parallel with the door jamb. The vertical trim piece will bridge between the window surround and the door jamb.
It’s smart to fill the gap between window surround and framing at each of the nailing locations.
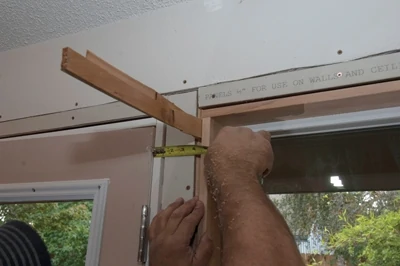
We use a gauge block to mark the trim reveals (locations) on the window surrounds and door jambs. Our gauge blocks have rabbet cuts to mark reference points for trim overlap.

We measured from reveal marks on the door jamb to the reveal marks on the window surround to determine the width of the vertical trim board, which functions as a mullion between the door and window but goes all the way from the floor to the header.
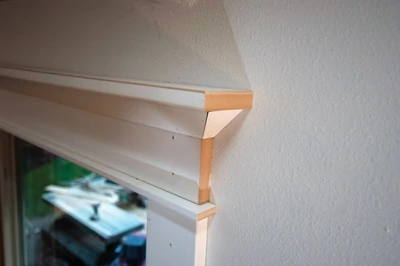
After installing the three vertical trim boards (strike side of door, between door and window, and right side of window), we capped them with a 1-by-1/2-in. parting bead, a 1×6 header, a simple crown and a top cap. It takes six pieces of trim to complete the header. We often nail all these pieces together on the bench and install them as one piece over the vertical trim boards.

We made our crown molding by beveling a piece of 1×4 at 45 degrees along both edges. The return piece wraps around the header, which sits on top of the parting bead.
The top cap is ripped and cut to length to produce the desired reveal, or overhang, to the crown.
(It can be tricky to shoot the right length finish nail at the correct angle to get enough bite without popping through the top cap.)
A single horizontal board trims the bottom of the window surround between the vertical mullion and the vertical casing leg.
![[31] 2LW_2762](https://extremehowto.com/wp-content/uploads/2014/05/31-2LW_2762.webp)
