

Tile is hard. Tile is unforgiving. Tile bends for no man, but when it’s under too much pressure, it can snap. The rigid ceramic or stone material of tile makes it tough stuff to cut, and your standard saw blades simply won’t get the job done. When it comes to cutting or drilling tile, you need the right equipment. This article explores a variety of tools and techniques to make the job easier the next time you’re hitting the hard stuff.
DIY Basics
For small installations of glazed tile, DIY’ers can sometimes get away with a small handheld glass cutter. Simply use a straight-edge as a guide to score the glazed surface of the tile with the cutter. Then, place the tile over a dowel aligned beneath the score mark, and press down on both sides of the tile to snap it along the line.
A step up from this process can be found with a snap tile cutter.
To make straight cuts with this tool, first mark the cut line on the tile. Place the tile on the cutter’s base plate, align the cut line with the guide bars and lower the carbide-tipped cutter onto the line. Draw the carbide wheel or blade across the tile surface to score it. Then press down on the handle to break the tile along the score line.
A snap tile cutter is a simple tool that can speed up installation of a variety of tile jobs. However, most of these tools won’t work with thick tiles such as quarry tiles or pavers. Plus, they can only make straight cuts that extend across the entire tile. For curved cuts, partial cuts or anything irregular, you’ll need different tools.
Nip it
“When a problem comes along, you must nip it.” Devo said that, or maybe Barney Fife.
Tile nippers provide a simple way to make small partial cuts that can’t be made with a straight-cutting tool. In many cases you must cut an access hole in tile for a pipe or other obstacle. In other cases you may need to remove a corner to install around a set of cabinets. Similar challenges are bound to come up in virtually any tile project.
A tile nipper looks much like a pair of pliers but takes patience and practice to master. By taking small bites (1/8 in.), you can remove material in a controlled fashion as you progress from the outer edge of the tile toward your cut line. The smaller the nibbles you make with the nippers, the more control you have of the cut and the less likely the tile will crack or shatter beneath the pressure of the blades. Practice on a scrap piece of tile to get the feel of the tool before making any critical cuts in your installation.

The nipper’s teeth usually leave a fairly ragged edge along the cut. This may not be an issue if the cut will be concealed with a plumbing escutcheon or some similar device. However, in areas where looks matter, it may help to smooth the rough edges of the cut with a file.


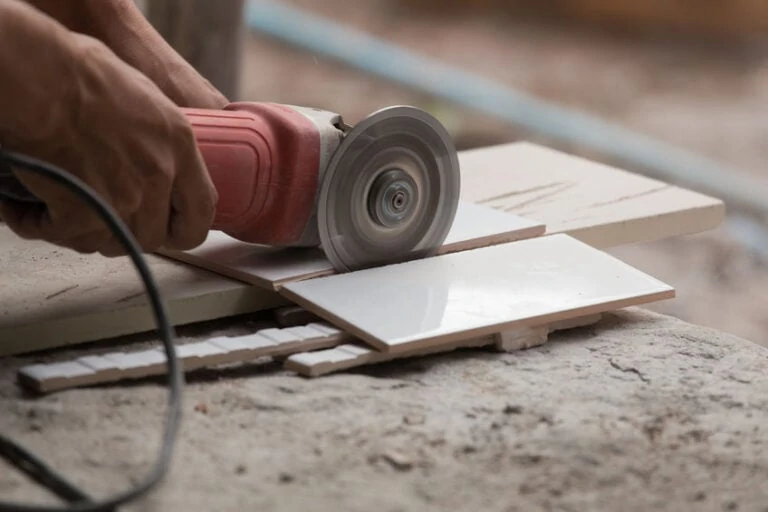
Wet Saws
Tile professionals and serious DIY’ers often rely on wet saw for cutting tile. A wet saw uses a circular blade with an integrated water reservoir (usually with an electric pump) to cool the cutting action. Wet saws are available in a variety of configurations. With the table-saw type, the blade protrudes from beneath the table surface and the tile is pushed over it. With a bridge-type saw,
a motorized cutting head rides along guide rails and is drawn over the tile. With a sled-type saw, the tile rests on a platform that glides along guard rails as it is pushed into an overhead blade. Portable handheld wet saws are also available. The over spray from wet saws can be very messy, so they’re typically used outdoors.
Wet saws are generally equipped with diamond-tipped cutting wheels and can remove ceramic and stone material with great precision and minimal heat buildup. Equipped with a miter gauge, they make cut accurate cuts at any angle. The blades do, however, cut more slowly than a wood blade cuts lumber.
Although the circular blade of the wet saw enables only straight cutting, you can use the saw to make irregular cuts. When you need to fit a tile against a post or molding, simply scribe the profile of the obstacle on the tile. Then, make a series of closely spaced parallel straight cuts up to the profile line. Use tile nippers to remove the thin strips of tile between the kerfs.

Tile & Glass Bits
When you need to mount fasteners in tile, glass-and-tile bits for boring the pilot holes have an arrowhead-shaped tip designed for penetrating brittle materials. Begin drilling the hole at a slow speed and use a spray bottle of water to cool the cutting surface, which helps drilling performance and extends the life of the bit. Gently increase speed and pressure as needed.
Quick tip: The most difficult part of drilling tile is breaking through the hard glaze on the surface, which can cause the drill bit to slip or skate out of position. One trick is to cover the tile with masking tape, mark the hole on the tape, then drill through the tape into tile. The tape provides extra grip on the surface to keep the bit in place.
For cutting larger holes in tile, you can select from carbide-tipped masonry bits or diamond-tipped hole cutters. Just like the smaller bits, the cutting action of the carbide bits should be lubricated with water to reduce heat.

However, unlike smaller bits, the diamond-tipped hole cutters are designed to drill at higher speeds and can even cut dry. They create holes with large diameters for pipe and cable access located in the center of a tile. To use a hole cutter, chuck the bit tightly into a drill or rotary tool. Turn on the tool so the bit reaches full speed. Gingerly tilt the bit into the tile so its edge begins to penetrate the surface. Once the edge of the saw begins to make a cut deep enough to keep the bit in place, slowly tilt the tool upright so the rim of the bit contacts the surface on all sides. Continue cutting until the bit plunges completely through the tile. Although many hole-cutters can cut dry, lubricating with water will still prolong bit life.


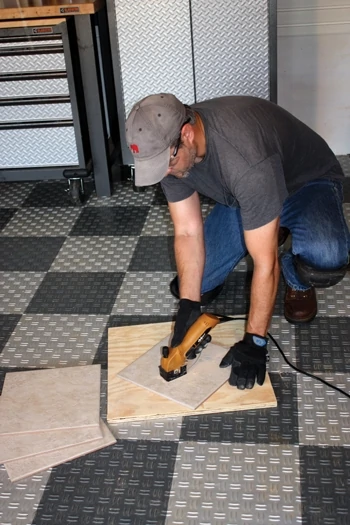
New Innovations
The most unique tool we tested for this article is the new ExaktSaw, which is a multipurpose flooring tool with a 2-in. circular blade. The small diameter of the blade gives it the ability to make curved cuts in tile—an impossibility with a larger blade. The ExaktSaw also has the unique ability to plunge-cut, with the blade completely enclosed in the tool until the operator presses a trigger that lowers it into the cutting surface. This means the user is not limited to approaching cuts from the edge of the tile. You can plunge cuts right in the center with ease and accuracy. The tool comes with a variety of blades for cutting wood and metal, but when fitted with the diamond-tipped abrasive blade, it ran curved cuts through porcelain tile without a hitch. Set the blade depth to avoid over-cutting, and you can make all your cuts right on a scrap piece of plywood next to your flooring installation, saving trips to an outdoor wet saw.

Another notable tool advancement is the line of Morse Diamond Grit reciprocating saw blades from the M. K. Morse Company. Like diamond-tipped hole cutters these blades use brazed industrial diamond grit for a durable, fast-cutting solution for granite, ceramic tile, glass block, marble and more. Although a recip saw isn’t the most accurate cutting tool for tile installations, it is a high-productive tool for demolition projects where tile isn’t being installed, but removed.
