

The international headquarters for APA — The Engineered Wood Association, in Tacoma, Washington, underwent an extensive exterior makeover as 25 year-old panel siding was replaced with engineered wood lap siding.
“We tackled the residing project like one of our research projects,” says Ed Keith, senior engineer, technical services division. “Our ultimate goal was to improve our building envelope performance by incorporating better construction details and products that protect against moisture intrusion.”
As an accredited research lab and wood-products certification agency, the association is considered the voice of the engineered wood products industry. If the association is the voice, then its headquarters is the face and that face needed a lift after years of exposure to famous Northwest rain.
The five-story, 35,000-square-foot building, dedicated in 1979, was originally sided with channel-grooved, kerf-sawn panel siding. It had been finished twice in its 25-year existence, once with a transparent stain and the last time in 1993 with acrylic latex. The siding held up reasonably well, considering design encumbrances such as a lack of overhangs, deep-set window bays and minimal flashing and caulking materials used on openings and wall-to-roof intersections.
“Building designers and contractors knew little about moisture-transmission science when the building was originally constructed,” says Keith. “Contractors put up the building the way it was designed, applied the building paper and flashed the windows and that was about it for moisture details.
“The parapet surrounding the flat roof is over 40 feet from the ground,” says Keith. “The walls of the building acted essentially like giant wooden sails collecting wind-driven rain in every unprotected crevice, crack and joint.”
The result was moisture intrusion on the western and southern faces of the building (the direction of the prevailing wind), a problem exacerbated by the subsequent invasion of ants and termites.
Solutions
APA’s research into moisture-control construction practices began years ago, culminating in 2001 with the development of a comprehensive moisture-training program identified as the Build a Better Home program. This program, with over 30 moisture control details for wall construction, served as the basis for the following sequence, which would take six weeks to complete:
• Tear off existing siding
• Moisture and insect inspection and treatment
• Replace worn framing and sheathing
• Install shingle-lapped Typar membrane
• Tape membrane overlaps and edges
• Install polyethylene corner and starter strips
• Install Home Slicker rainscreen
• Flash window openings
• Install new powder-coated metal window pans
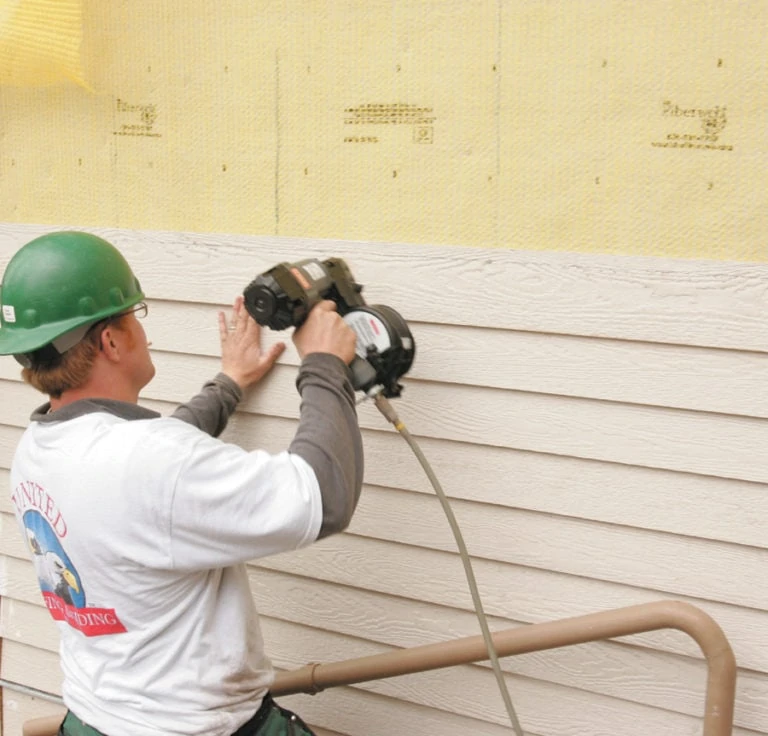
• Install LP SmartSide lap siding and trim,
priming all cut edges
• Caulk joints
• Paint exterior siding and trim with two coats
of acrylic latex paint
In the fall of 2004, APA selected United Roofing and Siding, Vancouver, Washington, a contractor with a track record in remedial moisture control and construction. More importantly, they understood the science behind moisture intrusion, and were willing to experiment with materials and ideas that APA brought to the project.
The project’s initial phases involved a careful evaluation of the existing sheathing. Moisture levels in many of the sheathing panels fell outside of the acceptable 11- to 13-percent range for in-service moisture content, due to outdated flashing and moisture control methods. “Not unexpectedly, we replaced the sheathing that framed the sides and top of the window bays with 5/8-inch resawn T1-11,” says Keith.
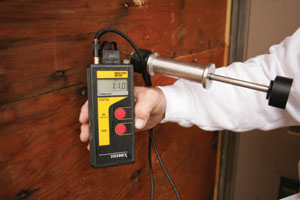
The first step of the siding project is to test the moisture levels of the existing sheathing.
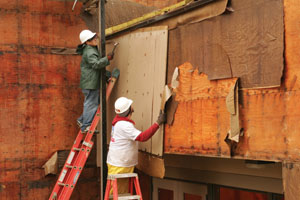
Roughly 20 percent of the old sheathing was removed and replaced.
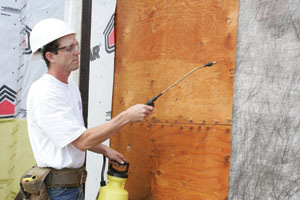
A borate solution was sprayed over the entire structure to prevent mold and repel insects.
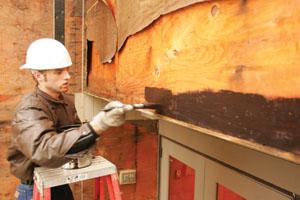
At the lower horizontal drip edges, the sheathing was brushed with a 6-inch-wide coat of roofing mastic to further protect the edges from moisture intrusion.
Altogether roughly 20 percent of the old sheathing was replaced. APA opted for the added protection of a borate solution sprayed over the entire structure to prevent mold and repel insects. In addition, at the lower horizontal drip edges, the sheathing was brushed with a 6-inch wide coat of roofing mastic to further protect the edges from moisture intrusion.
After the sheathing installation, attention turned to moisture drainage. Here APA chose Home Slicker, manufactured by Benjamin Obdyke, a nylon matrix with channels for moisture evacuation. APA felt that the Home Slicker was more cost-effective and offered a better performance profile relative to drainage and drying compared to the alternative of strapping the wall out.
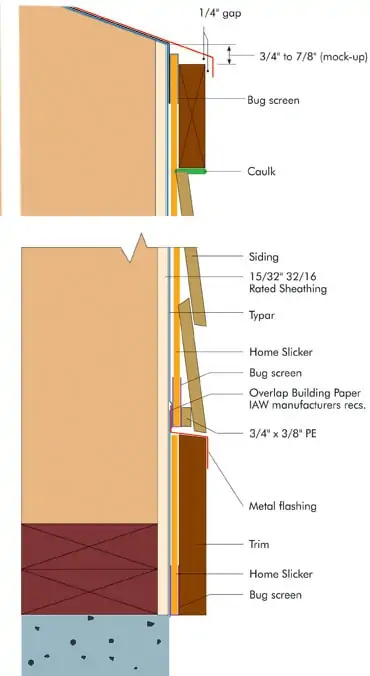
“The product addressed many of our concerns,” says Keith. “The 1/4-inch air space provided a capillary break that helped equalize the pressure between the front and rear of the siding, permitting the drainage of any water that penetrated the siding, while enhancing the ability of the entire assembly to dry itself out.”
The rainscreen was applied over Typar, selected for its ability to keep rain and other external moisture out of the wall cavity, while allowing moisture vapor generated from within the building interior to escape the wall cavity. The Typar membrane was installed per the manufacturer’s recommendations, using T30 wire staples. Each joint, seam and hole was taped off before applying the rainscreen. Common window screen material was overlapped at the top and bottom of the rainscreen to prevent insect intrusion behind the siding.
At inside and outside corners, APA suggested a new twist on an old detail to prevent wind pressure behind the siding from driving the wind-driven rain around the corner, also known as wind wash. Three-inch-by-1/4-inch-thick strips of polyethylene were fastened on both sides of each inside and outside corner, on each wall. The rainscreen was then butted up to the strip. This permitted each of the enclosed air spaces formed by the Home Slicker to act as a “chimney.”
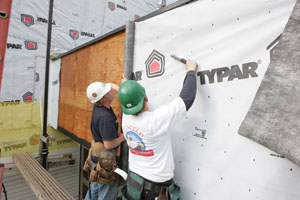
The Typar membrane was installed to keep rain and other external moisture out of the building cavity.
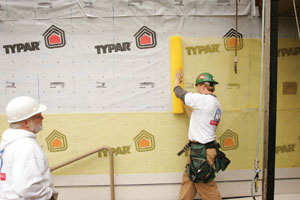
The Home Slicker rainscreen was installed to ensure proper moisture drainage.
Siding Installation
The next phase involved the installation of LP SmartSide engineered wood-lap siding, trim and fascia components. This technically advanced line of siding and trim products boasts new formulations for insect and decay resistance in addition to one of the longest 100-percent repair-and-replace guarantees in the industry — a full seven-year labor and material replacement feature as part of a 30-year fully transferable limited warranty. The product comes fully primed with a resin-saturated paint-based overlay.
United Roofing and Siding’s Rob Sims had not worked with LP material since the well-chronicled problems in the mid 90s, but was impressed with the look, weight and workability of LP’s latest siding products.
“We use the fiber-cement siding but it does not look as good as the LP product,” says Sims. “They [LP] are willing to back this with a pretty strong guarantee, so we will use it on future projects.”
The 16-foot 7/16-by-6-inch boards were spaced 1/4 inch at the butt joints to allow for expansion and contraction. (Normally, 3/16 inch of space is recommended, but due to the long length of the siding boards and the 125-foot building length, the additional width was required.) The long lengths minimized the number of seams, another advantage over cement siding products. Following the manufacturer’s recommendations, the boards were blind-nailed, and any exposed heads were caulked and painted. All cut edges of the trim or siding were well primed prior to installation.

The lap siding was fastened with 8d ring shank nails.

The trim was fastened with stainless steel strip screws.
Two types of fasteners and drivers were chosen for their superior holding capacity. The lap siding was fastened with Senco galvanized 8d .113 ring shank nails 24 inches on center. They were driven into the boards using Senco’s SCN56 siding coil nailers. The trim package was fastened with Senco’s stainless steel strip screws and the DuraSpin screw-systems tools.
To properly seal the gaps and joints, APA turned to DAP’s SIDE Winder polymer-based formula. This product was chosen for its lifetime guarantee and workability over wet lumber and metal.
The product was applied by pushing the bead into the gaps, rather than pulling down as many professionals do. Special attention was paid to forming an hourglass contour, which allows a smaller cross section in the middle of the caulked joint. This allows differential movement within the joint, alleviating stress concentration at the mating surface between the caulk and the surface to which it is applied.
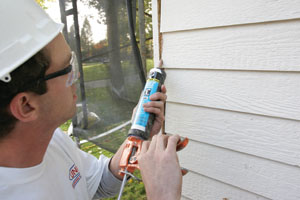
Gaps and joints were sealed with DAP’s SIDE Winder polymer-based formula.
The entire building was then double-coated with a Kelly-Moore 100-percent acrylic with titanium oxide opaqueing agents — both good things — especially formulated for low temperature application. The paint crews sprayed through the three-week period leading up to Christmas, where the average temperatures were in the high 30s with humidity levels of 81 percent.
With far greater emphasis on moisture control details and carefully selected products to protect and seal the building envelope, APA is confident that the building will look as good on its 50th birthday party as it does today.
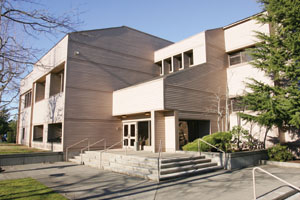
This is the APA Headquarters after new siding has been installed.
Editor’s Note: APA – The Engineered Wood Association (formerly American Plywood Association) is a nonprofit trade association whose domestic and international members produce a variety of engineered wood products. APA’s primary functions are quality inspection, testing and applied research. www.apawood.org
MATERIALS USED
Lap siding and trim
LP SmartSide products
Plywood sheathing
Murphy Plywood
Weather resistive barrier
Typar, BBA Fiberweb,
Rainscreen
Home Slicker, Benjamin Obdyke, www.benjaminobdyke.com
Caulk
SIDE Winder, DAP, dap.com
Fasteners
8d galvanized ring shank and stainless steel screws, Senco www.senco.com
Paint
ACRY-SHIELD Exterior Low Sheen Paint, ACRY-SHIELD 100% Acrylic Exterior Wood Primer, Kelly-Moore, www.kellymoore.com
