By Matt Weber
Right Frame of Mind. Cutting, Shaping and Joining Your Own Picture Frame.
During college I had a part-time job chopping wood for a framing shop in Memphis, Tennessee. I made several frames per day, joining the miters with a Cassesse machine. This was a large, table-sized machine driven by an air compressor, on which we’d join the corners by pressing a foot pedal that fired a V-shaped metal fastener into the underside of the miters. These V-shaped wedges provided a good, strong connection for a picture frame, but most folks don’t have a Cassesse machine laying around the garage.
Neither do I, but after having assembled countless picture frames, I cringe at the prospect of paying the high cost of a professional framer to do something I can do myself. Maybe I’m stubborn. Maybe I’m cheap. Either way, this article will show how you, too, can be stubborn and cheap by cutting, shaping and joining your own frame from hardwood that’s widely available at most home stores. The stock I used for this project was 1X oak lumber that I picked up at my local Lowe’s store.
Of course, frame shops offer all sorts of picture moulding, from wood to metal to plastic, in countless designs and profiles. You can always purchase these pre-manufactured sticks and go straight to the measuring and mitering. Or, as shown here, you can make moulding from “scratch.”
One advantage to making your own picture moulding is that there aren’t many rules. You’re the artist. You can make the moulding as thin or as thick as you want. If you’re handy at crafts, you can add detailed carvings, burned wood engravings or faux finishes. You can go crazy with a variety of router bits, or even build up your molding with trim strips of various profiles to create elaborate cornice designs.
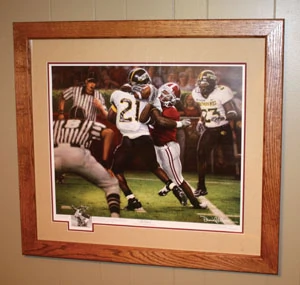
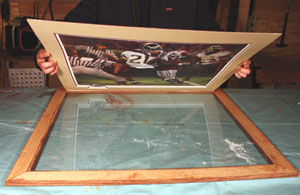
I was framing a sports painting—a print by Daniel Moore, an artist who paints University of Alabama football players in moments of game-changing glory. It had been professionally matted by a framing shop and given to me as a gift. Considering the subject matter, I didn’t want my moulding frilly or feminine, so I cut it from 1-by-8 oak stock.
Making the Cut
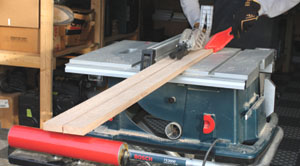
The 3/4-inch thickness of the oak worked fine for my purpose, but I ripped the boards on my table saw to about 3 inches wide.
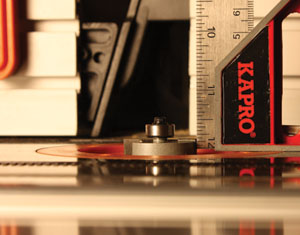
The next step is to rout a rabbet along one edge of the 3-inch moulding strips. You can use a free-hand router, but for this type of operation I prefer a router in a router table so the fence can keep the stock stationary. To determine cutting depth, measure the thickness of both the matted picture and the glass that will cover it. Adjust the rabbeting bit to allow both the glass and matted picture to lay into the groove and be recessed—or, at least flush with—the back of the moulding. The rabbeting bit I used has a ball-bearing guide to keep the groove a consistent 1/2-inch wide, which will conceal the edges of the picture mat.
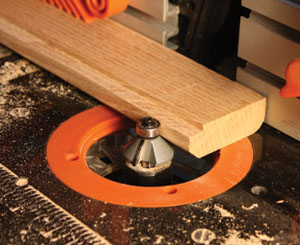
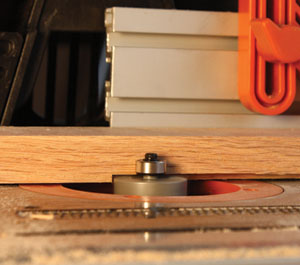
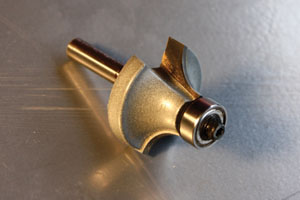
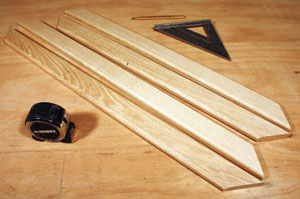
With the backside rabbet complete, I flipped the moulding over to add some detail to the front. First, I ran the outside edge of the moulding across a round-over bit, which gave it a more graceful (and nick- and dent-resistant) curve. I then ran the opposite side of the moulding over a chamfer bit. The chamfer bit cuts at a 45-degree bevel along the edge to provide some extra shadow lines.
When routing, cut the stock carefully to avoid burn marks that can discolor the grain. The easiest way to do this is to make a few shallow passes over the work with the router bit, working progressively toward your overall desired cutting depth.
Measuring, Mitering
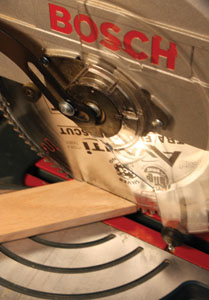
I was making a square frame, meaning 45-degree angles. If you’re making anything funky, like an octagonal frame, then you’ll need to pull out the ol’ geometry book and calculate your cuts. You can cut the sticks with a miter box and handsaw, or chop that first 45 with a powered miter saw.
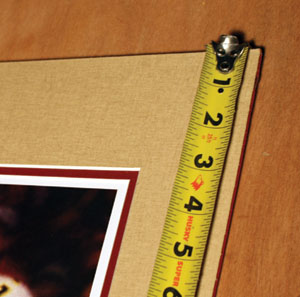
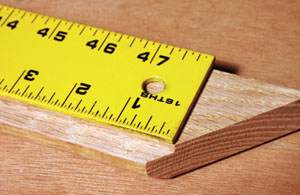
Next, measure the top edge of the picture (and/or matting) to determine the length of the frame. When transferring that measurement to the corresponding length of picture moulding to be cut, it is critical that you calculate the measurement from the outside edge of the rabbet, not the inside point of the miter. This accounts for the length of the recessed groove that will conceal the edges of your picture. If you were to measure your moulding from the shorter corner of the rabbet, then you will cut the moulding too short for the picture.
Double-check your measurement before cutting the other end of the moulding in an opposite 45-degree miter. Then, add about 1/8-inch to the length of each stick, so when positioning the artwork you’ll have a little wiggle room to guarantee no binding of the mat. To ensure consistency of cuts, I lock the stops of my miter saw so I’m cutting the next piece—the bottom length of the frame—to the exact same length.
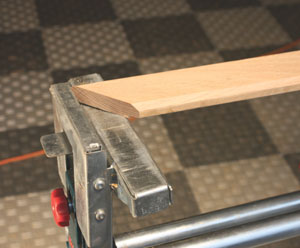
Be sure the moulding is firmly supported when cutting. Although this flat oak stock was easy to cut, smaller and/or taller profiles can sometimes sit slightly out of square against the fence, or roll a bit beneath the blade, which can lead to an uneven cut at the rear of the miter. Keep the moulding steady and square against the saw base and you’ll require less wood filler later.
Repeat this cutting process for the two side pieces of the frame, ensuring the measurements match each other exactly and orienting the miters for “inside” corners.
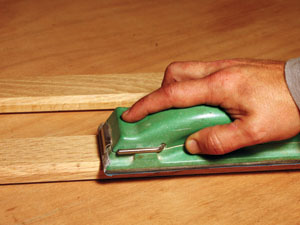
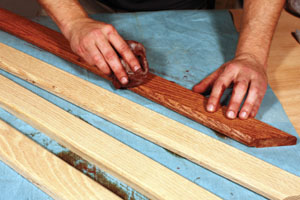
Once the sticks were cut to length, I sanded them smooth and wiped on a mahogany gel stain. I liked the darker tone of the mahogany, plus it still allowed the natural wood grain to show through the stain. I chose a gel stain simply for its ease of use. Gel stains are a cinch to apply by simply wiping them on with a rag. They clean up fairly easily and give the wood a rich look. I used two coats, allowing drying time between each.
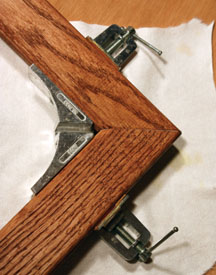
Joinery
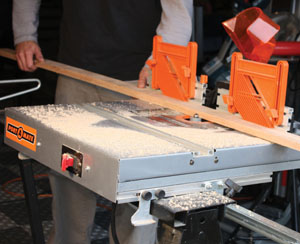
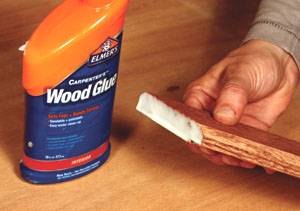
In lieu of the Cassesse machine, I joined my corners with a combination of wood glue and finish nails. You’ll need a large flat working area, such as an uncluttered workbench, as well as some miter clamps for this procedure, particularly if working with long sticks of moulding. Apply a liberal amount of quality wood glue to the face of each miter, join and clamp the pieces tightly with the faces of the moulding completely flush. Use a toothpick to remove any beads of glue that squeeze out of the joint. These particular clamps elevated the moldings about 1/4 inch off the table, so I had to use shims beneath the opposite ends of the sticks to relieve pressure at the miters and prevent the joints from separating.
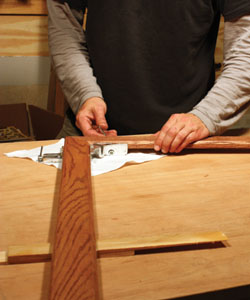
The fasteners come next. As with any hardwood, begin by pre-drilling the nail holes. I used a Dremel, but any drill will work—in fact, we used a manual hand drill in the dark ages back at the framing shop. Use nails long enough to extend well into the matching piece of stock. I used two different sizes of nails for each corner. The shorter nail joined the outside point of the corner. I used a longer nail as the second fastener to penetrate through the thicker portion of stock and nearly 3/4-inch into the mating piece of moulding. Set the nail heads below the surface of the moulding. Allow the adhesive to dry overnight, and the combination of glue and nails will create a strong joint.


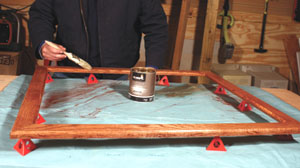
You can join the remaining two corners on the following day. Once the frame is dry, use a stainable or color-matched wood putty to fill nail holes and conceal any gaps at the joints. To add a glossy finish, I used two coats of varnish, allowing each coat to dry overnight and lightly sanding between.


Finishing and Assembly
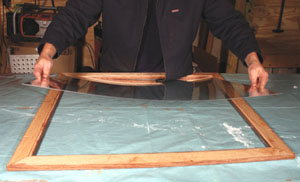
Rather than using actual glass for this picture, I went with Plexiglass for a little extra durability. My local Lowe’s cuts the sheets to spec and sells them for a reasonable price. When placing the glass and picture in your frame, do so in a fairly dust-free area. For example, the Plexiglass required me to remove thin scratch-resistant film before placing, but its removal created static electricity on the plexi surface that attracted little bits of a fuzz and debris, which I then had to labor to remove so they wouldn’t be sealed between the glass and picture. Using compressed air to clear the glass works well, and leaves no streaking like a spray cleaner is apt to do.
If you’ve cut and routed the moulding correctly, then your glass and frame should lay right in, flush with or recessed within the frame. If you’ve built your frame too small, I suppose you can always take some scissors to your artwork. But that’s kind of like rearranging the colored stickers on a Rubik’s Cube and calling it “solved.”
Finishing up, I simply taped the rear of the matting in place to hold its position and then backed the entire frame with foam board sealed along the edges with Gorilla Tape. This isn’t the most beautiful back-of-frame treatment—but who looks at the back of a picture? In the old frame shop, we used “framer’s points” to secure the mat in the frame (see sidebar, p. 56), and sealed the backs of the frames with construction paper, glued along the perimeter of the frame. Whichever method you choose, the idea is to seal out dust that could potentially work its way between the glass and artwork.
When it comes to picture-hanging hardware, a wire will work fine for smaller pictures, but for larger ones I prefer the extra stability of two predrilled picture hooks mounted to each side of the frame. After that, all that’s left is to mount your new showpiece.
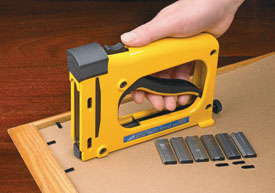
SIDE NOTE
Framing Tools for the DIY’er
A point gun was a staple (pardon the pun) in the frame shop I worked at in college. Functioning like a heavy-duty stapler, this framer’s gun drives flexible points into picture frames to hold the glass/artwork/backing sandwich securely in position. Points are driven parallel to the backing into either hardwood or softwood, but leaving a 1/64” space—just enough to hold the sandwich securely without causing damage.