


By Larry Walton
I have plenty of home-improvement projects on the planning board in my office, but this one went straight to top priority. This one was personal. It didn’t take many meals of hand-washing water glasses, plates, forks, spoons and knives before I was headed to the appliance store to buy a replacement for our old dishwasher.
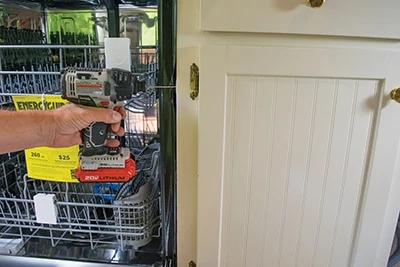
We often joke on the jobsite that a dishwasher is the simplest installation, but it takes three trades to get it done. Even with the proper cabinet opening, power source, water supply and water outlet, it still takes a plumber, electrician and carpenter to finish the job. In your own house, you can do it all yourself with a few simple tools.
I didn’t need to select a dishwasher because we had done that a few months ago when we bought a new fridge. The new dishwasher was the same brand, stainless steel finish and handle style as the fridge—all part of the plan to get matching stainless appliances as part of our ongoing kitchen refresh.
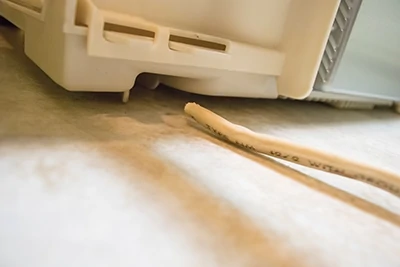
There were a couple of design features of the new dishwasher that had impact on the installation procedure. One feature gained considerable room inside the machine compared to previous models. Rather than leaving empty space under the floor of the dishwasher, the capacity was increased by making use of the area just above the floor. The power and water connections must be made in front, leaving no room to coil extra water hose and power cable. In our case this meant changing from copper to a braided stainless water line and trimming the power cable to only what was needed.
The other design feature that was different from the previous generations of dishwasher was the preferred option of anchoring into the cabinet stiles at the sides of the appliance (rather than into the countertop at the top of the cabinet). This will be an advantage for us in a few months when we install the new countertops.
When installing a dishwasher, pay close attention to the instructions about routing the drain hose. There is a minimum elevation the drain hose must reach in route to the sink cabinet. There is also a requirement to avoid a large belly in the hose in the span between the high point and where it connects to the disposal or sink drain. The installer of our old dishwasher brought the drain hose into the sink cabinet just below the sink bottom and gained the high point with a clamp inside the dishwasher cabinet. To avoid interference with the larger appliance dimensions, I drilled a new hole in the cabinet partition to route it high enough to avoid using a clamp inside the dishwasher cabinet. This allowed us to pull drain hose slack into the sink cabinet and out of the way of the appliance as it was slid into place.
After shutting off the power supply at the breaker box and the water supply under the sink, here’s how I avoided worsening my dishwater hands by installing a new dishwasher:
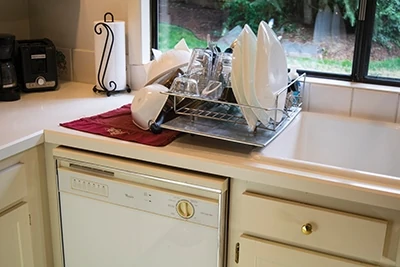
This crowded dish drainer above our old dishwasher indicated why I moved the new dishwasher up the list of home-improvement priorities.
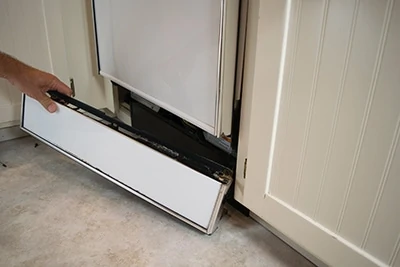
Removing the lower front panels to access water and power connections involved removing four screws.
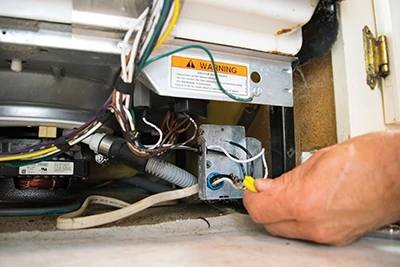
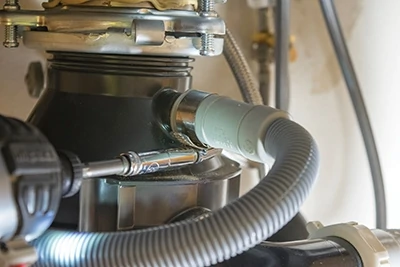
I took the electrical junction box cover off, removed the wire nuts and removed the ground screw. You can also see the drain hose clamp in this photo. I loosened it to disconnect the drain hose.
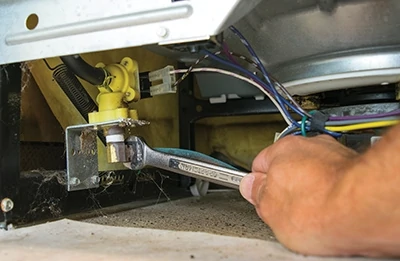
I used an open-end wrench to remove the nut from the compression fitting that held the copper water supply line to the dishwasher.
I used a screwdriver to remove the mounting screws, which attached the tabs at the top of the dishwasher to the countertop.
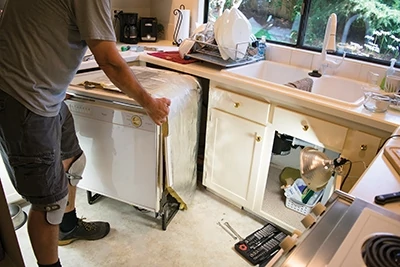
After detaching the hoses, cables and mounting tabs, the dishwasher slid right out of the cabinet opening.
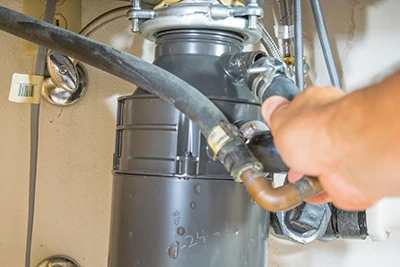
The drain hose then gets detached from the disposal. The new dishwasher came with a drain hose attached.
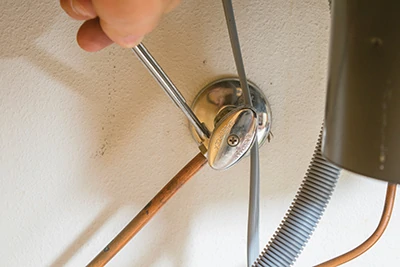
I removed the old copper water supply line from the stop inside the sink cabinet.
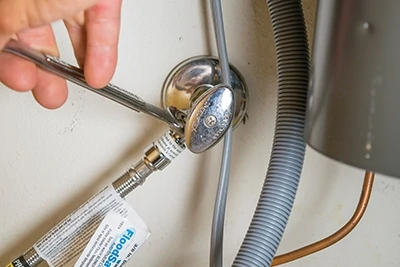
I attached a new braided stainless water supply line, which can more easily make the corners necessary to hook up to the new style of dishwasher.
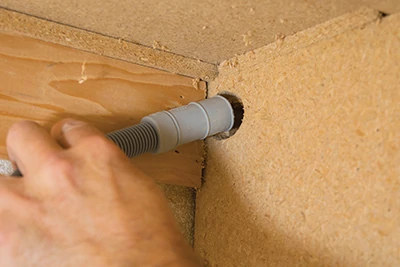
The drain hose line threaded through a new hole I drilled high in the partition between the dishwasher opening and the sink cabinet.

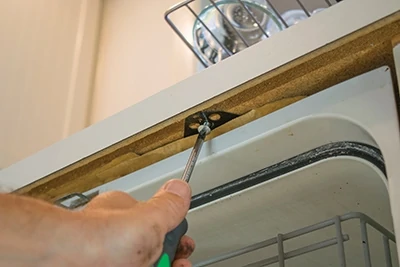
I tested the mounting brackets at the cabinet face frame to see how much of the brackets could be broken off for a proper fit.
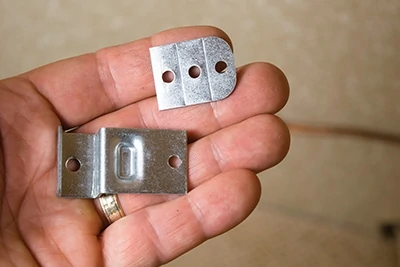
The extra bracket material can be snapped off by grabbing it with vice grips and bending it several times.
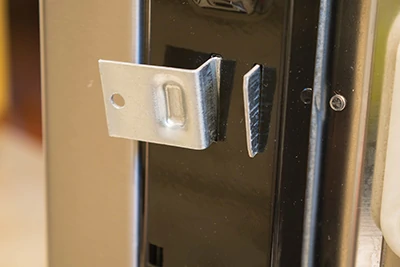
I put the brackets into their slots along the sides of the dishwasher.
The power cable and the water supply lines need to be aligned with the openings in the bottom of the dishwasher before sliding it into place.
I checked the dishwasher for alignment with the cabinet stiles and parallel with the countertop before predrilling through the mounting bracket holes into the cabinet stiles.
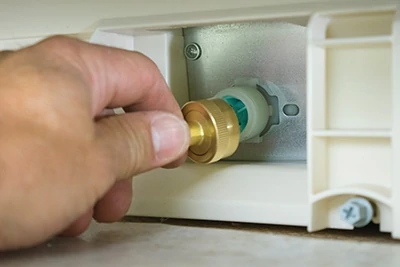
The water supply line is attached to the dishwasher with the use of a right-angle connector supplied by the appliance store.
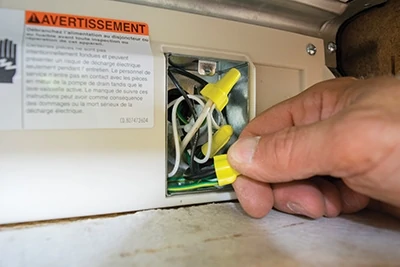
I connected the power supply to each of the three wires, white to white, black to black and green to the bare ground wire.
I used a hose clamp to attach the drain hose to the opening on the disposal.

Be sure to remove all packing materials, paperwork and product samples from the interior of the dishwasher before testing and running a cycle without dishes.
Side Note 1
Custom Fit
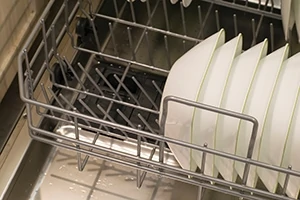
Our bowls did not like the new dishwasher rack until I bent two rows of the posts to fit the angle of the bowl sides. You might check with the spousal unit before customizing a new dishwasher like this—just sayin’…
 Side Note 2
Less Hand Washing
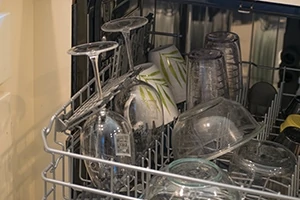
The additional space and a nifty mechanism for locking stemware in place gives this machine more versatility, which means less hand washing of oddly shaped utensils and vessels.
