By Mark Clement
Making the Most of the Most-used Door in the House
We’ve all seen it: The fancy-pants front door so often gets all the trick-outs: a glammed-up glass package, sweet sidelites, capital crown detail and nice hardware … Fancy-schmancy and gussied up.
And then it’s rarely used.
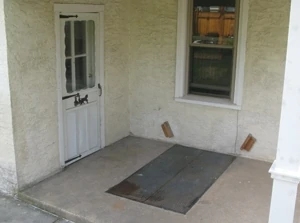
The front door deserves our attention for many reasons, but in lots of houses front doors are inexplicably about six miles from the driveway, which distances them even further from our daily lives. The result is that the door so many people use on a daily basis is the one that makes the most sense: the side or back door, the one that’s in the same zip code as the driveway. It’s the door your parents, friends, spouse and children use, too. And, if it’s like the one we just ramped and amped for this article, it’s lame. Hey, it’s the side door—who cares, right?
We care, I guess. We stripped the paint-caked 1-by casing and 70’s-era aluminum storm door (obviously purchased from “Dent City Doors”). I designed a layered casing package using PVC 1-by that not only looks smokin’ but gives this workhorse of an entrance the dignity and durability it deserves.
Indeed a major function of a door is to enjoy using it and how it looks, for our family and the people who walk through it. It’s a “best foot forward” kind of thing, even if it’s in the back.
Pre-Order the New, Remove the Old
As much as I wish Step One were to trash the existing train wreck, it wasn’t. Instead, we measured and ordered the new storm/screen door. To fit the opening and match the house, the storm/screen was a special order, which took a little time to make and arrive. No problem. We spec’ed a Larson ScreenAway aluminum storm door for several reasons. It looks great, and we could easily get the size and swing direction we needed.
The color matched our existing windows (Simonton’s Driftwood), and we could get the newest thing in hardware finishes that my designer (and wife) loves—oil-rubbed bronze. What may be my favorite feature, I never have to remove or replace the glass and screen again. It all stores—and deploys—seamlessly within the door. Brilliant.
Oh, and unlike its predecessor, it’ll hold some weather out. Come on winter!
I removed the old aluminum door (which is recyclable if you have someone around who scraps aluminum), then stripped the existing 1-by-4 casing that was beyond saving.
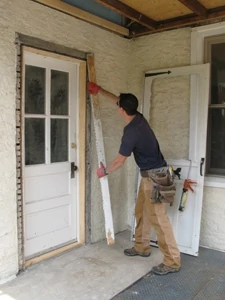
The interior jamb was also a wreck, but since it remained I stripped the paint back to bare wood. You may not need to do this if your paint is OK, but I mention it because if you do, it is much easier with the door off. Be careful of lead paint on old houses.
New Trim
Designing a layered trim package is one of those things where your eyes can be bigger than your stomach. In other words, if you go overboard you end up with a pile of curlicue that looks worse than where you started. The best guidelines I can suggest are to keep your mouldings consistent with the style of the house and make them proportional to the size of the opening. You still want to add layers, texture and shadow lines, but a little goes a long way. And, if you’re unsure of your design, get a couple of other eyeballs on it for some feedback.
For my purposes, ripping, routing and layering 1-by does the trick. I used Fypon PVC for all the 1-by material on this project. For a 32-in. door, a complete moulding assembly about 4-1/2-in. wide works nicely. I wouldn’t go bigger than 6 in., nor would I make it more than 2 in. proud of the wall cladding.
Here’s what I did:
I replaced the existing 1-by-4 with new to re-fill what I removed and bring it back flush with the existing stucco.
I capped the face of the 1-by-4 with a 1-by ripped to 1-1/2 in. wide and routed with a cove.
I wrapped the edge of the two-layer assembly with another coved 1-by, ripped to 1-3/4 in.
Fabbing It Up. Fabrication is pretty straightforward. It’s easier to run a router on a wide piece of stock, so before ripping pieces to width, I rout the cove. Note: Even though I did it (brain cramp), the inside edges of the 1-by-4s don’t actually need to be routed because they’ll be covered by the Larson door’s hinge rails.

I used a table saw to rip 8-foot lengths of PVC to width.
If I’m setting up for a big PVC trim job on grass I like to lay out OSB or a drop cloth to catch the dust. I use PVC on my doors because it doesn’t decay. This is good for doors, but big piles of PVC dust can choke out patches of grass. If dust does get away from me, it’s better to suck it up than blow it away, and a leaf vacuum like a WorxTriVac is a good call.
Trim Installation. Install the components in layers.
Start by flushing the edge of the 1-by-4 to the inside edge of the jamb (no 1/8 or 1/4 in. reveal as with most doors). Measure from the floor to where the jamb-leg meets the head-jamb. This is the short-point of your 45-degree miter.
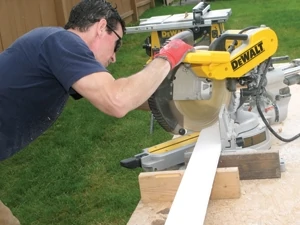
Cut and Install the Components. Be aware that measuring to short points can sometimes be tricky, so cut carefully. You can always go a little long and trim if it doesn’t fit.

Next, flush the second layer to the outside of the 1-by-4, cut to size, and face nail. Wrap the assembly with 1-by-1-3/4 on edge. I always whack a few nails or narrow crown staples through the miter to help keep it closed.
If you have the time (I didn’t) to fill and paint the new casing before installing the storm/screen, do so. I did manage to get the caulk applied, though.
Install the Storm Door
I’ve installed a lot of aluminum storm/screens over the years, and they are an awesome bump for curb appeal and a nice addition to an energy-efficient home. The basic instructions are straightforward for most doors, but as with most instructions, they’re barebones. So instead of regurgitating them for you (how easy would that article be to write?), I want to highlight a few tricks to make installation faster, easier and more accurate.
Work Table. I have a work-table of some sort set up for virtually every job I do. This operation is no exception. Trust me, I’ve installed enough of these doors with everything spread on the ground to know that a table will save you time, trouble—and your knees! Sawhorses and a sheet of 3/4-in. plywood will do the trick.
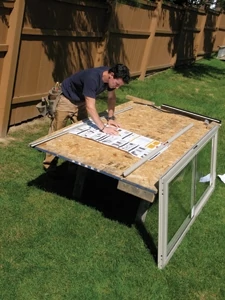
Tools. An impact driver will cover 90-percent of the fastening/drilling tasks, but I also like to have a drill/driver, long driver bits, a twist drill bit set, a Dremel rotary tool, an awl, and a screwdriver to make some of the more finicky jobs easier to accomplish.
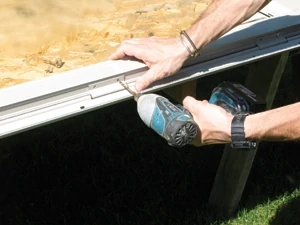
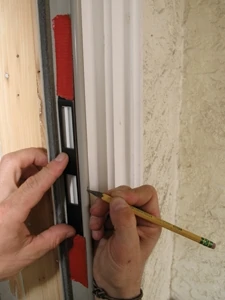
Laying Out the Hinge Side. I like that Larson has you use the hinge-rail itself to mark the hinge-rail’s location on the house’s hinge-jamb. There is a special punch-out in the hinge-rail (it looks like the symbol for a toilet on a set of plans), and you butt the hinge-rail (minus the door) where it goes, with no guesswork. You then mark the hole and install a place-holder screw on which you will hang the door after you connect it to the hinge-rail.
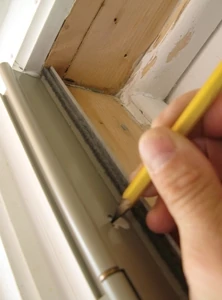
Fastening Hinge-Rail to Door. Pre-drilling the doorframe is necessary for the screws to grab, and pre-drilling is no problem if your 1/8-in. bit is sharp. However, it is tough on dull bits, and I have broken several pushing them too hard. It’s smart to have a few extra in the bullpen. Also, it’s nice to have a helper here to orient the hinges so you can work accurately.
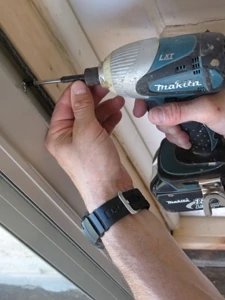
I find that getting the hinge-rail set tightly to the head jamb can be a little tough—even with the set-screw installed above. So I hang the hinge-rail on the set-screw, then wedge the door/rail assembly up tight (using my pry bar as a lever works nicely). Then, to make sure it stays, I drive a Torx screw through the lower layout hole, setting the rail fast.
Slide Rail Extender.In the old days you had to cut the door rails to length with a hack saw. It was easy enough but made installing the door an all-or-nothing proposition; transpose 9 as a 6 and you need a new rail. Larson’s smart solution to this is the “slide rail extender,” a plastic sleeve that fits over the bottom of the jamb leg and extends it to the ground. Even if you don’t over-tighten the screws it’s a little cramped in there. I use a scratch awl to press it down without damaging it.
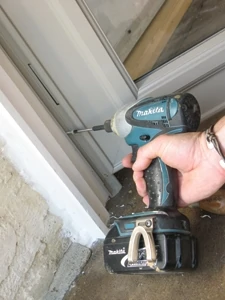
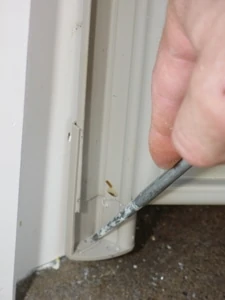
Next, set the screws. Easy does it if you’re not an ace with an impact driver. All you need to do is snug the screws.
Rails and Existing Jambs. Unless you order your door the exact size of your opening (which I do not recommend), you may have a reveal on the inside edge of the rail where there’s a gap between the rail and the existing jamb. This can be covered with caulk or a small stop-bead ripped on the table saw.
Drip Cap. Set the drip cap such that the reveal—the distance between the door and the cap—is the same along the entire top of the door. This is done by “eyeball,” so make sure the door swings unobstructed before moving ahead.

Lockset Installation. Installing the lockset is practically its own operation and can be slightly frustrating. At least for me, dealing with lots of small parts takes as long as everything else up to this point. The key here is organization: I use a 1-by-12 scrap to lay out everything so I can see it, get to it and move it. It saves all kinds of time.
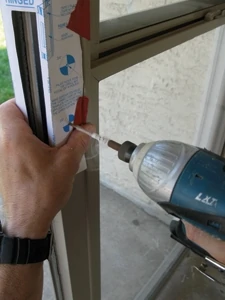
Lockset Template. I’ve had problems aligning these templates a couple of times now. It’s one of those “fold around the door” things, which works well on a square-edge door, but on the contours of the Larson I had a tough time aligning both sides dead on.
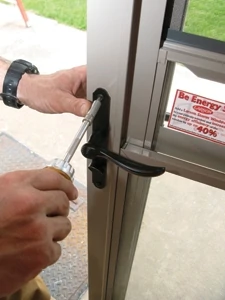
Lockset Hole. Because I drilled my lockset holes slightly out of alignment, I was able to enlarge them just enough using my Dremel 8200. I ground a little metal away, tested the lock, ground more, tested again. As long as the faceplate of the lock covers, you’re OK. Fasten with a screwdriver to prevent over-driving.
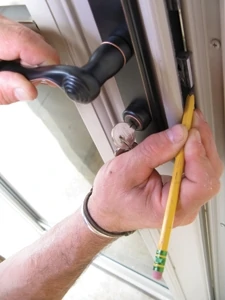
Lay Out the Strike.Use a sharp pencil and mark the location on the hinge-rail where the strike and bolt hit. Make Xs between the marks so that when you set the strike-plate you know what the lines indicate. I tack the strike-plate with tape, test that it works, then fasten it. Remove your pencil marks with an eraser.
Sweep.Cut the rubber sweep about 1/2–in. proud on each side of the expander. Slide it in the rails and crimp. Then slide the expander on the door. Be careful of scratching the paint here. Once in place, inspect the door bottom for light coming through, then trim the sweep to size. Scissors work best.
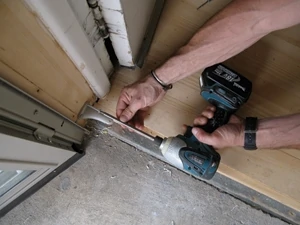
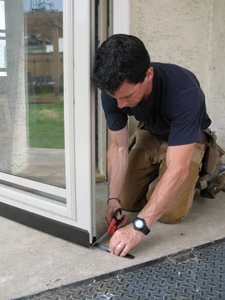
Closers. Installing the closers is yet another separate operation with its own instructions. I like to use a 6-in. long driver bit to fasten. The long driver enables me to drive the screws straight past the hardware without the tool bumping into it. I wish I had thought of doing this years ago. As for the closer itself, adjust the door closing speed with a screwdriver and be careful not to strip the nylon screw. Also, for seriously windy areas, don’t hesitate to drive a 3-1/2-in. Torx screw through each closer such that it catches framing. This will extend the life of your door and door jamb.
A door that works great also adds to the beauty of the most-used opening of the home.
Editor’s note: Mark Clement is host of MyFixitUpLife and a licensed contractor. Visit www.myfixituplife.com.


