

By Clint C. Thomas
From managing time to managing finances, here are some tips to streamline your next remodel.
With the home buying market being more difficult and higher interest rates forced upon borrowers, many people are choosing to remodel their existing homes, or add on new rooms for additional space. Once again, thanks to a tough economy, most homeowners don’t have the surplus revenue to pay a contractor to do this work and are, instead, choosing to utilize one of the American people’s most valuable assets, our Yankee ingenuity.
However, many people who are venturing into the realm of the serious DIY’er are doing so with little past experience, and experience is what can make the difference between a successful, even pleasurable, renovation and a disaster. The following tips are the culmination of 20 years of experience renovating and remodeling different houses.
Tip #1: Live On Site
The first key to a successful project is to live in the house that you are working on, or at least live on the property if the home is not yet habitable. This serves two purposes. First, it helps to deter your building materials from walking off your job site. Thieves are not going to steal your new lumber if they know that you are at home, but if they know that you are only present on the weekends during daylight hours, then they will simply wait until the weekday and rob you blind.
Security is not the only benefit that is provided by living in the home during construction. The other benefit is that it allows more time to work on the project. By living on site, you are eliminating the travel time, and the time to unpack and pack up your tools and equipment. It also gives you a lot of time in the evenings to work on your house, or at least to spend time conceptualizing how you intend to bring your project to completion.

When remodeling a home, keep track of your receipts which can reduce your capital gains tax when you sell the house.
Tip #2: Maximize Your Time
Time is a scarce resource, so it is important to ensure that the time spent on the renovation is productive. It is very easy to drag out a project for much longer than necessary. Over my family’s many renovation projects, my children have heard me say the words “we are burning daylight” more times than they care to remember.
The best way for a person to utilize their time is by planning ahead. Far too many people will sleep until 8:30 or 9:00 o’clock in the morning on Saturday and then get up and go to the building supply store to buy their materials. This ends up wasting half of that day or more. Another negative factor is that as the day progresses the temperature rises. This is welcomed in the winter time, but can be downright miserable during any other time of year.
Therefore, plan ahead and go to the local box store on Friday night to purchase the materials you will need for that weekend. This way, Saturday is devoted to working on your project and not running after supplies.
This leads to the second point: Wake up early. We all love to sleep in, but get up at sunrise, eat a quick bite and get to work. Most people are much more productive and focused first thing in the morning, and cooler temperatures make the work much easier.
Tip #3: Work around the Seasons
There is a time for everything, and summer is not the time to re-roof your house. Winter is not the best time to install ceramic tile. A little bit of advanced planning can save a do-it-yourselfer a tremendous amount of grief. Identify the projects that you would like to complete over the next 12-month period, and then decide which ones fit best with which season of the year.
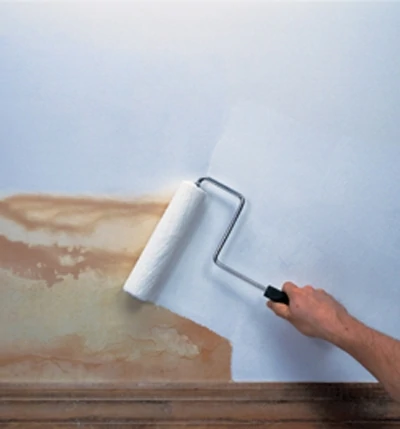
Roofing projects and other heavy construction should be done in the early spring or late fall to take advantage of the mild temperatures. Tile work is best done in the summer since tile saws use water in the cutting process, and few people relish the idea of sticking their hands in ice cold water in the middle of winter. Exterior painting cannot be done in the winter and is best done in the spring or late fall.
Tip #4: Do it Once and Don’t Look Back
Before beginning any work, analyze it all of the way through by breaking it down into each individual step. Once you have identified the steps involved, try to arrange those steps in a logical and orderly manner. For example, perform all of the demolition work first, and I mean all of the demolition work. Everyone gets anxious to start making things new. It is tempting to jump at the first opportunity, but it’s counterproductive to install new trim or apply a fresh paint just to have it covered in dirt and dust.

Careful planning can maximize productivity. For example, drying times can often cause work stoppage, but applying caulk, glue or paint at the end of the day can take advantage of the nightly “off” hours so you’ll be ready for the next phase in the morning. Photo © Red Devil
A handy tip to help eliminate dust during demolition is to place a box fan in an open window, pointing the fan so it sucks air from inside your house and blows it outside. Once all demolition is finished, sweep the floor in the direction of the fan, and it will suck a lot of the dust right out the window.
In line with this same advice is to begin at the top and work downward. Far too many times people will paint the walls and then put down new flooring just to go back and have to paint the ceiling or install crown molding. This causes the new work to get dirty or spotted, or at a minimum, it causes the homeowner undue stress because they are trying not to destroy what they just completed.
Also, don’t be afraid to jump around. For example, while you are waiting on the paint on the ceiling to dry, prime the new door casing or install the new baseboards since they are not close to the ceiling. Then, while the baseboard caulk is drying, hang the new light fixture.
Tip #5: Look for Ways to Save Money
Any remodel costs money. Often times it costs more than we planned to spend. Watch for sales, inquire about store discounts, such as military discounts, and if you don’t qualify for any of the normal ones, don’t be afraid to ask the store manager to give you a “contractor’s” discount if your project is a large one.
Also, by planning ahead it is possible to stretch your construction costs over several months, thereby easing the strain on your wallet. Another added benefit to planning in advance is that you have more time to find a sale on supplies required for your job. If your renovation involves heavy-duty machinery or exterior work, searching for durable Case equipment parts can help cut costs without sacrificing performance.
Tip #6: Invest in Quality Tools
Tools are a capital investment. It costs money to buy them, but in the long run they can save you thousands of dollars in labor costs. The best way to purchase tools is one at a time. The most sensible strategy is to start out with a basic battery and supplement this on each and every project by buying tools as you need them.

When it comes to power tools, you often get what you pay for. Professional-grade tools are more expensive than “super center” consumer tools, but they also perform better and last longer—a worthy investment for the serious DIY’er. Photo © Fypon
Beware, because all tools are not created equal. Always purchase professional-grade tools. They do cost more, but they are better made, offer superior performance and will last much longer than the weekend-warrior series.
Remember that tools can consist of more than just what you hold in your hands. They can include ladders, scaffolding, sawhorses and the like. Birthdays and Christmas are good times to rack up on such things. Years ago, my wife and I bought some rolling scaffolding as our present to each other one Christmas. The rest of our family laughed at us, but it has been well used since and is worth its weight in gold.

It’s smart to be covered with the appropriate insurance. If your insurance agent doesn’t offer both liability and hazard insurance during the construction process, numerous secondary companies exist that will underwrite such homes. Photo © DaVinci Roofscapes
Tip #7: Make Sure You’re Covered
If your project involves new construction or a room addition, make sure you have some form of homeowner’s insurance to cover the work you are doing while it is under construction. Most typical homeowner’s hazard policies only cover completed work. Many mainstream insurance companies will not even underwrite a house that is under construction, but it is imperative to have both liability and hazard insurance during the construction process. Numerous secondary companies exist that will underwrite such homes. Ask your regular insurance agent for suggestions on whom to contact if their company doesn’t issue such policies.
Tip #8: Keep Accurate Records
One of the last things anyone wants to think about are income taxes, however, the burden they impose can be reduced by keeping accurate records. Additions and improvements to one’s real estate will increase the cost basis for tax purposes. Cost basis is the amount that a buyer pays for their property plus any capital improvements to that property. Capital improvements do not include ordinary repairs and maintenance. For example, if a person buys a capital asset for $100,000 and then sells that same asset for $130,000 the $100,000 purchase price is the cost basis and is not subject to income taxes. The $30,000 difference between the cost basis and the selling price is the owner’s capital gain and this is subject to income taxes, unless it is the result of selling their primary residence and meeting the five-year time requirement.

However, if the same house (say it’s being used as a rental) is purchased for $100,000, has $10,000 of capital improvements, like a room addition, and is then sold for $130,000 the owner’s cost basis increases to $110,000 which, in turn, reduces their taxable capital gain to $20,000.
In order to take advantage of this increase in cost basis it is necessary to maintain accurate records for all of the work done. You cannot deduct your own labor, but you are able to include the actual costs of the materials used as part of the improvement. There-fore, keep all of your receipts together, and it is recommended to keep a running total of all of your expenses for easy reference in the future.
Other Home Ownership Articles
