

Get the Most from Your Paint Brushes and Rollers
Painting seems easy to the average Joe, and that’s what makes it hands-down the most popular DIY home project. The truth is, almost anyone can throw paint on a substrate, but professionals achieve a top-notch finish by sticking to some tried and true guidelines. For starters, don’t skimp on prepping the surface, always use a primer (see sidebar), and invest in some quality equipment.
Here’s an example: Years ago I had a tough time painting a bedroom dresser. Savvy shopper that I was, I found a cut-rate brush at a grocery store for a steal—just $0.99. As it turned out, I had to continually remove bristles that would fall out of the brush and stick to the paint. The filament-removal surgery meant the painting took twice as long as it would have using a quality brush that stayed intact. Sometimes you get what you pay for.
The Right Brush for the Job
Basing your brush decision on price alone is a sure way to regret your purchase. For oil-based finishes, use either synthetic filaments or natural bristles. While some professional painters still choose to work with bristle brushes, many are now switching to the new synthetic brushes—or using both types on a case-by-case basis.
For oil or solvent-based finishes, the best synthetic brushes are made with 100-percent DuPont SRT Tynex or blends with some Orel polyester. Synthetics always offer the highest abrasion resistance and can last about five times longer than bristles.
However, brushes with 100-percent high-quality hog bristle also work well. Black China, a hog-bristle brush from Purdy, has been the mainstay of many professional painters for years for finishes with higher viscosity. It’s an excellent mix of bristles of varying lengths and stiffness. White China is similar but most effective with lower-viscosity finishes, such as oil-base stains, enamels, varnishes, shellacs, lacquers and polyurethanes.
The shape and stiffness of the brush also matter. A softer brush helps to prevent brush marks. In heat and humidity, nylon polyester blends retain their stiffness better. Black nylon brushes are available with varying stiffness. The warmer the climate, the stiffer the brush should be.
As far as shape, the wider, thicker brushes work best for painting walls, and thinner, narrow brushes work best for trim. An angular sash brush is particularly handy for close-up trim work.
One hallmark of a quality brush is that the filaments are “SRT”—Solid, Round and Tapered. Solid nylon enables filaments to bend easily and recover their original shape. Conversely, hollow nylon filaments bend and remain buckled, which ruins the brush. Round filaments are the profile of natural bristles and carry paint well. Filaments should also be tapered—wider at the base, narrow at the tip—to bend easily for better flow and smoother paint release. Additionally, longer filaments should be “tipped” (further narrowed at the tip) and “flagged” (tips sliced), which simulates the ragged ends of natural bristle, so the brush holds more paint and releases it without brush marks. These sound like minor aspects of brush design, but they matter greatly when you’re painting. Not only will a quality brush last much longer than a cheap one, but it will achieve a much better finish, and you can really tell the difference.
Brush with Greatness
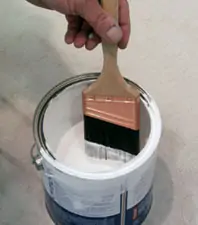
Although a paintbrush is a fairly simple tool, many DIY’ers don’t use them as they were intended. When you see someone load a paintbrush, they usually dip the brush up to the metal band (ferrule) and then scrape the excess off on the lip of the can. This is a poor way to load a brush, causing paint to build up both on the brush and the sides of the can. When the built-up paint dries it turns into little chunks of hard paint that fall back into the fresh paint and end up as lumps on the wall. Here’s the right way: First, dip the brush 1 to 2 inches into the paint. Then, gently tap the brush on the side of the can, first one side and then the other. The excess paint will stay in the can and leave you with a fully loaded brush for field painting or cutting in.
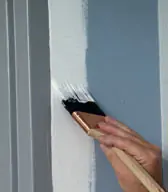
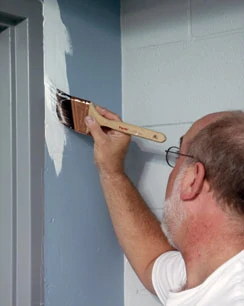
“Cutting in” is the art of drawing a straight line that separates two colors using only a paint brush—no masking tape or other aid. This is often seen at the edge where a wall color is cut into a different ceiling color. When cutting in, always use a fully loaded brush. Using it parallel to the area to be cut, let the brush open up into a semi oval and bring it into the line you are cutting. Follow the line until the paint begins to break up. According to the experts at Purdy, it is best to cut in while breathing out or holding your breath. Repeat this procedure, working into the previous area.
Rock ‘n Roll
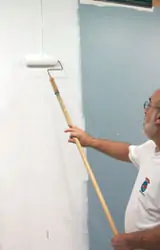
The next go-to paint tool for DIY’ers and pros alike is a paint roller. For large walls there is no substitute for rolling on a heavy coat of paint in a short period of time with just the right texture. For medium to higher viscosity paint—the thick stuff—you should use a less dense roller cover. For example, a fabric like polyester holds and releases paint well, plus it’s usually less expensive than other fabrics. However, thin or medium viscosity paints work better with a denser fabric like Dralon, which is a woven fabric tightly twisted to its backing to prevent the fabric from shedding.
And with rollers, size matters. The higher the pile, the more texture you will have on the finished paint surface. Pile height of 1/2-inch and up creates a stippled effect. Pile heights on some roller covers are as high as 1-1/4-inch for a deeply textured effect. Higher-viscosity paints work together with higher nap roller covers to create the texture. Conversely, low-pile roller covers, from 1/4 to 3/8 inch, are ideal for painting smooth surfaces in kitchens and baths. When selecting a roller cover, pay attention to the product packaging, which should spell out explicitly what finishes the cover is intended for.

Pro Technique
One often overlooked step in a painting project is prepping the roller cover. All synthetic covers require some form of preconditioning to improve their performance. Before use in latex paints, rinse the cover with a faucet or garden hose, then spin it to remove excess water. Before using oil-base paints, the cover should be lubricated in the solvent used to thin the paint. Mohair covers should also be preconditioned in the solvent used for thinning. Preconditioning prevents the lack of paint release caused by the paint attaching to the fibers. However, lambskin roller covers have natural oils and don’t require preconditioning.
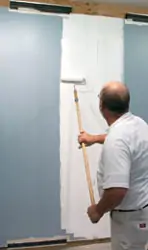
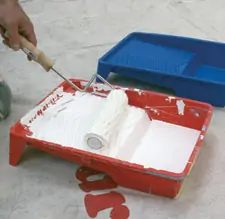
When rolling, fill the tray no more than 1/3 full. Load the entire surface of your roller cover with paint, rolling it slowly down the tray into the paint, then back several times so the cover absorbs. Use the tray grid to prevent overloading. When painting walls, start at the top and work downward. The experts at Purdy suggest you start by rolling a large “W” in a space about 3 by 3 feet. Then fill in between the gaps, blending into your initial strokes. Always work from the unpainted into the painted surface.When you start another area, repeat the process.
Use these basic techniques for your next painting job and you’ll achieve a fine finish that looks professional.
Editor’s Note: Information and images for this article were provided by Purdy Corporation, 1-800-547-0780, www.purdycorp.com.
NEW PAINT PRODUCTS
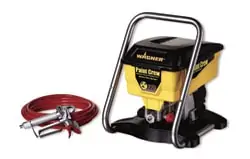
Paint Crew
Wagner’s new Paint Crew is a piston-pump sprayer designed to offer the performance of a contractor sprayer yet priced for the homeowner. The Paint Crew uses standard reversible spray tips and comes complete with hose, tip and metal spray gun. Retailing for less than $200 and intended for big projects like painting a house, it’s tough to beat the performance for such a nice price. EHT tested the Paint Crew, and the sprayer lays down paint fast and smooth. The unit is not intended for professional use, however, as some of the plastic parts will likely need to be replaced after some wear and tear. But for a DIY’er tackling big painting projects, it makes a nice tool for a reasonable price. Visit www.wagnerspraytech.com or call 1-800-328-8251.
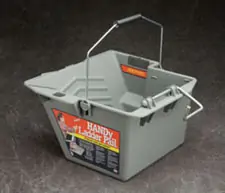
HANDy Ladder Pail
The new HANDy Ladder Pail by Bercom International makes ladder work easier than ever. The unique fixed bracket on the pail secures to most step and extension ladders and holds more than 1 gallon of any paint, stain, liquid or solvent. The Ladder Pail also includes an embedded magnet to hold brushes or tools in place so they don’t sink in a pool of paint. A built-in paint grid is designed for use with rollers up to 9 inches for large painting projects. Plus, the pail can double as a tool holder for trim and gutter work, preventing you from having to climb up and down the ladder to retrieve tools. Visit www.handypaintpail.com or call 1-877-464-1170.
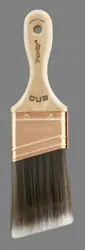
XL Cub
Purdy’s new “XL Cub” series of paintbrushes features a shorter, ergonomic hardwood handle for painting in tight spots. Purdy’s new XL Cub is hand-crafted using only satin-edge Tynex nylon and Orel polyester filaments from DuPont—solid, round, and tapered (SRT). Purdy’s proprietary tipping and flagging process creates thousands of microscopic tips from which paint is applied to the painting surface for a virtually perfect finish. XL Cub also features the stiffness retention of the XL line, enabling it to retain its body even in hot, humid conditions. Crafted of solid hardwood, the new short handle features an ergonomic thumb grip for superior control in tight spots, where the XL Cub is likely to find much of its use. Visit www.purdycorp.com or call 1-800-547-0780.
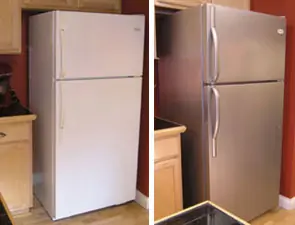
Before After
Liquid Stainless Steel
The world’s first brush-on stainless steel can turn old colored kitchen appliances into stainless steel pieces. Liquid Stainless Steel is made with 100-percent stainless steel that undergoes a micrometal process, which combines particles of stainless with a hybrid polymer so the metal will flow. The product is an automotive-grade resin that is waterproof, durable as a car finish and will not fingerprint. Roll on the Liquid Stainless and then brush back over it using an 11-inch Microfoam brush to create an authentic brushed satin, stainless steel finish. A clear topcoat seals it. Visit www.liquidstainlesssteel.com or call 1-800-650-5699.
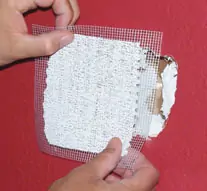
Great Wall Patch
Make permanent repairs to damaged drywall with the Great Wall Patch. This repair patch has a self-adhesive backing for easy application. First peel the backing from the patch, center it over the damage and press onto the wall surface. Spray the patch with water and rub it to activate the plaster. When the patch starts to harden (about 5 minutes), lightly press to create an indentation. Once the patch dries completely, cover it with joint compound and then sand and paint. The Great Wall Patch is available in three sizes: 4-by-4, 6-by-6 and 8-by-8 inches.
