

By Matt Weber
Water leaks are house killers, and this drywall repair story is testament to that. Act fast at the first sign of a water problem, because chances are good the leak has existed for a while before you’ve discovered it. This means that damage which has already occurred might be hidden in the walls or ceiling, and will only worsen until the problem is resolved.
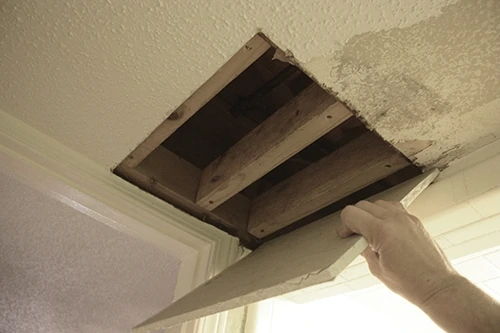
The ugly, melted, mold-stained ceiling shown in this article is the result of a leaking bathtub overflow gasket from the room above. Most of the mildew had been concealed by the ceiling texture (which had been coated in latex paint and served as a kind of leak-hiding “skin” for a while).
A little work with a scraper revealed that not only had the ceiling been repaired in the past, but the new leak had been spreading in secret throughout the drywall. And it wasn’t pretty.
We used a scraper to peel away the loose texture and then cut out the unusable drywall in a square shape. An oscillating tool with a drywall blade is a handy tool for the making the cut-out.

You’ll need a drywall patch for the ceiling, so measure the thickness of the drywall. It’s common for ceilings to utilize 5/8-inch drywall while the walls are 1/2 inch, because the thicker sheets tend to resist sagging. Cut a replacement patch from drywall that’s the same thickness.
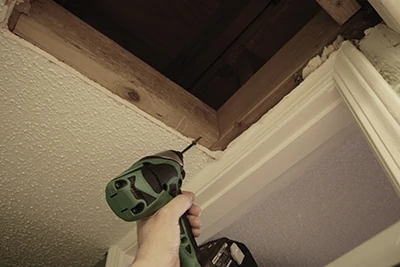
It’s a good idea to cut 2×4 blocking to fit between the joists and straddle the joints between your patch and surrounding ceiling drywall. Toe-screw the blocking in place with 3-in. fasteners. The blocking will support the patch edges with solid backing to minimize movement and prevent cracking in the finished ceiling.

Drywall tends to crack and crumble when screwed within an inch of its edges. To prevent damaging the patch, we fastened an intermittent 2×4 block between the joists so we could drive screws through the middle of our patch instead of the edges. Make sure to install the blocking flush with the bottom edge of the ceiling joists.
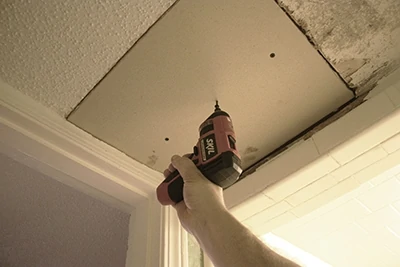
Insert the drywall patch into the hole and fasten to the middle block with drywall screws.
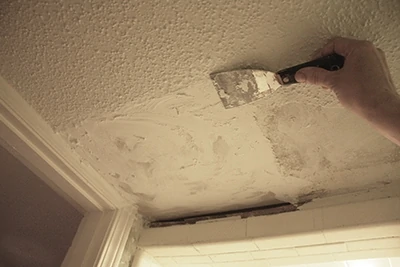
We filled the joints and screw heads with a flexible spackling compound and skim-coated the entire patch to blend with the surrounding ceiling.
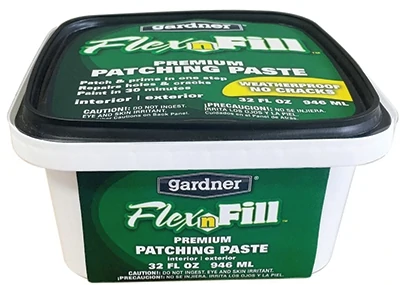
We used Gardner Flex-N-Fill spackling compound, which not only stays flexible to prevent cracks, but it has a built-in primer, which saves an extra step.
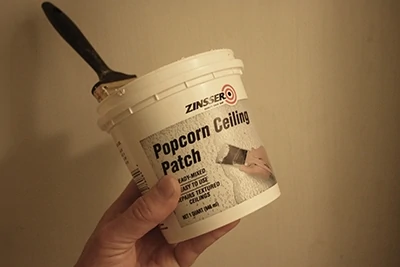
After the spackling compound has completely dried, the next step is to apply the ceiling patch. Spray-on and brush-on “popcorn ceiling patch” products are available, but we prefer the brush-on variety.
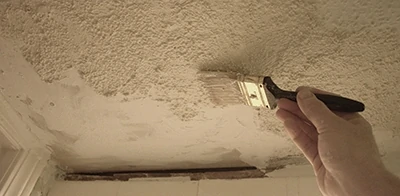
The brush-on patch allows us to move around the aggregates and adjust the texture to more closely match the surrounding ceiling. Once the texture had dried, I cut a small piece of crown molding and finish-nailed it as a transition piece between the ceiling and shower surround.

The Popcorn Ceiling Patch is a latex-based product that should be coated with shellac-based primer to prevent staining. If your textured ceiling has been painted like the one in this article, then finish the repair with a matching topcoat.
