

A router is not only an extremely versatile shop tool, it can almost do magic. Routers can be hand-held, or permanently fixed in a router table for any number of chores. They may have fixed bases, which are ideal for edge routing, or they may have a plunge-style base.
Routers are also available in combination kits with both fixed and plunge bases, so you can switch as needed. Some routers, such as laminate trimmers are single-use tools.
Routers are available in sizes rated by horsepower from 2 up to 3-1/2. The trade-off is the more horsepower, the larger and heavier the router. More powerful routers, however, are necessary for certain chores.
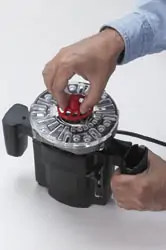
A speed control is necessary for use with the larger diameter bits. Electronic variable speed control is the best bet. Routers are available with different size collets to accept different size router bit shanks. The most common sizes are 1/4, 3/8 and 1/2 inch. Some routers come with different size collets.
Common Cuts
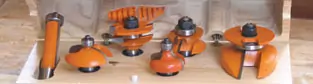
Routers are most commonly used for edge shaping, such as creating table edges, and for creating molding. By using specific router bits, or matching several bit profiles, you can create almost any type of edge design or molding you can imagine. Routers are also used for trimming plastic laminate edges on countertops. Special bits are also available for creating round-over or cove cuts and sink cut-outs in solid surface materials.
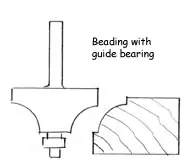
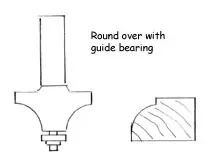
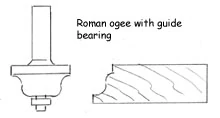

Some of the more common edge shaping bits.
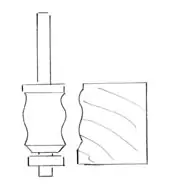
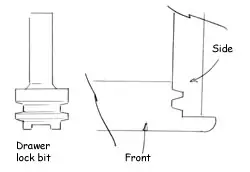
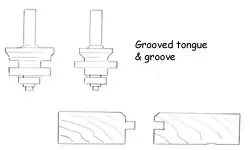
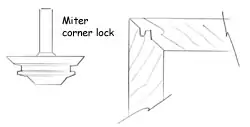
Routers can also be used to create a wide variety of joints. Edge-glued joints, such as when gluing up wide boards from narrow ones, can be easily created with a router using a variety of bit styles. These include tongue-and-groove, tongue-and-groove with V edging for car siding, 90-degree V-groove male and female bits, and special glue-joint bits. Routers fitted with a slotting bit can also be used to cut rabbets for joining cabinet backs to sides, for cutting grooves, slotting and dadoes for joining drawer bottoms to drawers. Other joint bits include: drawer lock bit used to create glue joints for joining drawer sides and fronts; flute and bead bits for creating small boat planking; corner lock bits for 90-degree corner joints, such as in jewelry boxes; and corner lock miter bits.
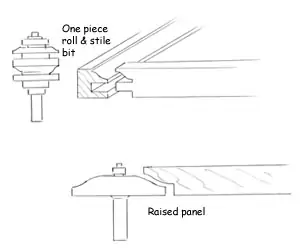
Frame-and-panel is a very popular door style for cabinets and furnitrue, and it is made using a router in a router table and a variety of bits.
One of the more popular door styles for cabinets and furniture is frame and panel. This is commonly made by using rail and stile router bits to create the rail and stile joints, and raised panel bits for creating the panels. These are for use only with a router table and you should have a heavy duty router.
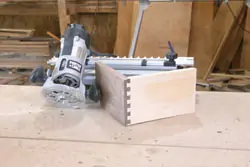
Another very popular and common joint is a dovetail joint, again popular for drawer construction as well as some types of furniture and small boxes. Dovetail jigs, such as the Porter Cable 4200 Series shown on page 14, allow you to rout all types of dovetail joints including: through dovetails, half-blind dovetails, rabbeted half-blind dovetails and even box or finger joints.

A good choice in routers for the jig is the Porter-Cable Model 892 that not only features a soft-starting 12-amp motor, but quickly moves from fixed to plunge and spiral-down bases, the latter two sold as accessories. A dual-position switch allows you to switch off power without letting go of the handles. And, the fine depth settings with a finger micro knob allows for easy setting of the bit depth.
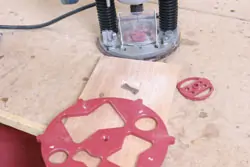
To rout dovetails you will also need a router base plate that accepts a guide bushing, and guide bushings to fit the router bit shank size. The TurnLock Router Base Plate from Milescraft fits most routers with a round base, is easy to install and comes with two turn-in bushings. Additional bushings are also available in a set ranging from 5/16 to 1 inch.

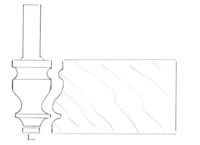
Molding bits are available for any number of chores
Another common router application is creating custom molding. A wide range of bits is available to create all types of moldings as well as picture framing materials. These include crown molding, cove, window sash sets and handrail sets. Multi-Form bits are used to create picture framing.
Plunge Routing
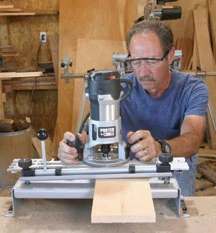
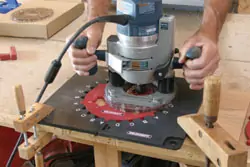
Plunge routing adds even more versatility, allowing you to “surface plane,” create fluting and make a wide variety of decorative cuts. In plunge routing the router is turned on with the bit free of the work surface. The bit is then fed or “plunged” into the work surface to the depth set. In most instances some sort of template and guide bushing are required. And again, a wide variety of templates is available.
The magic comes in the wide variety of techniques and jigs that can be used with a plunge router. One very practical use of a plunge router is in cutting hinge mortises. You can quickly and easily cut precise interior and exterior door-hinge mortises with a plunge router and Milescraft Hinge Mortise Guide set.
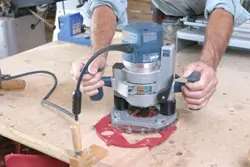
One fun technique is creating inlays. This also is easy with the Milescraft TurnLock Inlay kit. A 1/8-inch spiral router bit is fitted in the router collet and the work piece clamped to a bench. A Kreg “dog” clamp fitted in a workbench slot makes this easy. The template chosen is then secured to the work piece with double-faced tape. The depth is set, and the router used to make a pass around the inside edge of the template. The excess material is then routed within the template to create the pocket. The inlay material must be of the same or slightly thicker than the pocket depth. Set the depth of cut so the bit will go completely through the inlay material. Secure the inlay to a backing board, then secure the template to the inlay material. Carefully make one pass around the template guide. Dry-fit the inlay into the pocket, and sand the inlay or pocket to create a good fit, then glue in place.
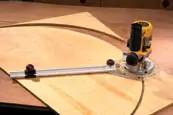
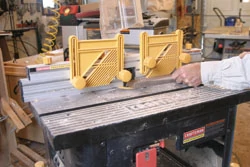
The TurnLock SpiroCrafter is an absolutely fun kit for creating “rose” like patterns for woodworking. Although it works best with a Milescraft Plunger Model 1000 or Dremel Model 330, it can be used with almost any router to create thousands of unique designs in wood and plastic. The TurnLock base plate is installed on your router and the guide bushing installed. First, make a design on paper and then select a template and pattern. The template has a rotating center that fits in cogs. Determine the rotation interval from the Design Guide. Place your paper pattern on the work piece and secure it in place. Center the template base and secure it to the work surface with clamps. Align the template so the selected pattern window is in the desired starting position and secure the template in place by pushing the template cogs into the appropriate template base grooves. Place the pencil guide on the pencil with the desired end directed toward the pencil lead. Mark the pattern by allowing the pencil guide to follow the edge of the selected pattern. Rotate the template to the next desired position and repeat the steps. Once the design is complete to your satisfaction, choose the appropriate bit and guide bushing. Set the router bit to the appropriate depth, bring the router bit and guide bushing into the selected pattern window, turn on the router and rout the pattern in a clockwise direction. Then rotate the template to the next position.
You can also create your own routed wood or plastic signs with the Router SignCrafter from Milescraft. Once the tool is assembled you choose letters you need to spell the words you intend to engrave and place in the letter slot. Use the TurnLock router base plate and guide bushing. Fasten the template to the work piece and secure the work board to your bench with clamps. Choose the appropriate router bit, turn on the router, lower the bit into the template, allowing the guide bushing to follow the letter template and rout out the letter. Repeat for the rest of the letters.
More Cool Tools
I have two old router tools from Craftsman that are no longer being made. They are, however, both great if you can find them at garage sales or flea markets. I wish someone still made them. The Edge Crafter is designed to be used with a router table and can be used with the templates provided to create “pie-crust” table tops as well as rout other round, oval or scalloped designs.
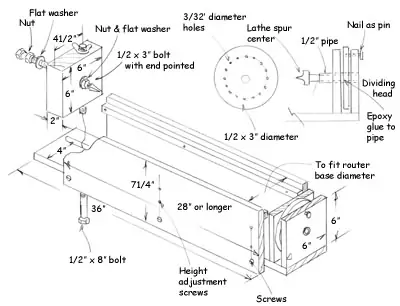
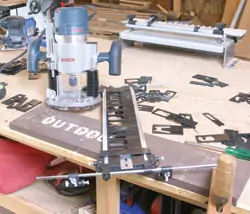
The Craftsman Router Crafter allows you to do contour turning with a router, straight fluting and beading, right- and left-hand spiraling and rope designs. If you have a lathe with an indexing head, you can also make a jig to fit over the lathe bed to position a router for fluting columns. Or you can make the fluting jig shown.
Another fun tool is the CMT 3D Router Carver System. This can be used with your plunge router to create hand-carved accents on drawers, doors or panels. The system comes with templates and holding frames, a 3D Router Carver Bit, 3D Carver video and full instructions.
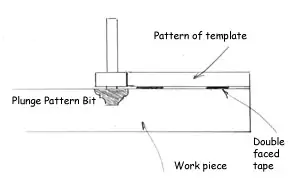
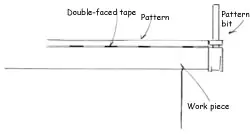
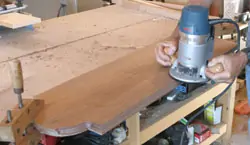
Pattern routing is used to create a number of precisely cut, duplicated work pieces, such as arched cabinet door tops. A template and flush-trim pattern bit is used.
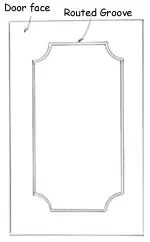
With a hand-made template, you can rout just about any design you can come up with, such as this cabinet door template that creates routed groove decor in the door faces.
Pattern routing is a great way of duplicating items, as with creating curved upper rails and panels for raised panel doors. The Frame and Panel Templates from Woodcraft make it easy to precisely cut numbers of parts. The Templates include cathedral or arched. Each set is machined for precise fit. After rough-sawing the work, the templates are fastened to the work with double-faced tape, and a flush trim bit used to rout the shape precisely. You can also make up your own templates of 3/8-inch plastic, HDPE or plywood for other shapes.
Many routing techniques, especially moldings, rails and stiles, and panel shaping require the use of a router table. And, some techniques simply can’t be done without a table. Woodcraft has two excellent router tables along with accessories or “systems” for use with the tables. These include the Bench Dog ProMax Cast Iron Router Table and the JessEm Mast-R-Lift Excel Router Table Top. I have also used the Craftsman Professional Large Benchtop Router Table with excellent results.
