

By Larry Walton
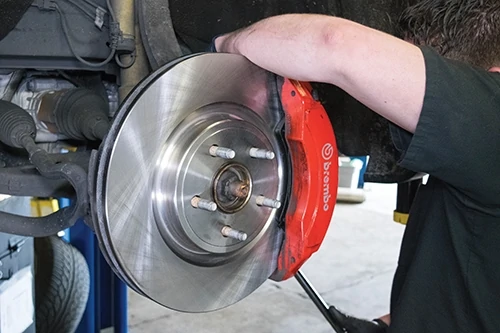
Brakes: Few would dispute their importance on any vehicle, but the Jeep Grand Cherokee SRT shown in this article can really give a braking system a workout. The Grand Cherokee has the capability to do some serious off-roading, which requires solid, precise braking. But more often these machines are pressed into service on the street with daily commute and passenger-hauling duties. The improved engine performance of the SRT (Street and Racing Technology) version puts even more demand on the braking system.
Disc brakes operate much like hand brakes on a bicycle wheel. As the brakes are applied, pads are pushed into both sides of the rotor, which is located between the wheel and the hub or spindle. Because braking is achieved through pad-on-rotor friction, there is no avoiding parts wear. Brake inspections at oil-change intervals are a good idea. Also, inspect brakes with the following conditions:
Brake Noise. Sounds associated with depressing the brake pedal often indicate the need for attention to the braking system. Squeaks, scrapes, rubs, squeals, grinds … There are a number of reasons the brakes can make noise including worn pads, glazed rotor, loose caliper, worn rotor or a rock in the calipers.
Feel. Brake problems often manifest in how the vehicle feels when braking. Surging, shuddering or pulls to one side are indicators that you may have a brake problem.
Response. Diminished braking calls for a check of the system and components. This includes depressing the pedal noticeably further to get results along with longer braking distances to slow or stop the vehicle.
Brake Dust. Because brake pads and rotors are always wearing, a buildup of brake dust on your wheels is normal. In fact, front wheels usually have more dust than rear because the fronts do more of the work. However, if you notice an unusually high amount of brake dust on your wheels and calipers, you know parts are wearing and a brake inspection is warranted.
When inspecting brake components for wear, look for thin pads, glazed rotors, cracked rotors, loose fasteners and leaking brake fluid from lines, pistons or cylinders.
Here’s how we changed the pads and rotors on a Jeep Grand Cherokee SRT.
Step By Step
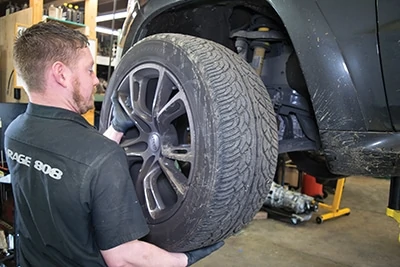
Removing the wheels allowed access to the rotors and calipers. Notice the buildup of brake dust on the wheels, which is a sure sign of brake wear.
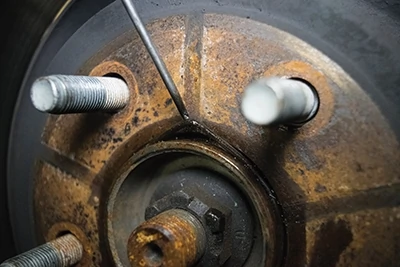
This O-ring keeps dust out of the bearing pack. Our mechanic Derek hooked it to remove it before removing the rotor.

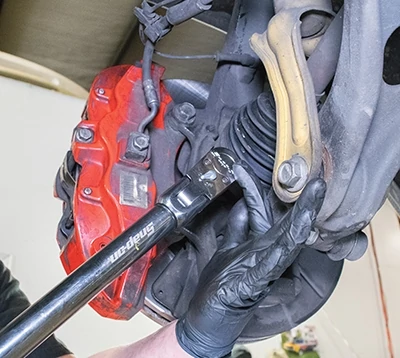
He removed these bolts from the inside to detach the caliper from the vehicle.
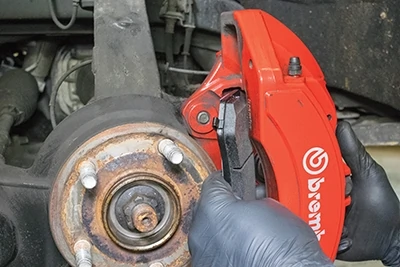
He then removed the caliper, which wraps around the rotor.
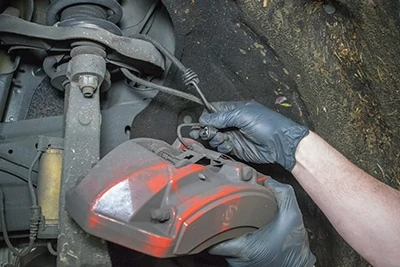
A bungee cord can be used to hang the caliper to reduce stress on the brake line.
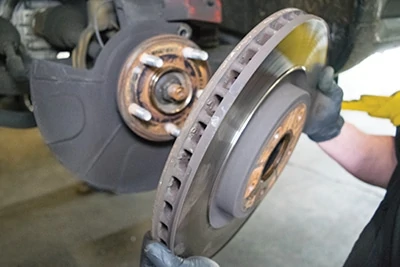
After a few taps with a mallet on the back side, the rotor came right off.

This close-up of the rotor shows how the pads have worn away a significant amount of the rotor surface.
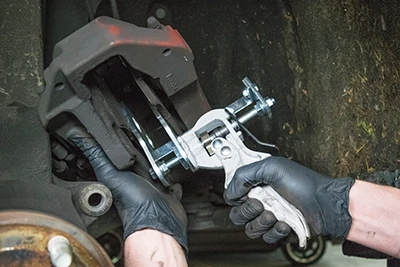
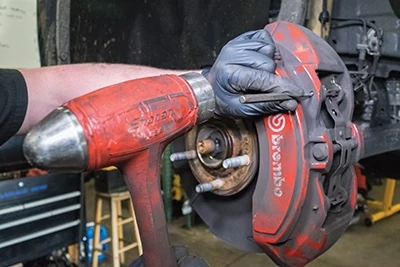
Derek used this spreader to compress the caliper pistons. You can also use a C-clamp and a block of wood, but be careful to protect the caliper where the clamp contacts it on the outside.
He remounted the calipers back onto the backing plates to make the next steps easier.
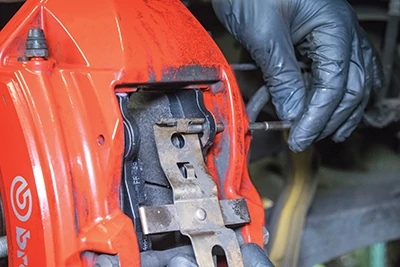
He used a punch to drive out the brake pad’s retainer pins.
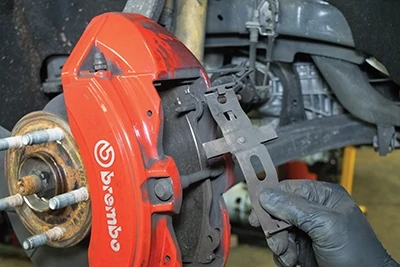
Removal of the pins also released the anti-squeal springs.
With pins and the anti-squeal springs removed, the brake pads can be easily removed from the Caliper. The brake pads were very worn but not completely through the friction surface.
Derek thoroughly cleaned the caliper with hot, soapy water.

He applied brake-parts lubricant to the surface on the caliper where the brake pads slide in and out. Be careful not get this lubricant on the friction surfaces of the pads or rotors.
He installed the new pads into the calipers. Notice how thick the friction material is on the new pads.
Derek pushed the pins through the caliper, through the inside pad, through the openings on the anti-squeal spring, through the outside pad and into the smaller holes on the outside part of the caliper, driving them in flush to the inside surface with a hammer.
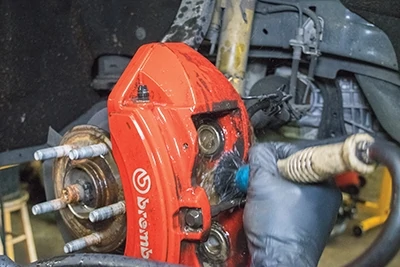
With the caliper now loaded with new brake pads, he once again removed it from the mounting points and bungeed it out of the way.
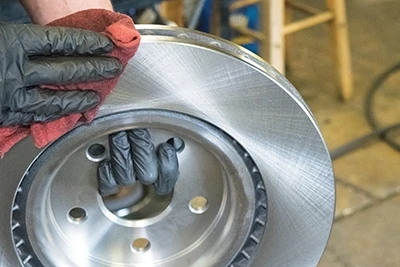
A rag thoroughly saturated with brake cleaner can be used to wipe down the friction surfaces of the new rotor and remove residual oils remaining from the manufacturer.
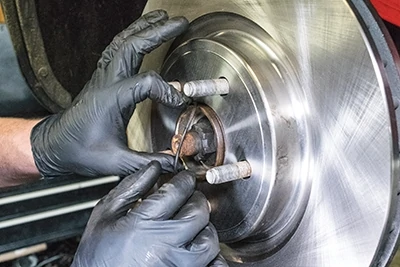
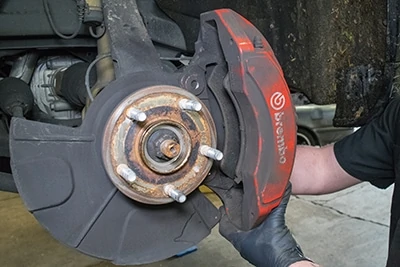
Derek installed the new rotor onto the hub and replaced the o-ring seal.

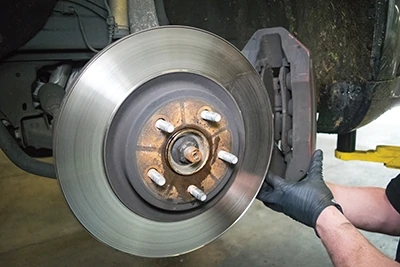
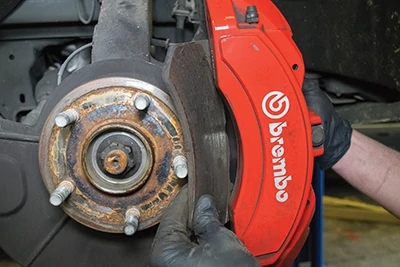
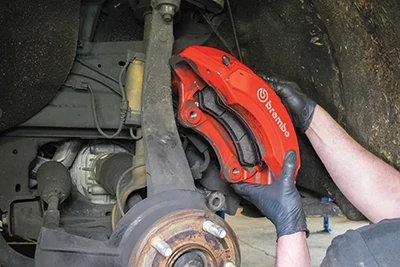
He positioned the caliper over the rotor.
The caliper is attached to the backing plates by reusing the original bolts and torquing to spec.
After reinstalling the wheel, the lug nuts are torqued to spec.
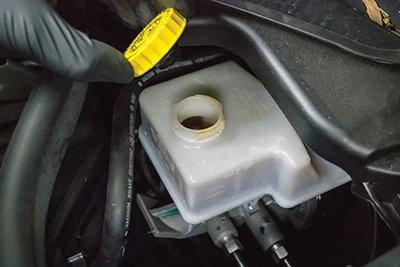
Last step is to check brake-fluid level. With new pads, the pistons are not extended as far so the brake fluid levels can change.
Side Note
Give Your Brakes a Break
How you drive makes a big difference to the longevity of the wear components of your braking system. Aggressive driving, tailgating, late braking, and failure to understand and apply engine braking all contribute to premature brake wear.
Look ahead and plan ahead. If you know you have to stop at an intersection, get out of the throttle sooner and let gravity and friction slow the inertia of the vehicle. Leave adequate following distance to the vehicle in front of you, so you can slow as needed without jamming on the brakes. Learn to use gear changes and the compression of the engine to slow the vehicle without an over-reliance on the brakes. This is especially important on long descents, where over use of the brakes can cause real damage to the point that can put you in immediate danger.
Take care of your brakes, and they will take care of you.
